


The ultimate guide on how to screen record
 Easily create engaging screen recordings and videos with ScreenPal’s free screen recorder.
 Easily create engaging screen recordings and videos with
 Our ultimate guide to screen recording shows you how to record any area of your screen, add voice narration, record your webcam, and more! We’ve also added extra tips and tricks to help you get started. Learn how to record your screen and capture and create videos within minutes!
You can also learn more from our separate device-specific articles:
Getting started with the free screen recorder
Recording your screen is fairly simple, especially if you have the right tools and software. Whether you are an educator, a business professional, or a content creator, you can easily create videos to communicate and collaborate. Create how-to videos, tutorials, product demo videos, YouTube videos, and more! Here are 3 steps to start recording with our free screen recorder.
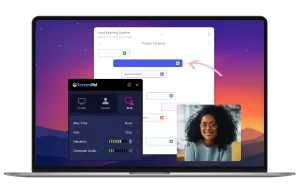
Step 1. Head to ScreenPal.com
There are a number of ways to launch the screen recorder. First, you can go to our website and launch it directly from our screen recorder page. If you have a ScreenPal account, you can log into your account page. Click the Create button, located on the upper right-hand corner of the page, and select Launch Recorder. We’ve also made it convenient for you to launch ScreenPal from your Windows taskbar or Mac menu bar.
Step 2. Launch the Screen Recorder
After you click Launch Screen Recorder. A pop-up notification will open, indicating that the recorder is being launched. If it doesn’t appear, you have the option to download the app onto your computer. Any time you need to record, you can click on download. This is great for those who want to screen record while offline.
Step 3. Start recording
Within seconds, you’ll notice the screen recorder controls on your computer and you can start recording. Below, you’ll find a list of your recording options, as well as tips for recording your screencast.
VIDEO: Step-by-Step Guide
ScreenPal’s free screen recorder is used by millions around the world, from educators to businesses to bloggers. There are numerous ways to use a screen recorder.
Watch this step-by-step guide and start creating screencasts within minutes.
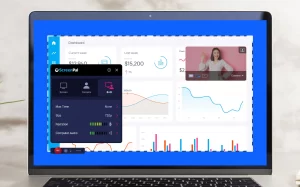
Screen Recorder options and tips
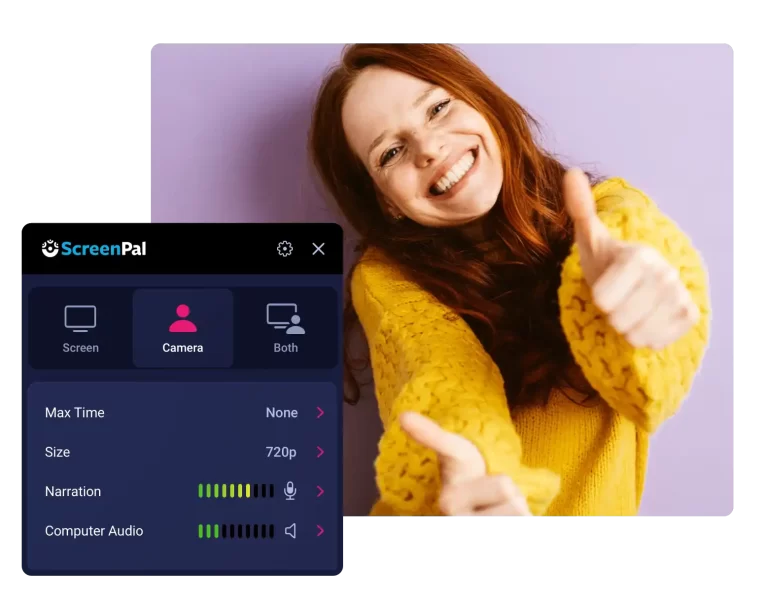
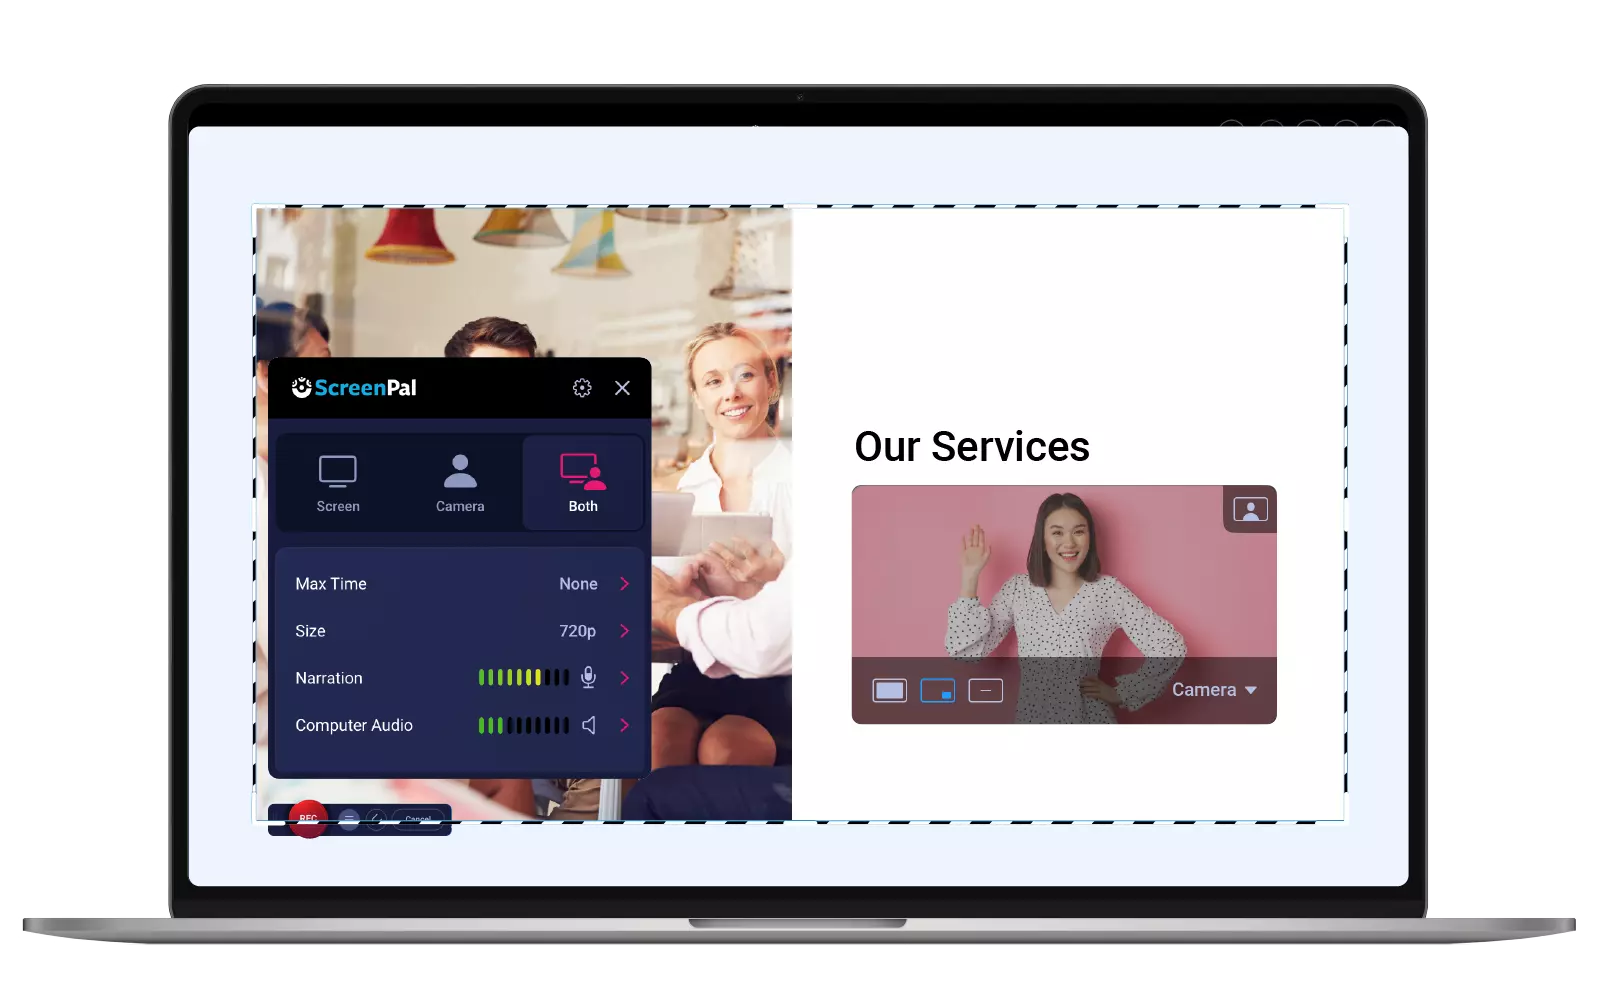
When you open the free screen recorder, a box will appear, providing you with options you can use to start recording. Below we’ve listed all your options, as well as extra tips to help you.
Record your screen, webcam or both

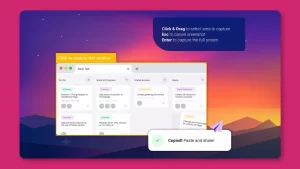
Screen
A black-dotted box will appear. This is the recorder frame. Choosing Screen allows you to record anything within the recorder frame. You can adjust the size of the recorder frame by choosing preset sizes or by dragging and dropping the frame over the area you want to record.
Tip: We recommend recording at 720p. This preset size is best when sharing on popular social sites like Facebook, Twitter, or YouTube.
Camera
Choosing Camera allows you to record your webcam. Once you select Camera, you can select a camera to record.
Tip: You can choose to connect a web camera of your choice. The recorder will detect any cameras currently attached to your computer. We recommend doing a camera test prior to recording.
Both
You can also choose to record both your screen and webcam together. This allows you to do a show-and-tell for your audience. You can better communicate with your audience as you show them your screen at the same time.
Tip: For extra flexibility, you can move your webcam to any position on your screen. Deluxe users have the ability to hide, adjust, crop, and resize their webcam in the video editor after recording.
Recording time, size, and audio options
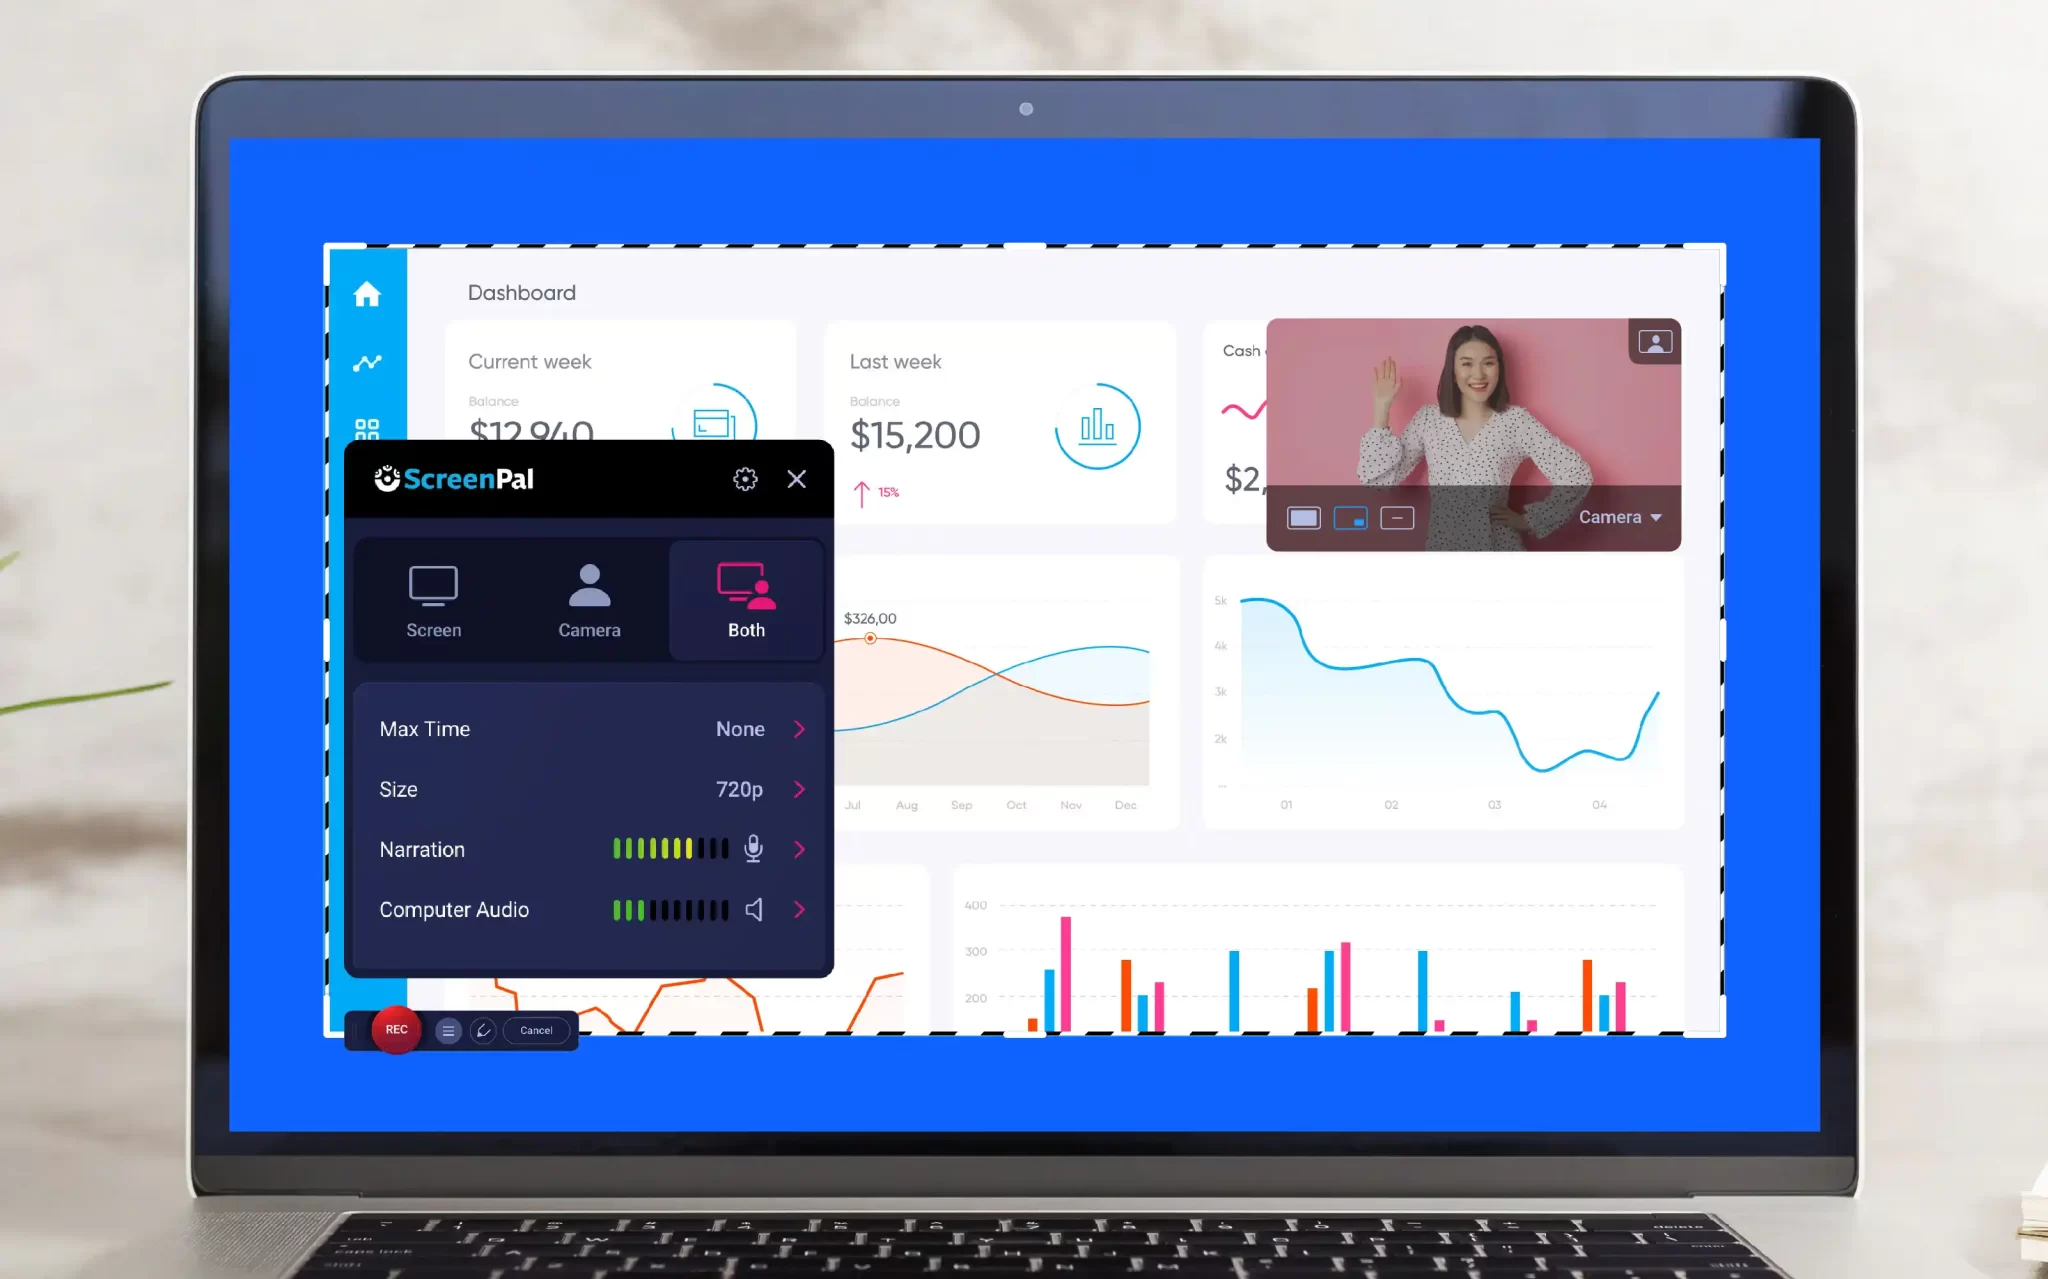
Max time
Free users have the ability to create an unlimited number of screen recordings, up to 15 minutes each! If you need more time or want the flexibility to record for as long as you want, we suggest upgrading to a paid plan for unlimited recording times.
Tip: With any paid plan, you can choose how long you want to record by clicking on the arrow next to Max Time and indicating your max recording time. You can also select No Max to record without a limit.
Size
You can adjust your recording frame with preset sizes or drag the recording area to fit your own custom size.
480p – Best for easy sharing and instant communication.
720p – Highly recommended for social sharing.
1080p – Use for higher resolution recording.
Active Window – Records the active window of your browser.
Full Screen – Records the full screen of your computer.
You can also adjust the recorder frame by dragging the corners or sides of the frame.
Tip: You can easily record Google Slides or PowerPoint presentations. We recommend recording in “Normal” mode and adjusting your recorder frame around the presentation. You can continue to read your slide notes as you record.
Narration
The recorder will detect audio sources connected to your computer. Click Narration to pick your preferred audio source.
Tip: Background noises can be distracting! We recommend using a separate microphone for recording your narration to avoid background noise. Make sure to do a mic test (microphone test) before audio recording.
You can also reduce background noise in the video editor under the audio settings.
Computer audio
The free screen recorder will only capture audio narration. To add computer audio, you’ll need to be a paid subscriber.
Testimonial highlight
Gannon Nordberg, a technology specialist at Lord Fairfax Community College in Virginia, is finding more ways to implement video on his campus.
He believes video helps keep students engaged in online course content. Hear what else he has to say about the screen recorder.
Helpful tips while screen recording
Once you have the Screen Recorder set up and ready to go, click on the red Rec button to start recording. A 3-2-1 countdown will appear. The app will begin recording after Go appears in the countdown.
You’ve got a ton of flexibility while you are recording your screencast. If you need more time to prepare or accidentally made a mistake, just pause the recorder.
Pause and continue
 You can pause your recording at any time. Your red Rec button will turn blue while you are recording.
By clicking on the blue button, you can pause your recording. You can take this time to adjust the recording frame before continuing to record again.
This gives you a chance to “edit as you go” and prepare for the next portion of your recording.
Truncate your recording
 There’s no need to start over. If you make a mistake, don’t worry! You can pause and go back to a section of your recording to re-record.
Click on the timeline box and go back to a chosen time to re-record and truncate that section.
Finished! Now what?
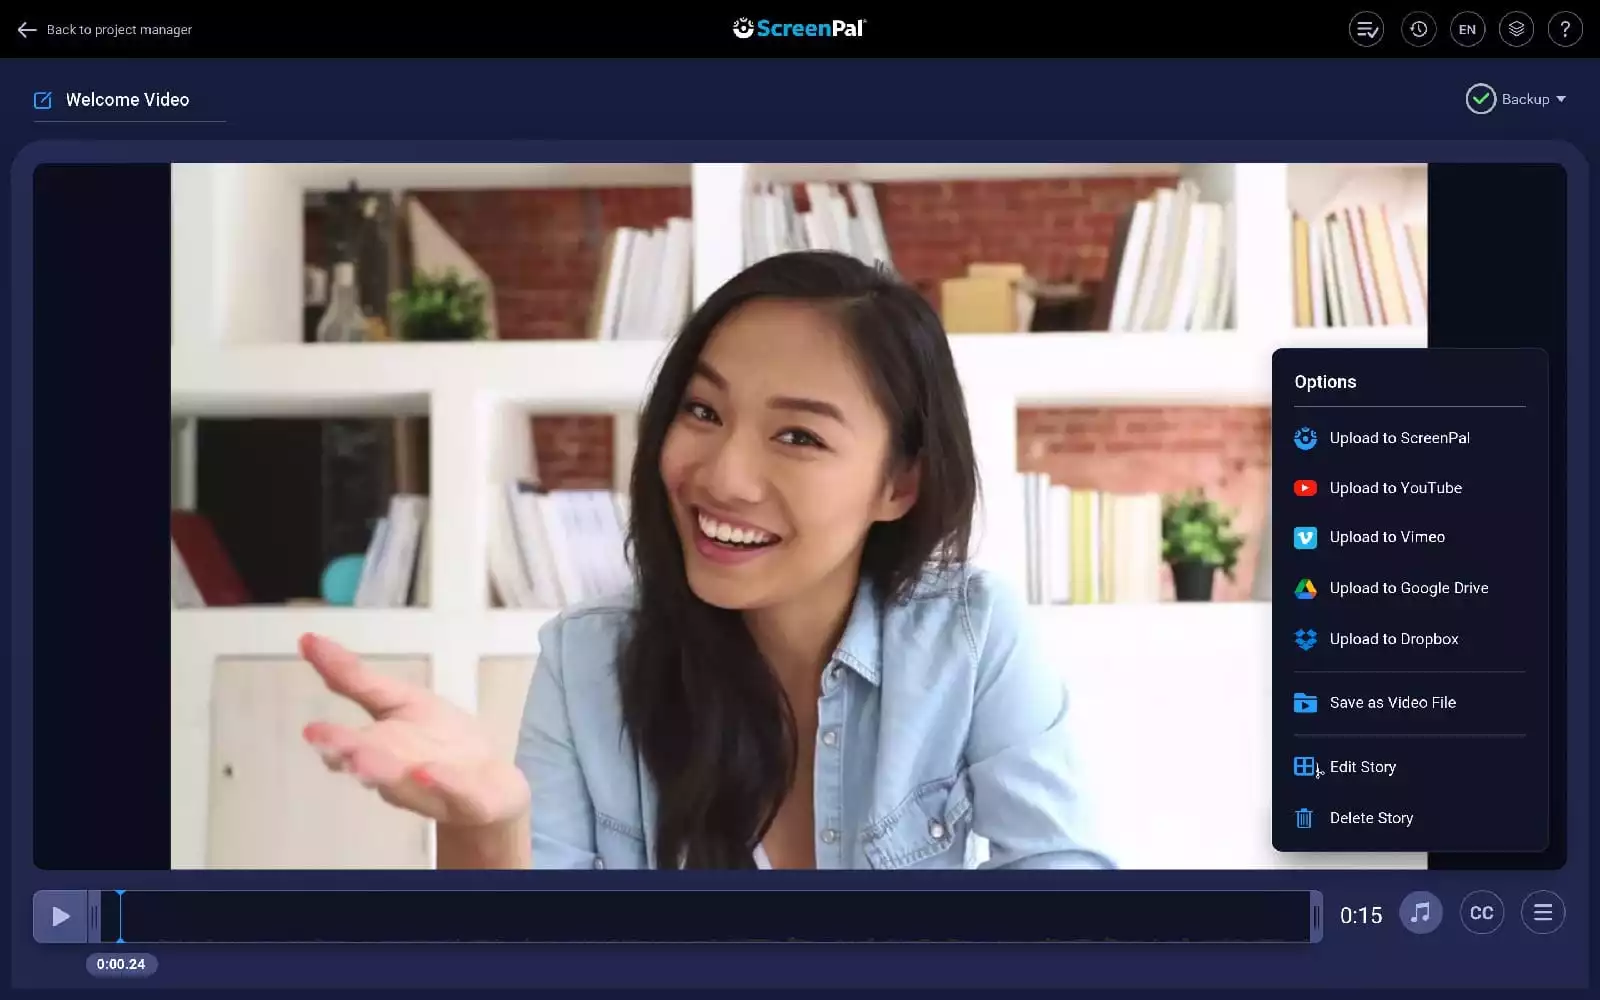
You’re done recording your screencast, now what? When you click Done, you’ll be presented with three choices to easily share or edit your screencast.
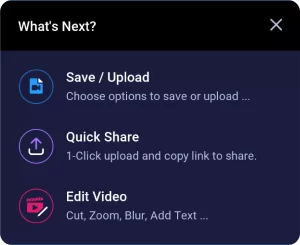 Save and upload – You can save your video as a video file or choose to upload to your hosting account, YouTube, Vimeo, and more!
Quick share – Easily grab a link that you can share with your audience.
Edit video – Need to make additional edits? Click Edit video to enhance your screencast with overlays, cuts, and more!
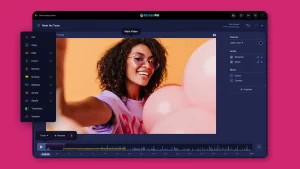
Below we’ve listed several basic editing features you can use with the free screen recorder. Upgrade to use automated captions, the blur tool, combine videos, and more!
Trim your screencast
Easily remove awkward pauses or silences at the beginning or end of your screencast.
When you finish your screencast, you’ll notice a timeline bar below your main video. There are bars located at the start and end of the timeline. Just drag these bars to adjust the start and end of your video.
Anything in-between these bars will be published.
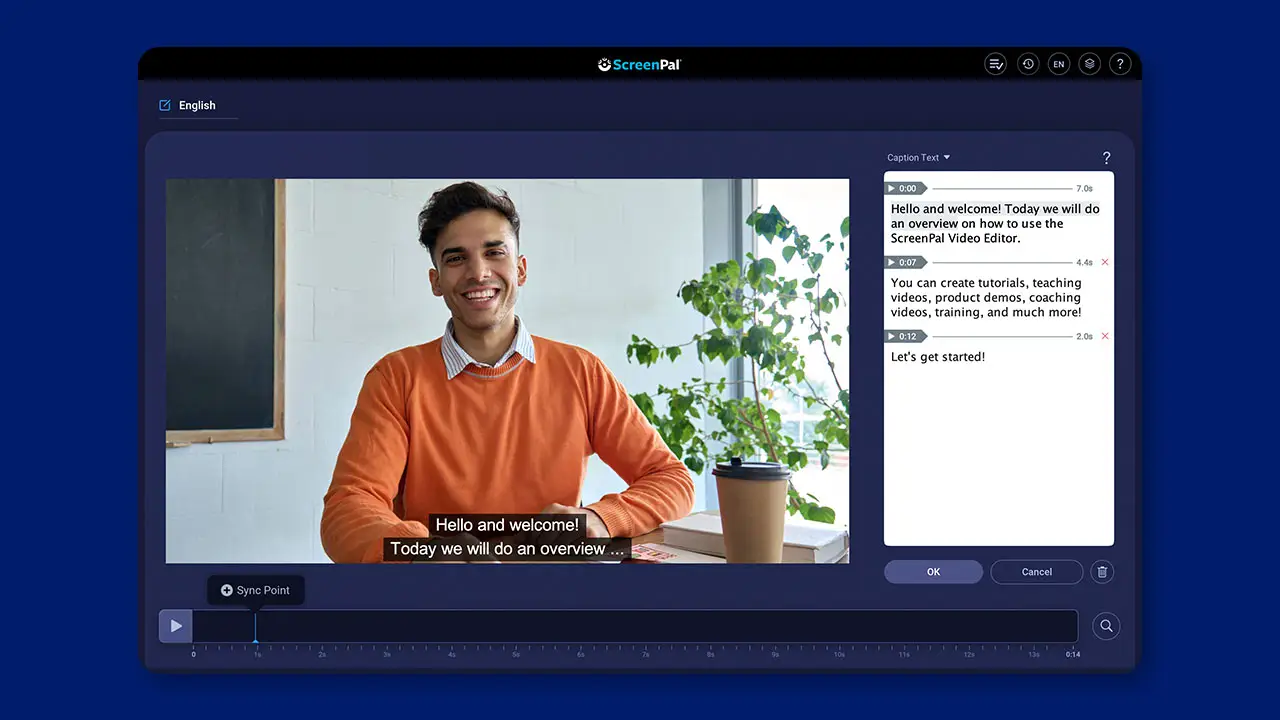
Adding captions
You have the option to include captions on your videos.
As a free user, you can upload a standard captions file. Upload a .sbv or .srt standard captions file.
There are more options for Deluxe, Premier, and Max users. You can use speech-to-text technology or type in your own captions in our Interactive Captions Editor.

Add a virtual background
If you’re recording your webcam, you might not want people to see your living space in the background. You can easily blur, remove, or replace your webcam background with a virtual background for free, using the background removal tool.
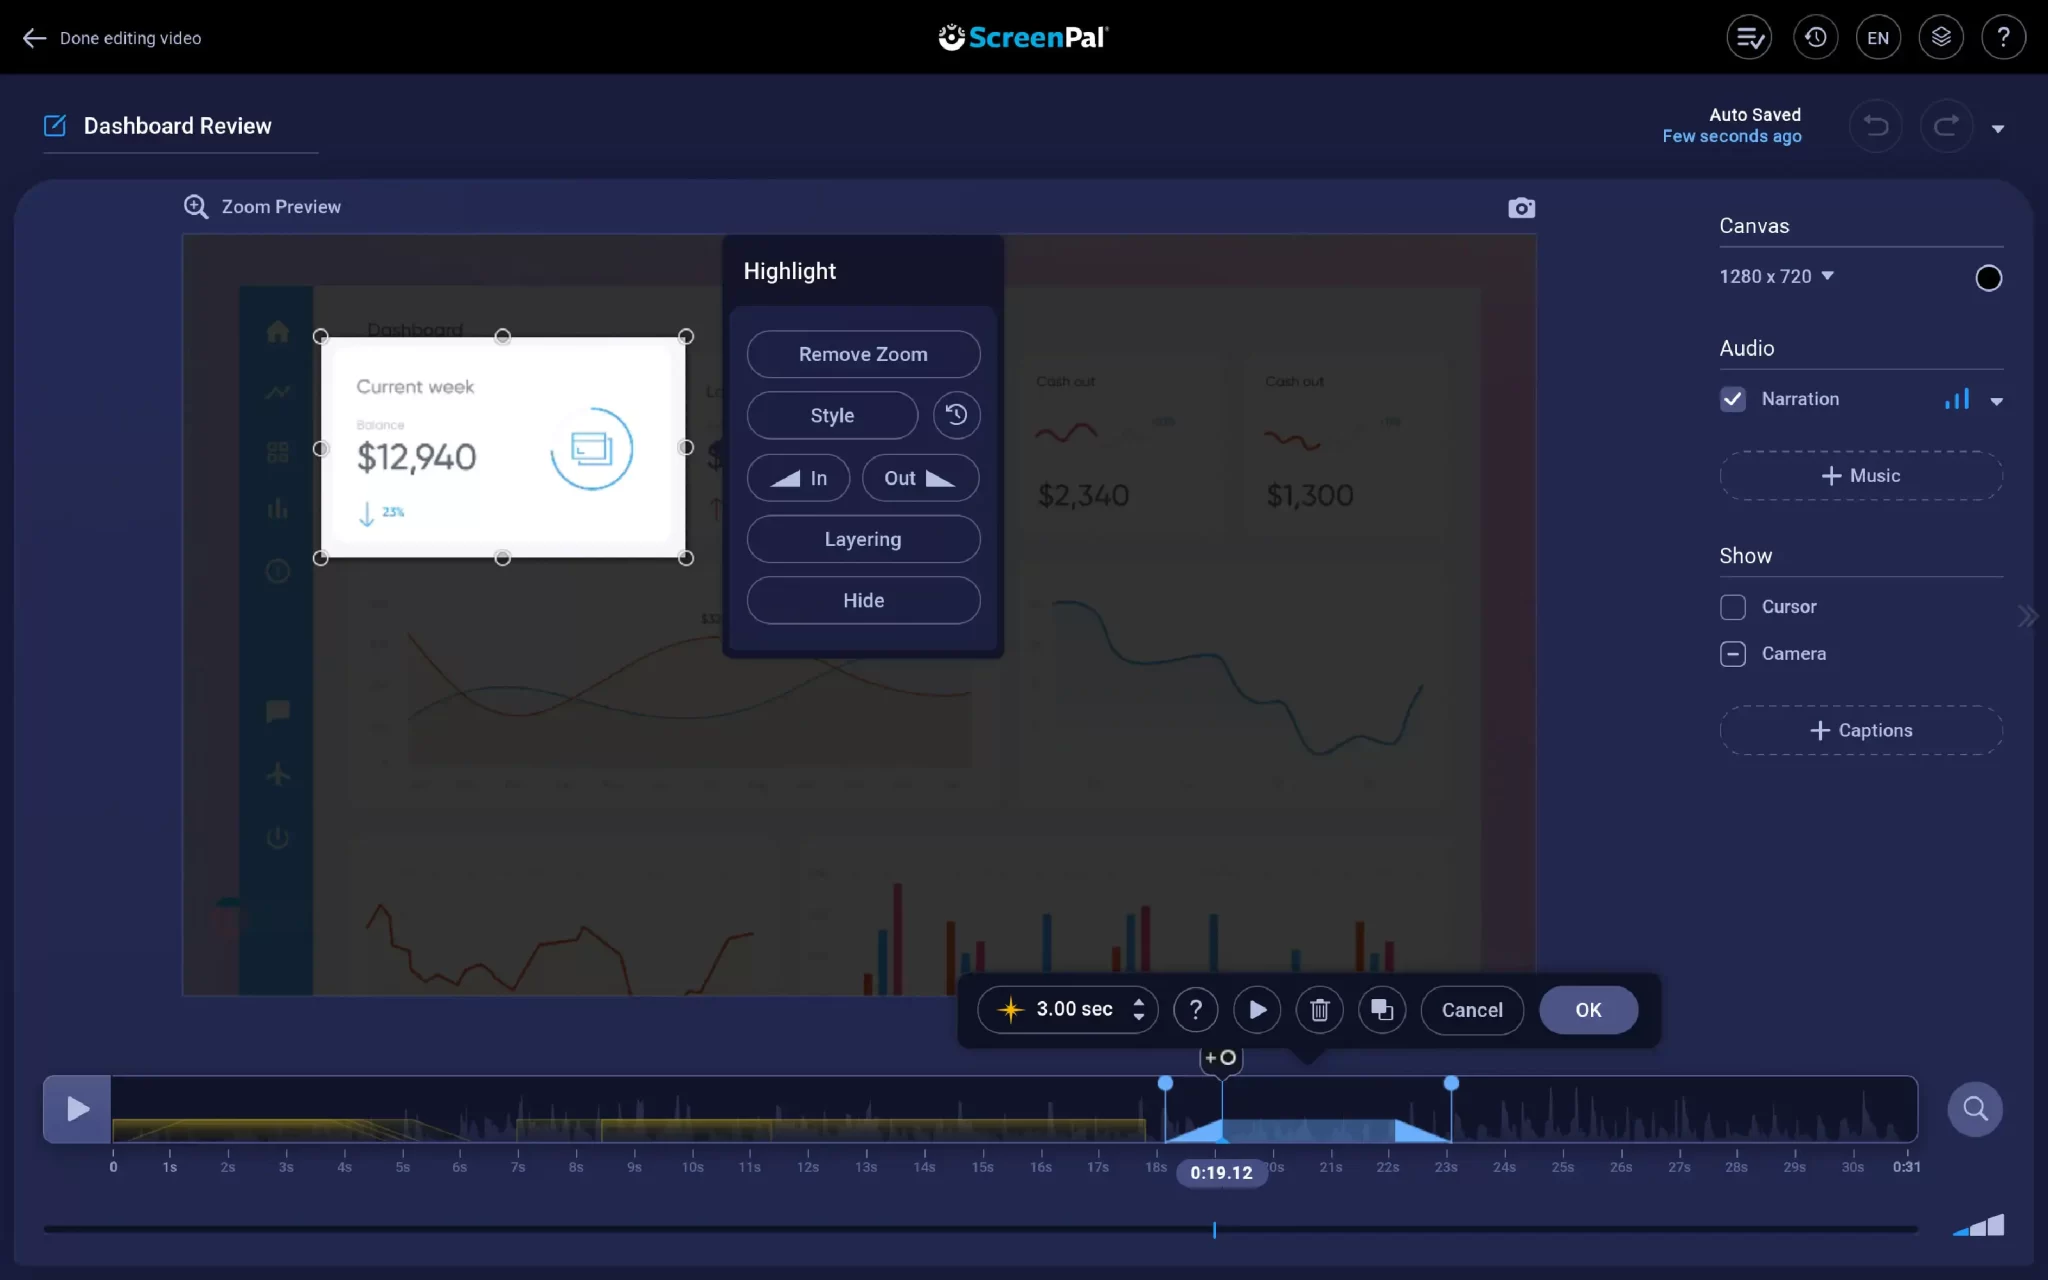
Zoom in and zoom out
You can easily zoom in and zoom out on your video to focus on different parts of your screen at different moments. This feature can be especially helpful for tutorial and how-to videos. It allows you to zoom in on the points of focus that you’re explaining in your video, so viewers can easily follow along with specific actions you are describing.

Share and publish
There are several upload and publishing options in the free screen recorder.
- Save as a video file – You can save your recording as a video file and choose either an mp4, avi or flv video file. You can save your recording in a folder on your computer or laptop. Just fill out the filename and click Publish.
- Upload to ScreenPal – Upload and grab a link to share your recording. To do this, you’ll need to sign up for a ScreenPal account or connect to your existing one. Please note: Free users can upload videos of up to 15 minutes long to ScreenPal’s hosting services. Solo Deluxe, Premier, and Max users have unlimited uploading times, as do Team Plan users.
- Share on YouTube – If you haven’t linked your account, all you need to do is click Launch web browser and follow the steps to connect your YouTube account. Once that’s done, fill in the information and it will upload directly to your YouTube account or a YouTube channel you choose.
Upgrade for more uploading options. By clicking on the + button on top of your Options menu, you can publish to other sites including Vimeo, Google Drive, and Dropbox.
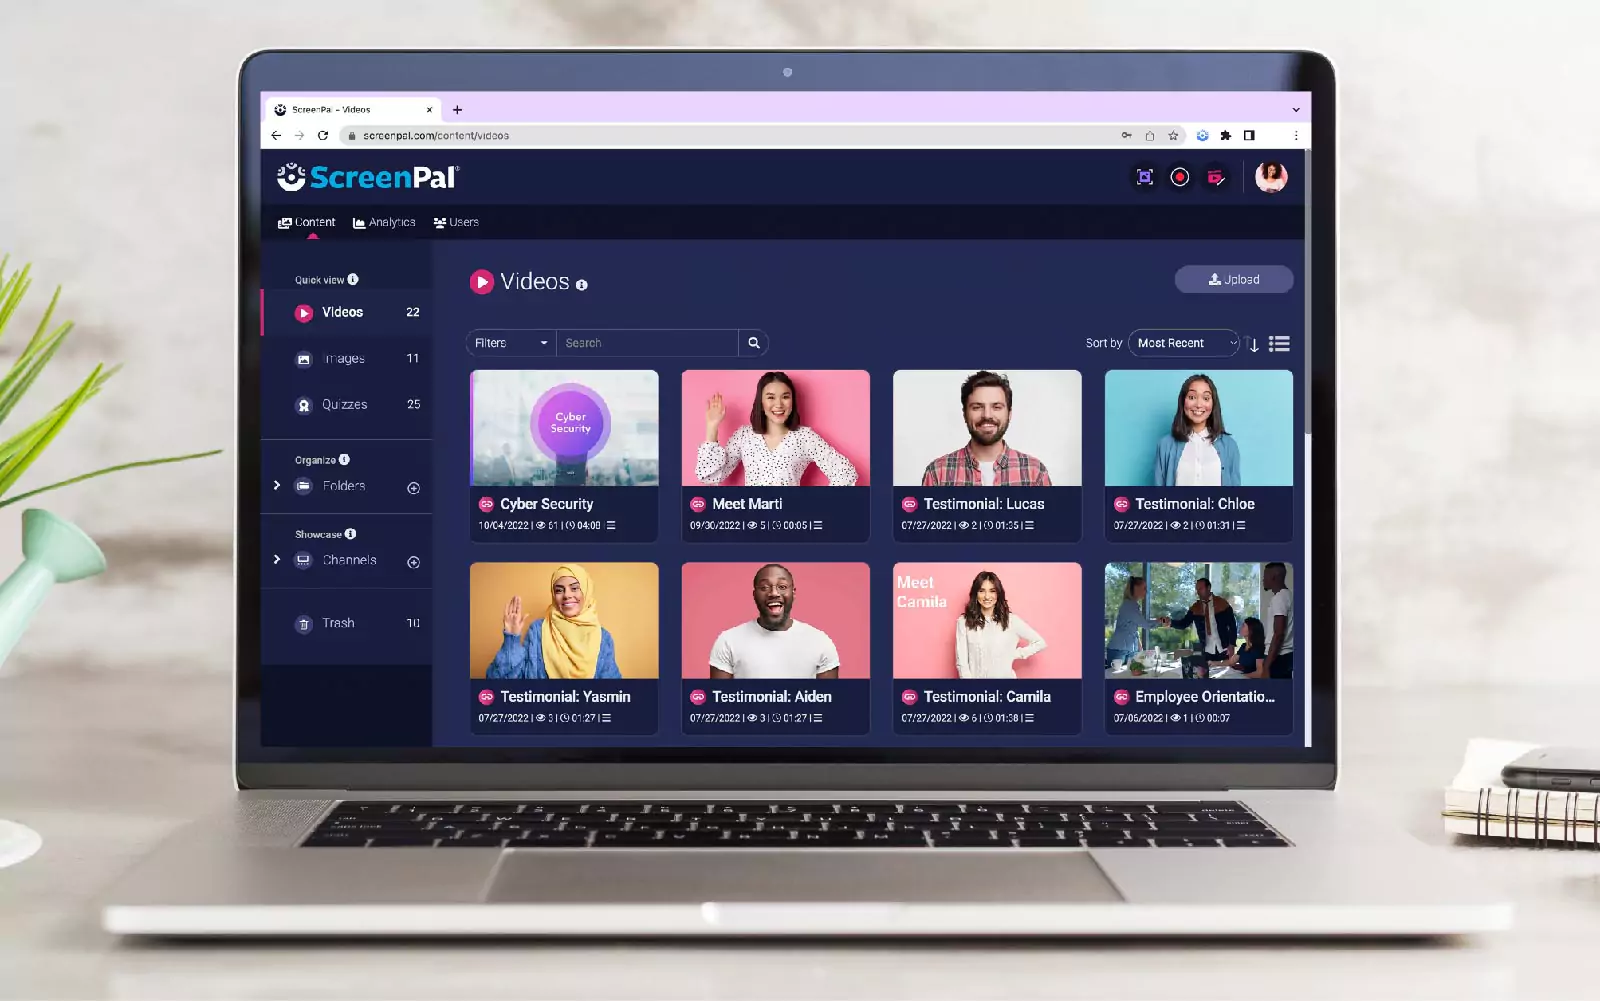
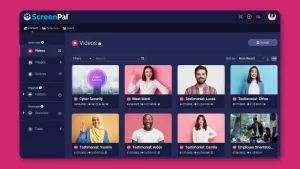
Host and manage content
When you upload your video to ScreenPal, not only will you be able to grab a sharable link, but you can access this video at any time within your hosting account. Login to your hosting account, to access all of your videos. The hosting account provides several benefits:
- Copy and share links of your videos.
- Save and share videos with a custom URL.
- Organize videos into folders and channels.
Deluxe, Premier, and Max users have more personalized options including embedding your videos onto your own website, customize players to fit your brand colors, and more!
Testimonial highlight
Leslie Fisher is an Education Technology Expert and Presenter and she has been raving about ScreenPal for years. She recommends ScreenPal to thousands of educators.
Hear why she uses it and how you can implement it into your workflow.
11 common ways to use screen recordings
 Now that you have a strong understanding of how to record your screen, available features, and tips on how to screen record, here are some ideas on how you can use screen recordings to create a wide range of useful, engaging videos.
This list is just a small sample of the ways you use screen recordings to explain your content visually and provide value to your audience. You can check out other screen recording blog content for more ideas on how to use and make the most out of your screen recordings.
1 – Webinars
Webinars provide a wealth of information. It can also be beneficial to record the information to review later on, especially for attendees who aren’t able to stay for the entire webinar presentation. If you’re hosting a webinar, you can record your screen to later distribute to your audience. The screen recording can also be used for marketing purposes to highlight key moments and promote future webinars.
If you’re attending a webinar and won’t be receiving a recording of it afterward, you can easily record your screen to watch the webinar again later and to refresh your knowledge of the material.
2 – Online calls
Screen recording software allows you to easily record online video calls in case there is information being discussed that you may want to reference later. If you’re on a video call with your friends, family members, or colleagues, you can record the video to review later or share with others.
It can be easier to focus and stay present in the discussion if you know the call is being recorded and can be reviewed later as well, rather than needing to take notes on all the key points of the discussion.
3 – Instructional videos
A screen recording can help you easily create video instructions, such as educational lessons or information on how to use specific online tools. You can record your computer screen, use drawing tools to illustrate your points, and use a microphone narration to add your commentary.
4 – Product demos
Screen recordings can be a great way to create product demo videos, allowing you to record an online presentation of a product to a potential customer or investor. You can demonstrate on a video call how the product or software works, complete with vocal commentary, webcam footage, and interactive graphics. Then share the screen recording with your audience so they can review later or reference when they are discussing the product with other members of their team.
You can even record demos of mobile products and website pages using our iOS screen recorder and Android screen recorder apps.
5 – “How-to” tutorials
If you’re making a “how to” informational tutorial, a screen recorder can be beneficial for easily explaining complex information in a visual way. You can record your screen, add narration, and use drawing tools to bring the viewer’s attention to the important sections of the video. You can also overlay your webcam footage for a more personal touch.
6 – Instructional videos
A screen recording can help you easily create video instructions, such as educational lessons or information on how to use specific online tools. You can record your computer screen, use drawing tools to illustrate your points, and use a microphone narration to add your commentary.
7 – Live streaming
Live streaming video allows you to communicate with your fans and followers in real-time, but the content is also often gone once it is no longer live. You can use a screen recorder to capture your live stream, which you can later upload to YouTube or on your social media platforms for your audience to view later, and to increase your reach to others who couldn’t attend the live streaming. This allows you to maximize the potential of your live streaming content.
8 – Online gameplay / walkthroughs
Screen recording is an essential component of producing online gameplays and walkthroughs. You can start the screen recording process to capture how you complete certain challenges. You can also overlay your webcam footage to capture real-time reactions and use a microphone to offer commentary in real-time.
9 – Online events
If there’s an online event you want to be able to revisit again, such as an online workshop or conference speaker, you can record your screen and review the video later. The screen recorder can capture the entire online event on your screen, allowing you to save it to your computer or upload it online.
10 – Classroom lectures
Screen recorders are extremely useful for creating or capturing online classroom lecture for both teachers and students. Teachers can record and edit their lecture to share with students who are virtual or unable to attend the class.
If you record an online lecture as a student, you don’t need to worry about taking exhaustive notes so you can relax and can focus on the information as it is explained. You can simply watch the recording whenever you want as your convenience and review it as many times as needed to take additional notes and retain the information.
11 – Record presentations
If you’ve made a Powerpoint or Google Slide, you can record the presentation and use drawing tools to highlight certain aspects of the presentation. You can also overlay your webcam footage and add voice narration to explain what you’re displaying in the presentation, making the presentation more informational and engaging.
All-in-one video creation tools
There’s no shortage of tools and resources available to learn, implement, and excel when learning how to screen record and create videos. Here are the tools you can use to succeed.
 Video editor
It’s rare that a screen recording video is captured perfectly from start to finish on the first attempt. Chances are, you’ll need to do some editing to add notes, clarifying the concepts, or record certain sections over again if there was a mistake.
With the video editor, you can use easy tools to quickly add text and overlays, cut sections of your video, or mix and match media content.
 Screenshots and image editor
You’ve heard the saying, “a picture is worth a thousand words.” With screenshots and images, you can send powerful pictures and visuals to your audience to get your message across more clearly and in a more engaging way.
In addition to screenshots, our image editor allows you to add annotations to help explain your thoughts or message.
Hosting management
Finding a way to organize and manage all of your videos is extremely helpful. Hosting management enables you to securely save your content, password-protect them for extra security, organize them into their own channels or playlists, and share them to a class or individual students.
There’s no need to go through multiple platforms to create content. ScreenPal is an all-in-one content creation tool giving you access to all of these features in one place.
Unlock your creativity with video
Video has become a powerful and essential part of modern communications.
From education to business, videos help people communicate, collaborate, and share impactful messages. Our suite of intuitive video creation tools makes it easy for anyone, anywhere to create videos.
Take advantage of all our great features. You have access to create amazing videos within minutes!


