This video will go over an overview, intro the main dashboard.
|
|
|||
|
|
|
|
|
|
|
|||
|
|
00:00 |
(Beginning of video)
|
|
|
|
|||
|
|
00:00 |
How to get started with leads leap.
|
|
|
|
|||
|
|
00:00 |
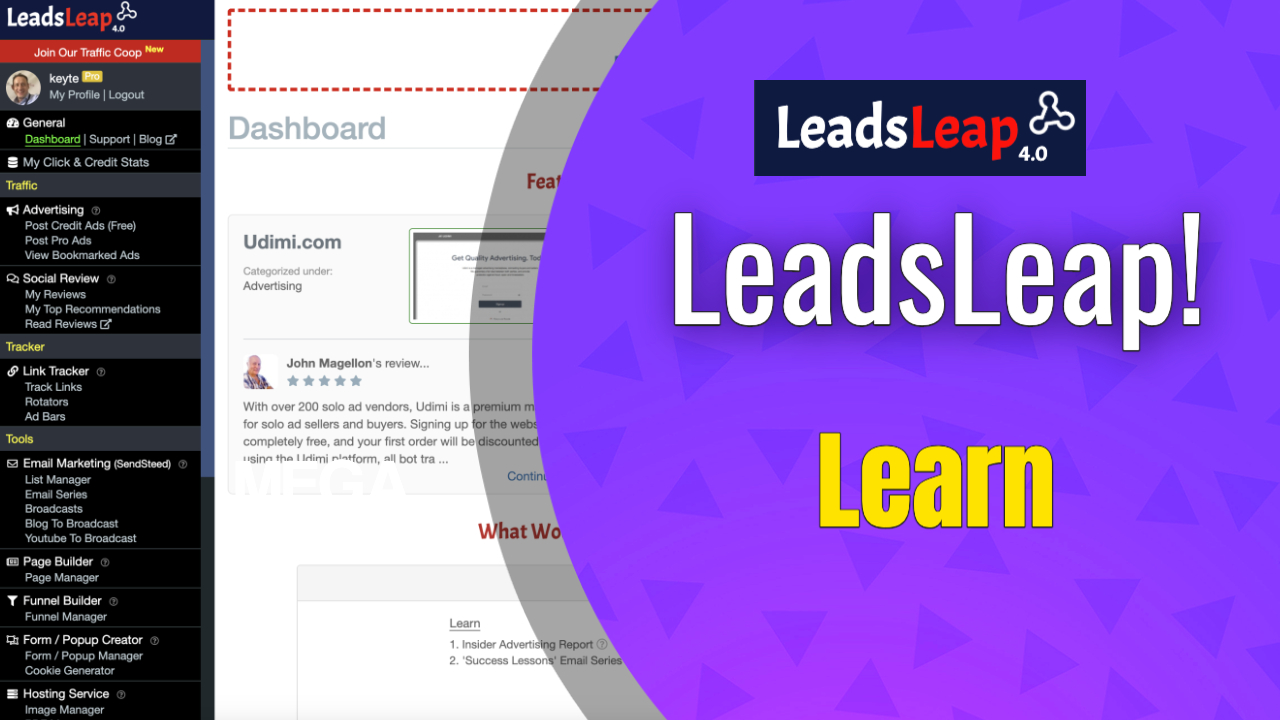
Unknown: Okay, hello, and welcome to the leads lead training here that in this video, I'm going to be talking about the main screen here, when you log in, this is pretty much what you're going to see right on the on, you know, right from the start. Now, whether you're a pro member or a free member, it's going to look something similar to this anyway. So the first time you log in, you're going to probably see a lot of links. On the left hand side here, let me just move this, move this away, so that you can see that now don't get overwhelmed. There's, there's there's quite a lot here. But there's also a lot that you won't ever really need. So just go at it step by step. And I'm just going to talk about the main home screen here. And what what are the sort of things you're going to need to think about? Or, you know, what are the first steps with using leads leap? So the first, the first well, let me just talk about the main screen here. Now, obviously, over on the on the right hand side, here, we've got the ads, okay, these are our ads, okay. You'll see these when you log in, and on every page, you'll see the ads. And the purpose of these is, this is the advertising platform, which is all built into Leeds leap, this is a great platform that we've got here, all the members of Leeds leap, are able to advertise their offers on this bliss lead platform, and you're gonna be able to do the same. Now, if you want to post an ad, we're going to, I've got videos specifically, that will show you how to set up an ad. And get started with that we've got some advertising opportunities here. So on the left hand side, you see right here, where it says advertising, okay, you can mouse over these question marks just just to see what they say. And you can also go to the tutorial here, which comes out and then you can learn about things specifically on this page. So if you want to learn about advertising, you just click on the links to that area. And then you you, you open the tutorial to learn a bit about that. Same applies to all these pages. Now, you can also mouse over some of these question marks to learn more about these various, you know, tutorials and stuff like that. But we always have this tutorial on every single page.
|
|
|
|
|||
|
|
01:55 |
How to learn more about your account.
|
|
|
|
|||
|
|
02:13 |
And you know, depending on what page you're on, that tutorial will change depending on the page you're on, it'll give you specific guidance on those particular areas. Okay, moving on, okay, you'll see the occasional ad at the top here.
|
|
|
|
|||
|
|
02:27 |
And sometimes if you refresh or you come back later, you'll see other things like recommendations from other members that have done, you know, some recommendations and stuff like that you can also post your own recommendation or review. That's what they're doing, they've got a review that you can go to the left hand side, and you can see your reviews, and you can, you know, post a review there as well. And then this is information about what's going on in your account.
|
|
|
|
|||
|
|
02:54 |
What would you like to do today, you know, learn about different aspects of your account. And you can go straight there, you can earn additional income with this platform, there are different ways to earn, again, mouse over the question marks to learn more about it. And it'll also highlight on the left hand side here on the links, just so that you know exactly where to go to to learn specifically about that section. Now, this section here is to the building your own business. Now what which aspects of your business do you want to focus on today? Do you want to focus on solo solo ads, you can find out information about that.
|
|
|
|
|||
|
|
03:34 |
You know, there's a lot of different things, you know, that you can learn about lists manager, page builder, how to, you know, get traffic advertising, that kind of thing.
|
|
|
|
|||
|
|
03:44 |
The daily activity bonus.
|
|
|
|
|||
|
|
03:44 |
So again, more information about that. Now, down here is more more specifically about your particular account. Okay, so your daily activity bonus, I haven't clicked on any ads. So when you click on these ads, on the right hand side here, the window will pop up. And then you'll be able to view other people's ads. Okay, there'll be a little timer here. And it'll tell you that, you know, you can close this down now and then click on another ad. The reason why you the reason why we do this is because it allows us to earn credits. And by earning credits by watching other people's ads, those credits can in turn, turn convert into hits for your ads. Okay, and more more suffering credits now. Okay, if you do 10 ads a day, just read the description here. And if you do 10 ads a day, it'll qualify you. And then you can start. I mean, the more ads you watch, the more ads you view every single day, the more credits you're going to earn. And then you know all the ads that you know are posted in the advertising section in the free ads or in or wherever you've posted your ads. They're going to get more views basically. So think about doing that. All right, and the credits you've earned okay to these credits, this is the server time. This has information about your earnings and other things and credits and stuff and information about the pages that you've created and the Rotate and other tools that you've created. So don't worry about all this stuff it's not all important you know, you don't need to really pay too much attention to all this here are some ads presented by your upline you can click here to set up your own message to your to your entire team and you can write something about that your own team will will see these are the people in the upline that have posted something I can click there and see what they're up to. And so that really concludes this video really the other thing you need to do is to go to the profile setting so my profile and then you need to fill in the information here such as your public profile what people will see about you and other things just follow the on screen instructions add in some links to yourself you know get to know your sponsor the person who referred you click here to learn about your sponsor and check out you know the you know if you're a free member you'll be able to see what are the options are for upgrading Okay, you'll probably see a link over here just to you know, invite you to have a look at the options that you'll have access to if you decide to upgrade and you know setting up the rest of your account how do you want to be paid that kind of thing how do they you know send you Commission's set that up you know, they use wise or PayPal, I believe the PayPal option or or wise and you can set that up? Or you can you know get paid using Bitcoin put your bitcoin wallet address in there. Okay, so that basically concludes this part of the video is just a sort of a little orientation, basic orientation to get you sort of set up and familiar with the general back office. I'm gonna go into more detail about certain other specifics in the rest of this course, but thanks for watching and see you in the next video. Bye for now
|
|
|
|
|||
|
|
05:15 |
Setting up your profile setting.
|
|
|
|
|||
|
|
07:08 |
(End of video)
|
|
Learn how to setup your ads inside your leadsleap members area.
|
|
|||
|
|
|
|
|
|
|
|||
|
|
00:00 |
(Beginning of video)
|
|
|
|
|||
|
|
00:00 |
How to use the advertising area.
|
|
|
|
|||
|
|
00:01 |
Unknown: Okay, hello, and welcome back. So this video I'm going to share with you guys how to use the advertising on leads leap. Okay. So as you see my mouse cursor circling around over here on the left, where we have traffic, okay, this is the advertising area. Okay, so here we have two options for you. If you're a free member, you'll definitely want to use the free ads. If you're a pro member, you'll want to use both of these, okay, both free and pro, what are the different what's the difference? Well, pro members are, you're able to post your ads in the pro area, and not need to serve other people's ads in order to earn credits. So the ads over here on the right hand side is where you see other people's ads. When you click those ads like this, you'll be able to earn credits every time you view someone's website. So this website is popping up right now, this is allowing you to earn credits. So the more ads you view, you're gonna look at another one. Okay, click this and view the ad, it pops up into a new window. And then close it when it's done. Okay, simple as that. So that's what you do is you go to you go through these ads. Now, if you've never posted an ad before, they're probably going to ask you or tell you to view something like 50 ads or something you need, you need a certain number of credits before you're eligible to post your first ad. So you need to do that. Now, if you're a pro member, you can post in the pro area section and you don't need to earn credits, you don't need to view other people's ads in order to get hits in the pro area. However, you won't, you won't necessarily get views in your free ads area unless you serve ads even as a pro member. So you might want to just still continue to serve ads, even as a pro member in order to get hits from the free ad section as well. Okay, but your throat, any ads that you post in the pro section? Yes, you will. You will get to hits anything you post in there if you're a pro member. So anyway, I'm going to show you how to post an ad, I'm going to just go through the free ad. So it's exactly the same as the pro ad. Same process. So I'm not going to go through everything.
|
|
|
|
|||
|
|
02:03 |
How to create a new ad.
|
|
|
|
|||
|
|
02:15 |
Now, as I've shown you how to click other people's ads, and that's fine. That's easy. Now my credit score is still it's still low, because I haven't clicked enough ads today to be eligible to earn enough hits. For you know, free ads. But that's okay.
|
|
|
|
|||
|
|
02:34 |
What I'm going to do is I'm going to post a new ad just to show you how simple it is. All you do is you click the blue button. Okay. Okay, so I've created more than enough ads.
|
|
|
|
|||
|
|
02:51 |
Okay, well, let me just go to I've got 10 ads in here already.
|
|
|
|
|||
|
|
02:55 |
So in order to create a new ad, I need to either delete something or or edit or whatever. Let me just see if I've got I'll do the the pro ad instead. Okay, that's fine. It allows me to do it out in a pro ad. So it's the same, it's the same process as the free ads exactly the same. So it says add a new ad. Okay, so I've done that. You can also check your your your steps here. But what you need is it just follow the onscreen instructions, you need a URL, okay. And if you've already got a URL, and you've got a page already set up in your let me just move that out of the way. If you've got your your ads, if sorry, if you've got your page set up in your page builder area, then you've got a page there that you can use. Or if you've got another page elsewhere, or any website or anything you want to promote, you just stick the URL in here.
|
|
|
|
|||
|
|
03:24 |
Setting up your page.
|
|
|
|
|||
|
|
03:49 |
If you want to learn how to do that, you build a page and use the Page Builder. I've got another video for that. So check out that video. Anyway. So for now, we're just going to show you how you're going to be able to set up an ad using an existing website that you've got. I've got everything set up here. So I'm just going to copy the page that I want to use to to promote. I put the URL in in there. It gives you important rules and descriptions about about what you're allowed to do.
|
|
|
|
|||
|
|
04:18 |
Put a catchy title Max 25 characters so I'm going to go to here and put something like this. This is probably going to be possibly too much. I don't know. copy copy that down. Now, depending on what business you're involved in, got too much too many characters in there. Get signups to any business. I'm just going to take out that just smoke we're still not going to do it. Okay, get signups to to any Okay, well let's see what else I can use. All right, let's change it though. hits, just so that I can get get this done for you, just to show you. So we've got 25 characters here. Now, if you if you're looking for add content, you know, go back to your sponsor, or, you know, whatever company you're promoting, and, you know, maybe go on to a lead capture page or or, or a page of the company that you're promoting. And then just copy the any ad copy that you've got there. And you just copy, copy what you need, as long as you've got permission to copy stuff. Or if you've got permission to you know, just talk to your sponsor, see, if you're allowed to use the content, and then copy it in there, or whatever, or it will just write out your own ads, it's really that simple. Then you have a little bit of a longer description here. So I'm going to just put in something like five days network marketing Crash Course, okay, I'll just put something like that in there. Or maybe the whole thing perhaps. I'm just putting random stuff in here. That's a bit over. Crash Course 100%, free, okay. All right, let's.
|
|
|
|
|||
|
|
05:37 |
Add a description of your e-course.
|
|
|
|
|||
|
|
06:10 |
Okay, let's go with that. So five day network marketing, Crash Course free lead generation. Alright, so this is an ebook that I basically created. And I want people to have access to this and download it. And I put some links into the funnel anyway. So people are going to be able to see what businesses I'm promoting. Anyway, so then I'm going to add an image, you open this up, and it tells you 300 by 250, which is the minimum size. But even if you haven't got the exact sizes, it doesn't matter, you can just alter it, but you can put this in there, it doesn't let me just drag and drop sorry, of course it doesn't, you can just click the button here instead. And then grab the image. And it works fine, because I've created the right size for the ad. However, in your case, if if your ad is too big or too small, or whatever, you can use the tools above to sort of move it around or whatever, or to shrink it or whatever. And then you just click the checkbox. And that'll add that in there. Okay, and then you see the preview right at the top there. And then you can put into the category, the best for what you know what your ad is about. So you know, for example, I'm going to choose lead generation or something similar. List Building that'll do, I'm going to put list building, because that's what I'm trying to promote, you know, people who want to who want to learn how to, you know, do list building or whatever orange into that, then that's going to appeal to them. But it doesn't matter so much. Don't worry too much just so anything that's sort of relatively sort of related, standard ad or product related ad or blog type ad or free giveaway, I'm going to put free giveaway because that's exactly what this is. Or a new launch or whatever. But it looks like that. Okay, you can read descriptions by mouse over in the hover over the question mark. And then this is an optional thing. So link to your social reviews. Read the description about what that is. And you can check out your reviews and write a review if you want to. I've done some reviews, I'm going to put live good in there because actually, technically this this ad will actually promote live good.
|
|
|
|
|||
|
|
07:11 |
What categories to put your ad in?
|
|
|
|
|||
|
|
08:24 |
Although it's a free giveaway. It will in fact, promote my live good on the inside. So I've already got a review about that.
|
|
|
|
|||
|
|
08:32 |
So that's a good idea to add that but you don't have to if you've got no if you don't have a review, either write one quickly or just just don't, don't bother or just keep it as default. Just select Automatic by default. And then I'm going to save that. So it says there's an error. Yeah, title contains unrecognised characters. Please try to you know, blah, blah, blah. Okay, so yeah, maybe because like, Okay, I'm gonna
|
|
|
|
|||
|
|
08:49 |
Getting hits to any business.
|
|
|
|
|||
|
|
09:05 |
Yeah, maybe because I copied it. Sure, was saying that but let me try again
|
|
|
|
|||
|
|
09:16 |
doesn't like me copy and pasting because that's what I did. But I thought I Okay, well. So get hits to any business. Okay, so it doesn't take very long to write it out yourself. And that works. Okay. So it tells me to click the preview button just to preview the ad. So you just preview it, and it seems to look fine. There's my ad right there. And there's my page that opens up like this. And then they get on the grab, grab the free report. So that's, that's how simple it is. And in order to get the hits as much as possible, you know, you just click on other people's ads, you view other people's ads, you get credits and you know your ads are now saved here. Yeah. So you know, all you need to do, all you need to focus on now is just simply make sure that you have enough credits and you do that by simply viewing other people's ads. Something you can do on a daily basis, and then just add up to 10 ads, which is the limit and then you should be fine. Well congratulations. That concludes this video. Thanks for watching and see you on the next training. Bye for now
|
|
|
|
|||
|
|
10:23 |
(End of video)
|
|
Make your own image ads for LeadsLeap
|
|
|||
|
|
|
|
|
|
|
|||
|
|
00:00 |
(Beginning of video)
|
|
|
|
|||
|
|
00:00 |
Okay, hello, welcome back. Now in this training, I'm going to show you how you can, you know, put together a quick ad, okay?
|
|
|
|
|||
|
|
00:06 |
So that you can advertise whatever business you're promoting here on leads lead. So literally was not just about, you know, setting up a funnel or page builder or you know, it's not just about lead gen generation you know it, you can also market your business, you can also advertise your business now you see all the ads over here, on the right hand side, you know, you can add your own ads, right here, where you know, if you're a free member, you're gonna be able to post free ads, okay, up to 10, if you're a paid member, you're gonna be able to post up to 10 Pro ads as well. Now, if you're a free member, you're going to have to continuously you know, every single day, you're gonna have to, you know, serve other people's ads, okay, continuously. You know, every time you click on an ad, you'll you'll earn points and the more ads you click on from other people, you're going to be at the more and more points and that'll, you know, in turn in exchange for your and your right to be able to get, you know, hits to your ads. Alright, so it's like a traffic exchange, you're exchanging hits, by by, you know, looking at other people's ads, alright, so the more you look more ads you look at from on other people's ads, the more likely you're going to get more and more traffic coming to your site, even as a free member. So as a paid member, you know, you can still, you know, serve other people's ads to get more more hits on your free ads. So you can get more exposure.
|
|
|
|
|||
|
|
01:35 |
But you know, as a pro member, you're gonna be able to post pro ads, and you don't need to surf for credits in order to get hits on your pro ads. But anyway, they're both the same, both exactly the same way of uploading ads. So I'm just going to show you on a free
|
|
|
|
|||
|
|
01:53 |
ad area, okay, now I need to serve ads, if I want to get hits, as it says here, it says my credit alert, my credits are low. So if I want to get more hits, I need to serve other people's ads. Okay, but I've got 10 ads in here on the free area.
|
|
|
|
|||
|
|
02:08 |
Now, what I'm going to do is I'm going to just remove one of these ads just so that you can see.
|
|
|
|
|||
|
|
02:17 |
Just remove this one for now. Just Just so that for this demonstration, I'm going to you know, because I need not, I need to be able to add a new ad here, I had 10 ads already. So that was the limit. Therefore I needed to remove one if I wanted to add a new ad just to show you how to do it. So what you do is you add new ad
|
|
|
|
|||
|
|
02:36 |
we've already got a tutorial about how to add, actually add your ads. But what I want to do here is how to create your own image ad. Alright, so actually, you know, actually go ahead and, you know, put your images in here. So how are you going to create those images? Now, my advice is to go over here to Canva. Alright, the reason why I'm using Canva for this demonstration is because I know a lot of people know Canva I personally don't use Canva that much simply because I use more advanced tools.
|
|
|
|
|||
|
|
02:51 |
Using Canva.com to create your ads. Canva.com is free to use.
|
|
|
|
|||
|
|
03:04 |
But, you know, I know a lot of people will find that Canva is an easy platform to use, therefore, you know, that's what I'm demonstrating here just to sort of be you know, newbie friendly.
|
|
|
|
|||
|
|
03:14 |
So, you know, you can come over here, you can go to Canva, create an account for free, and then go over here, create a design, if you want to create a design based on a certain thing, you know, or you can create custom size. Now, you know, if you just hop back over to and just check the sizes. Okay, so it's 300 by 250. So 300 by 250. Okay, so
|
|
|
|
|||
|
|
03:43 |
So what do we got? Okay? 300 Okay, we got that in there. And 250.
|
|
|
|
|||
|
|
03:48 |
Okay, so with 300, and the height is 250 in pixels, okay.
|
|
|
|
|||
|
|
03:53 |
And, you know, you can create your design.
|
|
|
|
|||
|
|
03:59 |
So we've got our kind of Canvas, a blank canvas here, and you can you've got some template recommendations over here, I'm just going to look for something like marketing, mock ups, okay, whatever. And then just go and browse something. Now there are some pro templates and the rest of free templates. If you mouse over it, you're going to see like it says pro here. So unless you're upgraded, you're not going to be able to use those.
|
|
|
|
|||
|
|
04:22 |
But I'm just going to look for something that I you know, can perhaps use just for this demonstration. But I think you get the point if you're going to use something like this.
|
|
|
|
|||
|
|
04:36 |
So you've got a simple template, and you know, you can use anything from over here or whatever it was or start from scratch. And you could just, you know, go to a capture page that you have and you want to advertise something. I'm going to just grab a quick screenshot of this perhaps just for this demonstration, and it's not going to be something I'm going to Use that I've got, I'm going to grab a screenshot. And I'm going to import that into the canvas. Oops, wrong one.
|
|
|
|
|||
|
|
05:09 |
Okay.
|
|
|
|
|||
|
|
05:12 |
Okay, that adds it in there.
|
|
|
|
|||
|
|
05:15 |
And then I'm just going to make it kind of fit
|
|
|
|
|||
|
|
05:24 |
probably not ideal, but actually, what I'm going to do is like it like that might be better. So crops it better.
|
|
|
|
|||
|
|
05:34 |
Yeah, seems to work.
|
|
|
|
|||
|
|
05:37 |
And, you know, I could just, you know, copy some text from somewhere like, you know, from a lead capture page.
|
|
|
|
|||
|
|
05:38 |
Copy and paste text from your pages.
|
|
|
|
|||
|
|
05:47 |
This might be too much text.
|
|
|
|
|||
|
|
05:51 |
Oops
|
|
|
|
|||
|
|
05:56 |
way too much.
|
|
|
|
|||
|
|
06:02 |
So
|
|
|
|
|||
|
|
06:12 |
it's kind of too much
|
|
|
|
|||
|
|
06:21 |
that's not, okay.
|
|
|
|
|||
|
|
06:29 |
Lead Generation, something like that, okay?
|
|
|
|
|||
|
|
06:37 |
Oops.
|
|
|
|
|||
|
|
06:43 |
Right, something like that. So really, really simple. All right. So I'm just grabbing a template. I've got my own images here that I've you know, recognising some people at certain ranks. But you know, you can upload videos, you can upload images, or whatever, and, you know, choose designs.
|
|
|
|
|||
|
|
07:01 |
You can change backgrounds or do whatever. And, you know, when you're ready, you can just simply click Download
|
|
|
|
|||
|
|
07:14 |
downloading.
|
|
|
|
|||
|
|
07:16 |
So there's my PNG file, you can, you know, preview it or whatever.
|
|
|
|
|||
|
|
07:22 |
And then I'm gonna go back to Leeds leap. Oops.
|
|
|
|
|||
|
|
07:28 |
And then I'm going to simply drag and drop that into there, actually, that didn't work, what I'm going to do is I'm going to upload it
|
|
|
|
|||
|
|
07:36 |
and
|
|
|
|
|||
|
|
07:39 |
put that in there. Now, if you're creating an image ad that doesn't quite fit, you know, you've got some little controls here that allow you to sort of and you can drag and drop it, and you can sort of shrink it and do all kinds of things. So you know, that lead generation, click here now really simple.
|
|
|
|
|||
|
|
07:58 |
And it just, you know, allows you to create some custom designs, you know, I mean, I see a lot of people putting all kinds of image ads, you know, but you know, some of them are pretty good. But, you know, you can create something that's, that's, you know, your own, okay, something something unique or whatever. Now, you know, the other thing you can do, I mean, what makes this so simple, is that you can actually just, you know, if you want to I'm going to just shrink this page a bit, but you could just create a screenshot of a page that that's really cool that you're promoting and you know, copy it to clipboard so I've just created a screenshot I copied it to clipboard and then I just paste it in there.
|
|
|
|
|||
|
|
08:14 |
Create an image ad from a screen-shot instead.
|
|
|
|
|||
|
|
08:43 |
There it is. So I was able to simply copy the screenshot that I just just took and I was able to paste it in directly into the box and it seems to fit nicely now that was probably just a bit of luck that it fit perfectly but if you can't get it you know exactly right in there you know the size is not quite right and then you know you've got these controls to to do you know play around with it and you've got the controls to shrink it or whatever and then when you're ready you could just do the checkbox there and and then there's there's your ad updated and then obviously you know like in the other tutorial on the other on the video I'm showing you how to update your text here and then you can select you know with category etc and then click Save so that's how you advertise your business on leads lead it really is as simple as that so what I was trying to do in this particular training as I just simply wanted to give you some you know various options and how to set up your ads. And yeah, well good luck guys. And thanks for watching hope this was useful. Alright, see in the next training bye for now
|
|
|
|
|||
|
|
09:49 |
(End of video)
|
|
Learn how to setup and manage your reviews.
|
|
|||
|
|
|
|
|
|
|
|||
|
|
00:00 |
(Beginning of video)
|
|
|
|
|||
|
|
00:00 |
Introduction to the social reviews.
|
|
|
|
|||
|
|
00:00 |
Unknown: Hello there, welcome back. In this section, I'm going to be talking about the social reviews. Okay, so notice where my mouse is, I'm on the social reviews area. Now, you've probably heard about your, you've seen other members doing social reviews, such as on the main dashboard. So if I go Open the tab in a window in a new tab, you see other members here, you know, you can click here, and you can view a little bit about those members, or here and see a little bit about these members. And then you can just read some of these reviews that some of these members have placed, you know, just dropped down and see what those reviews are all about. They're very, very useful. If you're looking to learn something about a platform, people talk about different advertising platforms, companies, business opportunities, they talk about various companies that they're, that they're involved in. But you're you have to, if you're gonna do a review yourself, what you need to do is, is you need to, you know, you don't want to be spammy, you don't want to be it's not, it's not a case of, you know, just just throwing out an advertisement. And expecting people to click on your link, necessarily, you've got to, you've got to provide value, and write a good report. But yeah, it's very easy to do. So when you come here, you'll, you'll see any of your reviews that you've personally posted, if you haven't got anything in here, you just click the blue button, okay, and it'll give you some some descriptions and ideas on how to get started with your reviews. So you can just start typing about a company. So if you're in a, if you're in a business opportunity, or you have a platform that you want to recommend that's going to help people in their marketing journey. Or if you've got any traffic recommendations, or anything like that, do a detailed report, or a review, as if you're kind of right writing a blog post, okay, make it real.
|
|
|
|
|||
|
|
00:58 |
What you need to do to get started.
|
|
|
|
|||
|
|
02:03 |
How to submit your review.
|
|
|
|
|||
|
|
02:03 |
Follow the instructions here, it tells you what you you know, do not do that, do this, do not do that. And, you know, make sure you follow the instructions below here give you a rating for this particular platform that you're working with. And so you've got to put in your domain, what this means is that the sorry, the, sorry, the official domain, this is not your personal link, it's the official domain, you just put the link in there, then you put your your affiliate link in there, okay, this is where people will sign up to that particular page, it tells you what you mustn't do, okay has to be your affiliate link of the company that we're promoting, okay, or the platform or the traffic recommendation or whatever, have a look at other people's reviews. So you can get an idea of what you're allowed to do what you're not allowed to do. But follow these instructions, give, give a rating, okay, and then start your, when you put your mouse in here, it'll give you some some some tips on how to word your review, just follow the on screen instructions, read down here to make sure that you get your review correct. And so on, and then submit your review for approval. Okay, so check the box and then and then just wait, you know, the support, we'll just manually reprint the Approve, it might take a few days or whatever. But okay, so let me talk about some of the other some of the other benefits of sharing out a review. So, as you can see, I've done some reviews myself, and obviously, they're not going to last forever, I've got some old outdated reviews that I that I don't I don't plan on renewing, but I've got one for my primary business, and I've got a traffic recommendation there. This is my previous business that I'm going to probably not renew. So after a while they will expire. Now you can renew them. Okay. And the good news is that if you have a bunch of reviews, like I think it's over three reviews, I believe, then your review will be mentioned on the main screen here. Okay, it will be listed on the main screen for others to see okay, in the in the leads the platform also, I believe that you know, you're going to potentially get your review added into the emails of the company. So when they go out to the various members, they your review will potentially get added in the emails but I think you have to have a certain number of reviews before you get for your your review will be posted to the other members okay. So, you know, go ahead and create as many reviews as you can, maybe three or more. So then then you can have more benefit, okay, and then it'll get out to the to the other members of the company, alright, but the the other place where people will see your reviews, you know, if if they are if they if people search Okay, so if you click Read reviews, you can read other people's reviews in different categories on the main website, okay, you can also do a search as well. So people will potentially read your reviews on the main website as well. You can also link your reviews externally using your referral link and if anyone wants to join leads lead on the from that refer from that review. They will join under you. So it's a great way to get your recommendations out there. And so use it Okay, absolutely use it. Anyway, that concludes this video. Hope that was useful. See in the next training bye for now
|
|
|
|
|||
|
|
03:17 |
Benefits of sharing a review.
|
|
|
|
|||
|
|
05:39 |
(End of video)
|
|
In this video we will cover how to track links, use the rotators, and setup an adbar.
|
|
|||
|
|
|
|
|
|
|
|||
|
|
00:00 |
(Beginning of video)
|
|
|
|
|||
|
|
00:00 |
Tracking your links.
|
|
|
|
|||
|
|
00:01 |
Unknown: Okay, hello, and welcome back, Edward here. So in this section I'm going to be talking about tracking your links. Okay, so in here where it says tracker, you got link tracker, and you see where my mouse is, we're going to be talking about track tracking links, we're going to be talking about rotators. And we're going to be talking about AD bars.
|
|
|
|
|||
|
|
00:19 |
Okay? Bearing in mind, guys, you know, there's a lot of help and tutorials right within this section. So, you know, I'm going to keep this video short and sweet. And you're going to be able to decide from this video, whether this is a good tool to use or not. But you can do further reading with the various tutorials are already within this section. You can also mouse over the sections here to read a little bit more about the various aspects. So yeah, what is it? What is what do we mean by tracking links? Now, before I get started with the specifically with the tracking links section here, any page that you create within leads lead anyway has has a lot of built in link tracking tools within within the pages. So you know, personally, I don't use these trigger tracking, Link trackers myself, not not not a huge amount. I mean, I've got some track link links that I have been tracking in the past.
|
|
|
|
|||
|
|
01:18 |
But I prefer just to, you know, a lot of my, what I do is I build pages within loosely anyway. And it's already got built in tracking tools within the page, page manager, and we'll get to the training in there anyway, so don't worry about it. But for now, let me just touch on what the tracking link tracker is. Now you could ease, you can easily set up a link tracker with an external domain or an or a URL that you that you are tracking, that is not part of Leeds leap, or maybe it's a it's a website that you are promoting, or an affiliate programme or, or any company or network marketing company that you are promoting, you might want to just track the links that are going on, there's a certain amount of tracking that can be potentially done with this section. But let me just explain. So if you want to track a link, what are we going to be able to track first of all, well, we're going to be able to track the hits, we're going to be able to track where those hits have come from. So if you're advertising on certain platforms like Facebook or or solo ads, you can set it up so that you know it's going to track how those those leads that are coming in from that traffic source are going to be performing on your on your various links. So what you what you do is you click here, you add a new tracking link, okay, you put the URL to your to your link, it could be an external URL, just read the read this information here, an external URL or, or a platform that you're promoting, or whatever.
|
|
|
|
|||
|
|
01:34 |
What is a link tracker?
|
|
|
|
|||
|
|
02:50 |
Okay, so put in a URL, I'm not going to do one for now, but I've already got some here to show you. And then you'll you'll have your links that you're tracking in the section here.
|
|
|
|
|||
|
|
03:02 |
Now I put a an affiliate URL here, okay. And sorry, the affiliate name of the company, in this case is second splash.
|
|
|
|
|||
|
|
03:11 |
And I've, I've got a the URL right in here. Okay, it's an affiliate URL, don't worry about the URL, specifically, it could be promoting anything, you can also click here to read this information. Now, this little checkbox, this might confuse a lot of people. Now it says here disabled cloaking. Now, in the past, cloaking was a popular thing. What it basically means is it basically means that if you want to hide the athlete URL from visitors, I personally don't think there's any need to do that. What it technically does is it puts your entire website into a sort of iframe. Okay, so your website is within a frame, okay. And then they're not going to be able to see your URL to your website. I you know, I mean, people have their reasons, but I personally wouldn't do that. And nowadays, I think on the whole, a lot of companies will not be able to allow you to do that. And there are certain security issues that they actually mentioned here as well. So nowadays, I mean, if you're confused about this, I would just check this, okay, so that, you know, you don't want to you don't want to use the you want to disable the cloaking, okay. So what what will then happen is when you use when you when you, when you're given a link, like up here, what it will do is it'll perform a kind of a redirect instead, it won't, it won't mask, it won't hide your, your URL, it'll, it'll, it's not going to mask it, it's going to redirect it to the to the actual the original website that you're promoting. Okay, and then therefore, there's going to be sort of limitations as to what you're going to be able to track but I think you've got enough tracking tools like that. That's the reason why I don't generally use these so much, is because I know it is infusing a bit overwhelming. So like I say, if you're confused, just check this, check this and disable the cloaking. Because the other thing is that if you're promoting affiliate links, sometimes the link structure can be broken, and you could end up losing that to that sign up. So that, you know, you could end up you know, sending that leads directly to the admin of the of that particular programme you're you're promoting. Now, you can also have an option of disabled real tracking, okay, it'll give you some information about that.
|
|
|
|
|||
|
|
03:25 |
Disabling cloaking.
|
|
|
|
|||
|
|
05:06 |
How to track affiliate links.
|
|
|
|
|||
|
|
05:30 |
So but by default, real tracking is enabled for uncloaked links real tracking, as for uncloaked links is done by detecting one second of visitor a visitor. So it's Yeah, I mean, there's, there's information about that. It's up to you, if you if you track it or not, you can you can disable that as well, there's going to be enough information allowing you to track whatever you need. If you're a pro member, you can put in a custom link there. And so you can put your private domain optional if you want. If you're a pro member, and you can tag, you can set up some tags here. If you want to categorise, you know your links, if you have a lot of links in here, you can use the the the bar down here to to filter out, which which links you're tracking. But I realised for some people, this disabling the cloaking and the disabling of whether you want real tracking or not, might be confusing, but there's a lot of information, you can say, Can my URL be close, you can click here. And you can check to see if your, your pages is close. So if you if you basically if you see the page as it should be, and it's definitely your page, and you can see, you know, everything looks fine. Yes, you can, you can check this and say I see my website, okay, check that great, the URL can be clicked. So there's a nice little tool there. It says yes, your your URL can be cloaked, therefore, you know, you can uncheck that. And, and what that basically means, hold on a minute, make sure that everything is on Yeah, so uncheck that. And then you can use that section. So that will be fine. Now, a few other little advanced features is a browser title, this is what they will see when the link when they click the link in the browser window. So right at the top and on the on the top of the browser bar, they will see the the title of the browser of the of the page, okay, so that's useful. So make it kind of descriptive. Now there's also a teaser option, what this means is anything you write here will be displayed for a period of time before they access the page, okay, it's like you could do like a quick ad or something like that, you know, anything you like, you can just do a little like a little preview of like an ad, if you want to, and you can allow it to view for three seconds before it redirects to your affiliate link. I personally don't use this section at all, not really.
|
|
|
|
|||
|
|
07:01 |
Advanced features: browser title.
|
|
|
|
|||
|
|
08:02 |
The other thing you can do is you can insert an ad bar, we're going to talk about add bars later on. Okay. But it's up to you, I've got a few add bars that I that I use, this is basically an advertising bar that you can put in at the top.
|
|
|
|
|||
|
|
08:17 |
So for example, put put something like that in there, okay. And then a little, little advertising bar for that particular offer that you've created within this, within this section down below here will be added to the top of your page, which is quite nice. It's quite handy. You know, check it out, do a little test and you'll you'll see what I mean, if you have any pop ups, you know, you can create pop ups using the section down here. Okay, which we'll talk about later in another video. But it allows you to put in an existing pop up that you've created. And, you know, you can you can insert any pop up you want. So for example, let me okay, let me put in Okay, let me put in that. Okay, so I've put, you know, I've already created a pop up, I'm going to have a pop up. So you could you could have an external link with an ad bar in there plus a pop up. It just has that little fancy customization of a page that is not part of Leeds leap or you know, it could be an advert it can be an external link or whatever. But, but include your various little things here like an ad bar and a pop up which is quite cool. You can monetize it tells you a little bit about how to monetize by yes show an ad after 10 seconds or no or private. Okay, so, you know, if, if you want to earn credits from displaying other people's ads in your in the system, you can put in a footer tab position, okay. What this basically means is you can decide where to place the footer tab As you know, it will also be positioned the position of the ad, if you enable monitor, monetizing. So yeah, this is basically positioning of your ad, where you where you want it left or right. And you can also have it responsive or not, basically means whether whether you know, your users are mostly using mobile devices, then you know, you want to put responsive to on, but by default is set to off. Or if you want any fixed specific heights of your, of how it looks, you can put that there to fix for specific iOS incompatibility, again, mouse over the question mark to understand what that means. But you can leave that blank, okay, click save. Okay, and then I'm going to just test this, this, this page, so I'm gonna click this, this link. Okay, there's my, there's my link, this is my second splash, Link. Okay. This is just an external platform that I'm promoting. But you see right at the top here, you can actually see, also, if I just moved myself out the way, you can see that ad bar, this is this is what the ad bar looks like. And there's the pop up, okay, remember, I created a pop up, again, you can create these kinds of pop ups within leads leap. So that that opens up, when they try to exit the page.
|
|
|
|
|||
|
|
08:48 |
Creating a pop up page.
|
|
|
|
|||
|
|
10:41 |
Testing a pop-up window.
|
|
|
|
|||
|
|
11:23 |
Notice that notice how I how I did that, let me just refresh the page again. So the page loads. And then when I try to exit this page, notice my mouse, okay, when I exit the page, the pop up window, this is what we call an exit pop up. So if you if your user or your lead tries to exit the page, in other words, if they're going to close the browser, and a pop up, pops up and says hold on, this offer ends in one hour. So if they click here, they go to whatever link you want them to go to.
|
|
|
|
|||
|
|
11:54 |
This ad bar is, is what that looks like. And you can put in any link or whatever up here, and it will put your profile picture of your leads leap in there and so on. And this is the the the advertising section, I've chose to have it over there on the left, that you can, the user can close that. But if people click on any ads here, then you will, you'll earn a little small amount of money. Okay. So yeah, that's how that works. Now, let me just continue on and talk about rotators.
|
|
|
|
|||
|
|
12:25 |
Rotate rotators.
|
|
|
|
|||
|
|
12:25 |
Rotate rotators works in a similar sort of way, the way you set it up, you just simply add a rotator. But the difference is, is that, you know, you can do all the tracking and everything.
|
|
|
|
|||
|
|
12:33 |
But by adding a rotator, you're able to, you know, add in multiple URLs. Okay. So first of all, you need to add a campaign.
|
|
|
|
|||
|
|
12:43 |
Okay, so the last few simple questions about the campaign, like give it a name and stuff and even add tracking links, which we've already just discussed. If you've already created tracking links, or you can add a page from within, you know, any of the page manager over here, if you created pages, you can add in a rotator. So you can have a lot lots of links in here, and then one link that you promote, and that when the users come to the link, or the visitors go to the link, they're going to be rotated from one link to the other. So when you get one hit, it'll rotate. And then and then the next time someone gets, you get a hit, it's going to go to the next link. And when the next time you get a hit, it's going to go to the to the next link in the list, it's going to just simply rotate to all the links in the list. And you know, you've got some settings there, such as name of the rotator, the URL, if you want to use a domain, that's optional, and then again, tags, okay. But this is a good feature that will that you'll be able to use if you want to share the traffic with members in your team. So if you've got people in your own downline in a particular company, you're promoting and you want to collect all their URLs. And just and you yourself have purchased some traffic or whatever, then you can share the traffic with all the members of your team. Or you can do some kind of Co Op, where all the members put in a little bit of amount of money, and then you manage it and then you send the traffic or whatever all you're all sending traffic to each other. That's another way to do it. Okay. So that's up to you. Now, next, let's look look at add bars. So add bars is also a great thing. You just saw an example of an ad bar with the kind of the red top, the red bar at the top of the page with your profile picture and an ad so what you do is you basically click here, so obviously you need to add a new bar in the first place if you've got nothing in there. And then once you've created an ad bar, okay, so create one. And it'll you know, it'll ask you a question the name of the ad bar, for example, I don't know live good, promo or whatever, and then put the URL that you want in there full URL to where you want them to click, and then the advertising text, the one that you you recently saw was this one. Okay, it's, this is the name of the ad, okay, and this is the URL that I want them to go to. It's my live good tour page. And then it's quick, quick, grab your top spot in the power line, okay. And then you can choose whether you want to kind of uproot your profile picture or arrow or whatever.
|
|
|
|
|||
|
|
14:17 |
Creating an ad bar.
|
|
|
|
|||
|
|
15:27 |
And then a countdown, so that it animates and closes after the countdown. So it gives them a sense of curious sense of urgency. Okay, so that's how the, the ad bar looks. Let me just show you again, as to what the ad bar actually looks like.
|
|
|
|
|||
|
|
15:44 |
Notice at the top, this is the ad bar. That's got my picture there. It's got limited offer download all my actually, that's a different ad bar. The one I showed you was was was different. Let me just show that again. I'm going to edit the ad bar and show you is udvar. Okay, let me just choose that one.
|
|
|
|
|||
|
|
16:07 |
Yep. Okay, so now we've saved it and I'm gonna go back to that page and just show you. Okay, so there it is. This time, it doesn't have my profile picture. Instead, I've chosen to have an arrow. Okay. And then a quick grab your top spot in the power line. It closes in this countdown timer, it'll close so they've got urgency. And then it closes but you can switch off that timer countdown, it's no problem. So that's how that works. That's pretty cool. Now next so we've done we've we've done all that so that section is all covered, the tracking links the rotator and the ad bar. You can also click the tutorial at the top here on any of these pages and it all pops out on the side here on the left hand side and you can even search for add bar or or whatever and it'll come up with specifics about that topic that you that you want. But but it's all you know what what can the tracker track okay, how does the tracker, differentiate clicks from real visitors and so on. So you've got a lot of topics here that will teach you every everything you need to know about this section. Alright, thanks for watching guys. That's the end of that video. See you in the next training. Bye for now.
|
|
|
|
|||
|
|
16:24 |
How to switch off the timer.
|
|
|
|
|||
|
|
17:27 |
(End of video)
|
|
In this video you will learn how to setup and manage your email lists.
|
|
|||
|
|
|
|
|
|
|
|||
|
|
00:00 |
(Beginning of video)
|
|
|
|
|||
|
|
00:00 |
Introduction to the list manager.
|
|
|
|
|||
|
|
00:01 |
Unknown: Hello, and welcome back. So in this section, I'm going to talk specifically about the list manager. This is very, very important. And one of the most essential aspects of loosely been, in my opinion that is, now, I think we all understand the purpose of a list, okay? And what does it mean, but I'm gonna go back into basics, because there are going to be people watching this video who may not even know what a list is, you know, and you probably heard, the money is in the list, okay, so if you're collecting email addresses, on your website, okay in so that you can, you know, set up a kind of a mailing list and continue continuously communicate with those leads, then that's what this is. Okay, so let me give you an example of a lead capture page. So lead capture pages come in all different shapes and sizes, we're going to talk more about how to create your own lead capture page. But basically, they all they're all designed to simply collect leads, okay, so you know, typically, you will have a field here a name, okay, put in a name here, put an email address. And when they click this button, they will simply become a part of your email list, what happens next will depend on what you decide, okay, you are the controller of your funnel, this is what we call a lead funnel. So when they you know, when you send traffic to your URL, such as this one that sends them to this particular page, or whatever, it doesn't necessarily have to be this page, this is just an example. We've got a lot of templates, and so on that you can get access to and reach out to your sponsor as to what share codes that they're using, or, you know, use an existing template built into the system.
|
|
|
|
|||
|
|
01:41 |
However, you know, a page is just simply going to have a form on it, there's going to be the purposes is a simple page that doesn't give out too much information. But it gives out a lot of curiosity, something really simple. And the best, the best way to do this is to just keep it as simple as possible, and then have a name here, and then an email address here. And then then they click the button, and they're going to be added onto your mailing list. Now we're going to talk more about how to create a page like this in the page manager, okay, so the page manager down here, so don't don't jump there yet, because we'll talk about that in the next video. But the reason why I covered that briefly there is simply because what happens next is that they're going to be added to your mailing list, okay, or your email list. And that's what this is, this is where you manage your email lists, okay, and you can create as many new lists as you like, I've got the number of lists that I that I've created and set up. But you know, you don't have to have so many, you know, you can have just one key list, if you're promoting one specific business or opportunity or platform or whatever, or maybe you're just branding yourself, maybe you just want to create one list for everything that you do. However, I would recommend not not doing that so much simply because you don't want to spam people if you've got all kinds of different offers and doing all kinds of different things that are kind of not really so not not really related to each other. So that's why I have so many different lists, however, you know, two or three lists are probably quite normal.
|
|
|
|
|||
|
|
02:29 |
Managing your email lists.
|
|
|
|
|||
|
|
03:14 |
So you know, even if you just start with one list, that's fantastic. And then you just focus on that list, and you give out the same kind of information, maybe maybe a list centred around how to generate traffic, maybe a list centred around how to promote your primary business, okay, or if you're specifically involved in a network marketing company, such as live good, you can just simply create a live good mailing list like I've done here. And these are the follow ups, you know, that basically means that I've set up some follow up messages, okay. And these, these email follow up series are going to go out periodically. So what you need to do first is you need to simply click click the blue button here, which will allow you to add a new campaign and a new list if you like. Alright, so that you can call the list anything you like, okay, so like, for example, my Amway business, or my, my live good business, or my crypto course, or my passive income, earning list? Anything you like, whatever you're promoting whatever you're trying to collect leads about whatever, you know, what do your leads want to learn about, okay? What are you going to be able to offer them? And how are you going to be emailing out those, those those leads moving forward? So you got to think about the content that you're going to be emailing them about.
|
|
|
|
|||
|
|
03:55 |
How to add a list.
|
|
|
|
|||
|
|
04:43 |
Okay? So I'm not going to create a new one because I've already created them. So once you've created one, you're gonna you're going to basically see a drop down window like this, you need to name the list, okay, whatever you want to name it. You need to give it a brand so that your people who join your list are going to know what See what it is about the topic of the list.
|
|
|
|
|||
|
|
05:03 |
Okay, so in this case, my list is about my live good. And my team within live good, it's called protein, but you can brand it the way you want to brand it is up to you, you can optionally give it a colour, if you want to brand it with a certain colour. You can also use an image as well as kind of a logo, if you want to upload a logo for your for your brand, it's up to you. And then this is where they get redirected to, after they opt in so that when when they put their name and email address on this page, they can click this button. And the very, very next page that they go to after the after they fill in the form here, will will depend it could be a download page, it could be a more info page, it could be a bridge page, it could be just a thank you page, a page where users say, thank you very much. I've just sent you your first email with all the information you need about the business. Okay, it could be something as simple as that, you know, and then maybe a link a button, where they go to, and sign up with your particular offer or business. Okay, that's simple. Okay, so put that URL there on the second page, that's the second factor, like the thank you page, let me let me just show you what a page like that might look like. Just let me just go to that page that I've created. So this is the second page, okay. So if they, if they, if they opt in, and they come to them, the second page will be this page, it gives them more information about the business, okay, it has a button here, so they can immediately join the business that I'm offering them, it gives them an opportunity to join my my personal group, okay, so they get the help and support and guidance, it gives you an extra bit of information about the company, again, they have another opportunity to join the company, you don't have to do it like this, you can make it a lot more simple, you know, just just all in all you really need is just maybe maybe a video presentation, it could be a presentation of the company, or compensation plan or something that corporate has created, and you're allowed to use, like a video, webinar recording or whatever. And then just a button underneath, that's really all you need, you know, giving an information, then a button to join the business. That's all you really need. Okay, and then but my I do advise having something like a way to contact you or communicate with you like the bottom of this page, I've got away ask me questions, and they click this and they can talk to me on my telegram, and so on. So I, you know, I also give this page out, I've got the share codes, so that you can grab this page with my share code, and so on. So you can get in touch with your sponsor, they also have access to this page, so chat with them. And I've also put a video here so they can learn how to import this page into their leads Live account, this is pretty much what I'm teaching you how to do now. So anyway, that's what that means, okay? And email me when someone opts in. So every time someone, basically when someone puts their name and email address on the form here, and they click this button, they'll be added to your list. So every time that happens, you're going to get an email saying, congratulations, so and so has joined your email list. Okay, let me show you an example of an email that's coming in, I get all these emails coming in every single day, because I'm promoting my list. As you can see, two new ones just came in the last few minutes. So I'm getting, I'm getting leads, that's what you'll see, as you're saying, since deed is the is the is the name of the list we're using here, for this particular leads lead platform, it's all it's all part of sense deed this whole system. So that's, that's the these are the emails that come in. That's what that's talking about. It says someone has opted into your list, the details and the information there. So that's, that's what you're going to see. So you know, get to work and get eyeballs onto your pages, advertise, get, get it out there, upload some videos on YouTube, go out on social media, get people to look at your business, alright. And that's what that that's doing is just simply collecting leads. And I'm being notified as and when I get to emails jumping in on my, on my list information about you. So you know, your name, your email address, need to go in there, you need to verify your, your list, okay, so what it'll ask you to do is it'll ask you to send a code to your email, whatever you put in here, the code will be sent there when you click this button. The reason for that is because it needs to verify that you are a real person. We don't want people coming in here using this for spam purposes. So that's why you need to verify your list. So when the code comes, you'll be able to put that into there and then that's fine. You'll be put an address in there. It'll explains why we need to do that.
|
|
|
|
|||
|
|
05:24 |
How to get users to the next page?
|
|
|
|
|||
|
|
07:44 |
Email me when someone joins your list.
|
|
|
|
|||
|
|
09:08 |
How to activate your list.
|
|
|
|
|||
|
|
09:45 |
And then email signature. This is what goes out on every single email that you get sent. That sends out everything that you put in here. You can open that up and you've got a little editor put your picture profile if you want to put your name in there. Put a way to contact you Have by email, Telegram, Facebook, whatever, it's up to you. And then that'll, and then check all these boxes, and then that will go on the bottom of every single email, click Save, and everything will be activated. And congratulations, your list is basically set up, however, you need to do a few more things, you need to go here on the next tab, and then make sure that you have a nice little welcome email set in here. Okay. So for example, hi, first name, my name is Edward Keyte, and I just sent, I just want to thank you for opting in, if you need anything, let me know I'm here here for you, okay, and a way to contact that they can contact you, let's go and get you set up, and then go back to your bridge page or whatever, or, you know, go back to this this page, so that they get more information about the business as to what they signed up for. Or rather, what kind of the extra information that they were seeking. So that's that. And then also, it says here, be on the lookout for my next email, as I'll be giving out some real gold nuggets to you. So what you're doing here is you're just giving them some key information about what to expect, within your list, you don't have to write all this out, you know, you can just make it really friendly, or whatever, it's fine. Notice there's some placeholders here, you can put the person's you can put the little placeholder here, anywhere in the email, or you know, like first name, for example, if you're collecting names, you can put that in there, and it'll personalise the email to them. So rather than saying hi, first name, it'll say Hi, Jeff, or Hi, Peter, depending on what their name is.
|
|
|
|
|||
|
|
11:36 |
How to personalise your email.
|
|
|
|
|||
|
|
11:36 |
So it personalises it. And you can also do it in the subject line as well. And it says here, enable smart greeting, just mouse over here to learn what that means. It means if you if you want to do a fancy way, of personalising the message automatically without using the first name field, then that's a good way of doing it, I personally don't use that. And then down here, the signature here, this signature is a nice, if you don't put the signature in, it doesn't matter, it'll automatically be added to every email anyway, right at the bottom. However, by putting the signature here, it helps you have more customization as to where you want the signatures to specifically be, this is a great way of putting in something like the signature first. And then after the signature, you can put in a PS and then maybe a PPS or whatever, just to give a bit more information. It's just how you layout your emails, you have more control and more customization, a little preview of the of the email here that's quite important or is up to you, sometimes I don't even bother. But it is optional. So that if people people can actually see in their email application roughly what the email is about, so that they're more likely to click potentially. So that's that. Okay, so that's a welcome message. Now, you can also edit the verification email, because this is a two, you know, a two step opt in, you know, you need to have that that's what it leads lead requires, there's no option for single opt in, you know, in other words, they have to verify their email address before they get your messages.
|
|
|
|
|||
|
|
13:14 |
There's no other way to bypass that. So if they don't verify their emails, then they're not going to be able to get your emails coming, coming and going forward. But there is a way around that. And I'll explain that in this video later on.
|
|
|
|
|||
|
|
13:26 |
However, you can customise this by giving them a bit of, you know, value in that. So it's up to you what you want to put in there. But or just leave it if you're unsure, just just use the default template, most people will not bother to edit that. So that's fine. So I'll Okay, I'm going to just move on. Now, if you've got to share code from somebody like your upline, you don't even need to really necessarily put in the welcome email because the chances are that there's the first email message in the share code from your sponsor. If they've given you a you know, a share code with all the email follow up series will automatically be added into this and of the the first email which is email zero. And let me just go here, I've got a lot of emails that are stacked up to go out periodically. The first email is also regarded as the the email that's instantly sent out immediately. So this email that you see here that we just spoken about, is the same email here.
|
|
|
|
|||
|
|
13:42 |
Importing a share code into your email list.
|
|
|
|
|||
|
|
14:30 |
So whatever you whatever you put in here in day zero, is going to go out immediately. And it's going to be the same email as what you've got here. So either you edit it here, or you edit it here, it's up to you. Now all these all these emails that are going out, for example, this is immediately this is day one, day two and so on. They go out on on, they go out automatically.
|
|
|
|
|||
|
|
14:54 |
This is a Pro feature so free members can't use this feature.
|
|
|
|
|||
|
|
14:58 |
If you want to use this feature and automate your your all your email follow up series. This is something that you can consider and you can upgrade and use this, you, you have an option to import a share code, if your sponsor has given you a share code. And you can use the Import option and putting the share code in there. Okay, follow the on screen instructions. And you can decide whether or you know what you need to set here. So replace all the existing ones, if you've already got email follow ups in there, you may not want to set that you want to do that instead. Or you can just replace everything that's already in there with the new share code with all the emails to overwrite everything that you've got in there already.
|
|
|
|
|||
|
|
15:40 |
Now, if you've got a day zero in the follow up messages, then yes, you can set you can check that you can just check that anyway, if you're confused, just check that anyway. If it's available, it'll be added into your in there as well. So that concludes that aspect of that you can you can import leads, okay, in a number of different ways you can import a CSV file if you've got external leads, but there are rules, okay, I think you can import up to 500 emails, but they need to be verified. I wouldn't go that route myself. But that's up to you. You can also import them by entering them manually. Okay, is that again, that's up to you by copying the emails, but don't spam people. Okay, if you start spamming people, people will complain about you and your account will be closed down, okay? And rightly so. Because you know, we don't want to encourage spamming. I'm not going to go through everything, otherwise, this video will become so long, then, so I've covered email series. Okay, so we've got we've gone over those.
|
|
|
|
|||
|
|
16:12 |
How to import and import emails.
|
|
|
|
|||
|
|
16:43 |
Okay, that's fine. And those are the email series for that for that particular broadcast. And then let's look at broadcasts, okay, broadcast is something that you really should use guys.
|
|
|
|
|||
|
|
16:54 |
You know, when people opt in, not only do you have an option to send them automated follow up emails that we just discussed, you also have an option to send them manual emails, okay, in in bulk, okay, so you don't need to do, you don't need to email them out one by one, you just email out to everyone on your list about something like a webinar or a training or just nurturing them about something or offering them some some value or whatever, you can just add a broadcast, and then put in an email and sorry, a subject line and a body. You can also you know, write it out and then test it as well. Again, you've got the personalization tags, okay, such as first name and stuff. So you can just write, you're basically writing up an email as you would normally. But in this case, you're going to be sending out to a lot, a lot of people on your list, potentially, you can send it out according to a time. Okay, so you can just select the time when you want to send it out. And then select the timeframe when it'll start to send out, okay, do you want to repeat this. So in other words, if you've got a webinar or something that happens every single week, and you want to notify them automatically, you can select Yes, every seven days, if your webinars every seven days, and it'll go out at the same time and day, on every seven days. And then you can set the limit, like, you know, you can go out, Max, you know, two months or whatever. Or you can go out, you know, however, until until whenever, okay, so maybe send it send it out for I don't know. However, however, until whenever you want to stop, stop sending it out for your repeat broadcasts, okay. If you've got a number of lists, like I do, then you can select whatever lists are appropriate, but don't spam, you know, remember that your content needs to, it needs to be filtered specifically to the people who have specifically signed up for that information.
|
|
|
|
|||
|
|
18:12 |
Set the limit on how many broadcasts you want to send.
|
|
|
|
|||
|
|
18:51 |
So be careful about selecting lots of different lists. So in other words, it's not a good idea to send out you know, your your new business opportunity that you joined. Such as, you know, a weight loss company, network marketing company to a list that you did previously about related to cryptocurrency, it just wouldn't, it wouldn't work, okay, so don't don't do that. And send it out only to active subscribers would be recommended. Of course, there are other options that you can consider there. And, you know, inactive subscribers, you want to be careful about that because people are inactive for a reason. Okay. And if you start sending out a lot of blasts to people who are inactive, especially spam, then they're going to complain about you and you might get a warning and your account could potentially be closed down. So be careful. You can also send out unverified subscribers this is what I was talking about earlier.
|
|
|
|
|||
|
|
19:46 |
You know, another way that you can get your people who are not verifying their account for whatever reason to actually you know, become verified. Alright, so is just just mouse over this and just to Check the information there. But this is a it looks like it's just a pro member feature. But if you want to get them to verify, you can send out emails up to four times, four times, or you can like a broadcast to people who are unverified, to try and get them to pay attention to your email. So if they click a link in your email, they're automatically going to come become verified. That's, that's a pretty unique feature with the lead sleep. I'm not going to cover too much about the link to tag option, because I personally never use this. But that's up to you, you can mouse over the details there. And, you know, learn a bit about that. And then when you're done, you can click Save and activate. And then you can save and close that, I would recommend you test it. But it'll go out and it'll be scheduled to go out and then it'll go out at the time you just you decide to send it out. Okay, so remember, let me remind you, if you click here, the tutorial section, it'll cover every aspect of the list manager, because you're, you're on this page, you're currently on this page now. So that's why the tutorials within this section are going to be talking specifically about the list manager. We're going to cover just very briefly, if you have a blog, and you want to second set up a blog. It's not a blog platform here. However, what it will do is if you have a blog, externally, you can put in the RSS feed for that blog. And every time a new blog is posted on your blog, it's just going to simply broadcast to the members who are subscribed to that to a particular list. Okay, so as you can see, I'm not using that feature. So you know, I'm not going to talk too much about it. Same applies for YouTube. I haven't set this up either. So again, if you have a YouTube channel, and you can collect, you can grab the YouTube RSS feed, which is apparently available, every time you upload a video, it'll send out that video to the members of your list, okay, of a particular list, okay, not all the lists, you have to set it up specifically, okay. And they need to sort of subscribe to that list in order to be to to to view your content. Anyway, that concludes that this section of this tutorial. So we'll talk about the page manager next and we'll probably recap some of the aspects of the email marketing area as well within the page builder section. So the next video is about the Page Builder. So as I say, we will cover some of the stuff that we've covered already in the email marketing section as well. Because there is some, you know, there is some overlap here and you know, there are certain things that will relate. Anyway, thanks for watching, and see you in the next section. Bye for now.
|
|
|
|
|||
|
|
22:47 |
(End of video)
|
|
In this video you will learn how to setup a page.
|
|
|||
|
|
|
|
|
|
|
|||
|
|
00:00 |
(Beginning of video)
|
|
|
|
|||
|
|
00:01 |
Introduction to page managers.
|
|
|
|
|||
|
|
00:01 |
Unknown: Okay, hello, welcome back. In this section, we're going to be talking about the page Manager. This is another area that you're going to spend a lot of time on, will certainly I do, and just like the the list manager that we spoke about in the previous video course, or training this section as well, I mean, I spend a lot of time in both of these, because I'm managing my list. And in order to build your list, you need to get people onto your list somehow. And the best way of doing it is to set up a lead capture page so that they can then get onto your list. Okay, now, I'm not going to cover too much about share codes and stuff, because we've got videos elsewhere about specific specific share codes that you might have been given access to, by your sponsor, whatever business you're involved in. So if you for example, if you're in live grid, we've got some share codes for our live good business. So get back with your sponsor, and ask for share codes specifically about those particular landing pages or capture pages. And then there's, there's a video specific about that. And it covers absolutely every aspect of setting up your page, using the share code that you've been given, and then making it go live. So So you got everything you need with those particular videos anyway, so I'm going to talk about the basics of page managers, and how to how to get a page added into your account from scratch. Okay, so this is this doesn't assume that you've already got any kind of share codes. So forget about the share codes for the moment, this is going to get you set up with your own page. Starting from scratch, we've got some built in templates within leads lead, and I'm going to show you how to use those templates. Alright, so let's get started. So the first thing you need to do is to click on this button here, add a new campaign. Now, regardless, regardless of this stage, whether you are deciding to make a thank you page, or a landing page, or a lead capture page or a squeeze page or whatever page, just forget about that for the moment, let's just think about, you know, just just adding in a page. And that's it for the moment. So give the page a name, my New page, whatever, okay, anything you like, whatever this is your label, it's going to tell you what, what you need to know about this particular page.
|
|
|
|
|||
|
|
01:41 |
How to add a new campaign.
|
|
|
|
|||
|
|
02:18 |
Because if you have loads of pages, you need to distinguish what this page is for and what is purposes. So give it a good name, and then add that campaign in there. So at this stage, we don't have a page, okay, we just had, we just have a campaign, it's already got a URL, but if you go to that URL, you're not going to see anything. Okay. So you've got a few settings here, we're not going to go over everything, but I will cover most things. So you need to add in a page. Okay, so click the button here. Now, in the past, in other videos, I've told you, you know, when we do videos, specifically about certain share codes that many of you have already gotten access to. And if you haven't gotten any of those particular, share codes, just talk to your sponsor, and we'll, you know, we'll be able to get you access to those. So don't worry. But in this video, we're going to talk about how adding a blank page. Okay, so, so what that's going to do is it's going to guide you to launch the editor. Or the minute my browser's just loading. Okay, so launch the editor. Now it presents you with done for you lead capture pages, or thank you pages, review pages, sales pages, download pages, you name it, whatever. Let's start with with an opt in page, an opt in page. Some people call it the squeeze page, some people I mean, technically, it's not really a squeeze page. I mean, you know, I call it a lead capture page, okay, because it's capturing leads, but some people call it an opt in page because they're basically opting in is the same thing. So pick a page that you like the look of. It could be one with a video, it could be one without a video, it could be one, you know, you see the templates here. Let me just pick something simple. Such as, I don't know. I don't want to judge Okay, let's let's pick this one. Just a really simple one. Okay, so you've got full control over everything. It's a complete drag and drop editor. And if you make any mistakes, you can undo it, you've got a little Undo button. Okay. So you're starting off with a template, okay, and you've got most of what you need already in here. Okay, this is just a simple lead capture page. You've already got the form in here.
|
|
|
|
|||
|
|
03:24 |
Start with an opt-in page.
|
|
|
|
|||
|
|
04:40 |
Setting up the settings panel.
|
|
|
|
|||
|
|
04:40 |
You can, you know, you can change things around if you want to, you can put the email below it. Okay. And then, you know, it snaps to grid, so it's pretty cool. And if you need a grid just for the guide, you can you can turn the grid on. My grid is not coming For some reason, that's interesting to know why that is, anyway, not that it matters. But if you want to, if you've got over here and you want to centre it up, you can just click the middle middle button here, and it centres it up. Okay, so you've got nice little tools to work with, I generally like having the Name field above, and then the email option below, you can change the little field here, such as, enter your email. Here, I like to give people very clear instructions, because you know, and then and then here, you can put in just, you know, highlight any, any anything here with your mouse, just just highlight it, and then you'll get the settings panel, okay, and then I just like to put the name it says input your place hold, okay, enter your name here.
|
|
|
|
|||
|
|
05:57 |
Okay, and then just, you know, select it, and it adds that in there, you can change all this information, just select whatever you want to select, you can just change it attention, this is time sensitive offer, please act fast, that's pretty generic, why not keep it get my free guide on how to build an online business fast, or I don't know, you get the idea. You can change it to whatever you like, it's up to you. And what you're texting, you can change, you can change the images. If you make if you make a mistake, you can go to undo. And then you confirm changes. So obviously, one thing you need to do is you need to follow these instructions. And so the important next step, click here now, so choose the list, okay? And then the an email list, you need to check this box here and select the email list because we've already been through this section. This section is the is the list manager, and anything that you've created in the previous training the email list manager there, if you've created any lists, in my case, live, good follow up, why not put that in there? So that'll be added into there? And then a redirect? Okay, maybe I'll, I'll send them to this redirect page. Okay, so I'll just copy the redirect page, and then put that in there. Okay, and then that's done. Okay, I'll close that. And then I'll save it. Okay. Work saved, done. So, yeah, as I told you, in the previous training, we talked about the list manager, okay, that's how you're going to collect leads, okay. So that's what I was doing over there, that's how you're going to collect the leads. So when they put the name and an email address, and they click the button, they'll they'll that there'll be added into your mailing list, and the first email will go out, okay. And I also set up a redirect. So when they, when they, when the leads, opt in, they'll go to the sorry, this page, okay? And then there'll be able to join you in your business or be able to download an ebook or whatever. Okay. There are a bunch of other settings, I mean, you know, if you, if you mouse over your main content, you've got things like, you know, adding new text item, added a link element, you can add in all kinds of things, little image, any images you want, if you want to put in your picture, you just click that and then you just put in the, you know, put it wherever you want. And then you mouse you put your mouse in the settings here, you can choose any pictures in the library, or you've got your own mind gallery here. So you know, you can upload a picture of yourself, you can either drag and drop from your desktop, or if you you know, or you can upload it from your desktop, but I've already got a picture of myself, I just want to put that in there. And that's fine. I can drag it to anywhere I want I can resize it and change the aspect ratio or whatever. I know the page doesn't look very good at the moment but you know you can play around with it and at the end of the day, the you know, if you've spent a little bit of time on it, you can make it look like a you know a better a better page for yourself
|
|
|
|
|||
|
|
06:45 |
Set up the list manager.
|
|
|
|
|||
|
|
08:11 |
Setting up settings.
|
|
|
|
|||
|
|
09:32 |
something like that, you know, just simple stuff
|
|
|
|
|||
|
|
09:50 |
Edward Keyte: you can Unknown: change everything you can you can move stuff around.
|
|
|
|
|||
|
|
09:53 |
Do whatever you want to.
|
|
|
|
|||
|
|
09:53 |
You can change whatever you want. You can replace it with another image Um, do whatever do whatever you want, you know
|
|
|
|
|||
|
|
10:05 |
maybe change it with a banner.
|
|
|
|
|||
|
|
10:43 |
Anyway, you can do anything you want, I mean, you can put text over over images, you can drag everything everything can be can be hovered over and layered. You can put anything in the foreground or in the background or anything, anything you like, you can change the background image. Background type, I'm going to use image and then I can just put in anything I want in the background, okay, such as this if I want to, and then my background has now changed. Okay, that'll do. And you have control over the brightness. Or you can change the brightness, you can do blur if you want to. And there are a number of things you can do you can you can change the opacity if you want to. Oops, doesn't look like that's gonna happen. Oh, there it is. Yeah. So yeah, it's up to you how you do it. So yeah, there it is that I mean, there's your page, I wasn't planning on showing you how to make a really cool page necessarily, but you know, at least you have something to start with. And that just gives you an idea as to you know, how much time you want to spend on making your own pages. But the chances are, you're probably gonna be able to get share codes of pages that your your upline or somebody has done for you. In which case now you understand not only do you understand how the page builder works, and you know, anything you do import from a share code, you know, you have you have the knowledge now on know how to edit it if you want to, and customise it the way you want.
|
|
|
|
|||
|
|
12:18 |
The purpose of this video.
|
|
|
|
|||
|
|
12:18 |
But that was just, you know, that's just really the purpose of this video is just to give you a basic understanding of this simple editor. And what we've got here, you've got a tutorial at the top here, okay, so you can click here and you can go through the tutorial, you've got a full preview of the of the page so that you can see it. And then you can click what it looks like on a tablet, you can click what it looks like on a mobile device. Okay, and so on. Okay. So anyway, thanks for watching. Anyway, I'll close that down now. And in the next.
|
|
|
|
|||
|
|
12:54 |
So next part of this video, I'm just going to talk about tracking. Actually, this page is not active, make sure your page is active. So we've got tracking tools built within this system.
|
|
|
|
|||
|
|
13:03 |
So you can you can drop this down, or you can drop this down either one. And just and just check with the tracking source code. This is a new page, there's no tracking. But you can go to another page with, you know, some hits. So if you get a lot of hits, for example, you can just check here and see where the hits are coming from. For example, I'm getting hits from different sources came from Google, from Facebook, from other places, and it says, you know, total hits, he got unique hits, in other words, people who came in individually, okay, some people come and click twice or two or three times. So that's why the numbers are difference there. And they're the real hits are basically people who they reckon have stayed on your page for at least five seconds. That's what they classes being a real hit. opt ins, these are people who actually, you know, decided to put their name and email address on the page and opted in. So that's, that's useful. The conversion a and conversion B, this is maybe for advanced users. However, what you can do is you can you go to the top here, okay, and you can grab for a capture page, let's say for example, you've got a lead capture page, okay? So what you can do is you can grab, say, we've just started a lead capture page at the top here.
|
|
|
|
|||
|
|
14:01 |
How to grab the conversion a and conversion b code.
|
|
|
|
|||
|
|
14:24 |
And you can you can grab the conversion a code, Okay, grab that code. Okay, and then copy that code down. And then when you've got a bridge page, okay, such as here, let's say this is a bridge page. You can put your code, whereas I haven't used this for a while.
|
|
|
|
|||
|
|
14:51 |
Yes, okay. Yeah, I think it's here it is. Yeah, that's it. So you can go here and you can put in your bridge page or your thank you page. You can put the code that you've got from your lead capture page in there. Okay, again, guys, you can just mouse over the question mark, to understand how it works. But this is the code from the lead capture page that I'm pasting into the page here of the redirect page, the thank you page. And then when you click Save, you're gonna be able to track if that person or that hit that view, has had actually visited that, that thank you page, or it could be any page, it could be a steps page, it could be the final page in your funnel or whatever. This is more useful for for a funnel that's, that involves a product that you're selling, that has multiple steps, it's just a way to track as they go through the entire funnel, whether or not that lead that same lead visited the the various steps of the funnel, you can also do the same for the for the conversion B as well. So if they actually bought the product or whatever, so for most people, you probably won't need to bother with that. So that's just just covering you know what that is. So anyway, that's basically the the basics of what how to set up a page there are other you know, aspects of it, but always just check the tutorial and so that you can understand what you know how to import share code, what is a blank traffic, what Sorry, what is what is bulk traffic and why it's not allowed, okay? Where to access, you know, all kinds of topics right over here. It's searchable. It's a searchable database. So check the tutorial and it'll it'll basically cover everything you need. Okay, thanks for watching guys. I'll see you in the next training. Bye for now.
|
|
|
|
|||
|
|
16:43 |
(End of video)
|
|
In this video I show you how to edit images, buttons, and text using the drag and drop editor.
|
|
|||
|
|
|
|
|
|
|
|||
|
|
00:00 |
(Beginning of video)
|
|
|
|
|||
|
|
00:00 |
Setting up image settings.
|
|
|
|
|||
|
|
00:00 |
here it is: SHARECODE: page-aNMmZVMk
|
|
|
|
|||
|
|
00:00 |
So as you can see, we've got we've got areas where, you know, you can change your, your image, your graphic, okay, and also right at the top here. So whenever you want to edit anything on the drag and drop editor editor page, alright, so you know, you've opened it up into, you've launched the editor, okay, and you see it all here, it's a WYSIWYG or it's what we call a WYSIWYG editor, What You See Is What You Get type editor, okay, you don't have to deal with any code or anything like that. And then when you select any element on your page, you're going to, you're going to see it on the right hand side, in the Settings area over here. So if I just select the image here, right over here, you've got the image URL for that for that particular image. Okay, now, when you put your mouse in it, you're going to see all your images in your gallery. So then you can either if you're a pro member, you have to be a pro member, I believe in order to be able to import your own images or upload your own images. Now, if you're if you're a free member, you should still be able to upload your image elsewhere, probably on Earth, third party image hosting website or something, do a Google search and upload your image somewhere else. And then you can just paste your image full URL into this box, right here. However, if you're a programmer, you can just drag and drop and add it in here. So you know, so you just find your, your picture of yourself, you click it, and it'll change the image, okay, automatically. So for example, if I wanted to change that image, I think I've got an image here of a different image of myself, you see, it automatically changes. Okay? So, so there it is. So to select it, put your mouse over there and change the image. And then if you want to change the text, you just select that element, you're over here on the right hand side, you can just simply change the text. Same Same with and then some people were saying that they were having issues about the telegram, link, it wasn't changing, it was still showing my link. So again, you just put your mouse over the link on the button. Okay, again, the panel, the Settings, Update on the right hand side, where it says go to you put your full URL to your telegram, okay. And if you're, if you don't know the full URL, you just use what I've put in there. And instead, you can just change your username at the end of it. All right, rather than changing the whole link, because, you know, basically your telegram link is just HTTPS, colon, slash, slash t.me/and. Then your username.
|
|
|
|
|||
|
|
02:07 |
How to change the telegram link.
|
|
|
|
|||
|
|
02:46 |
Okay, for Telegram, but you know, and then I was also suggesting if you wanted to just completely change the labelling, instead of putting ask me questions on Telegram, you could put ask me questions. And then you can change the whole thing here, Facebook. Okay, you could change the button text, or you could put in ask me questions, and then change, you know, by email or whatever. It's totally, it's totally up to you what you want to change. And then, you know, if you don't want to have an image there and you don't want to put your image there at all, you can just simply select that element. And then go up to the dustbin the trash can, and then just delete that. And then delete the name. And then if you want, you can just make sure that it's sent centred, it is centred, you can change the image of yourself and you can delete it, it's up to you. I'm going to just close that page down without saving it because I don't want to make those changes.
|
|
|
|
|||
|
|
02:47 |
How to change text and labelling of your button.
|
|
|
|
|||
|
|
03:16 |
How to completely remove the picture, if you don't want to have an image there at all.
|
|
|
|
|||
|
|
03:49 |
(End of video)
|
|
How to setup a lead capture page and connect it to a list.
|
|
|||
|
|
|
|
|
|
|
|||
|
|
00:00 |
(Beginning of video)
|
|
|
|
|||
|
|
00:01 |
Okay, hi, welcome back. Okay, in this training, I want to talk continue talking about the page manager area, okay, and just just address some issue. Another issue that some people were having that they were that were they were confused with about setting up a lead capture page, and making sure that you've covered every everything in every area of setup, you know, because it's your lead capture page that you're going to be sharing out.
|
|
|
|
|||
|
|
00:27 |
And when you share out the link, you want to make sure that your lead capture page is properly set up. So that it's it's ready to, you know, accommodate the leads that are coming in, that will accommodate the the traffic that's going to be coming onto your page.
|
|
|
|
|||
|
|
00:42 |
So that they you know, so you don't lose any leads, okay, now.
|
|
|
|
|||
|
|
00:45 |
Setup your Lead capture page correctly
|
|
|
|
|||
|
|
00:46 |
So what we're going to cover in this training is number one, making sure that you've set up your lead capture page correctly, so that it will in fact, collect those leads, all right, and you're not going to lose those leads, but we're going to make sure that you've connected up to a to a list that you already have added into your leads lead account, we do cover the list manager in the video training, okay, the list manager is here and make sure that you've created a list. All right, and you know that we've got some training about how to set up a list, so that's fine. And if you've got a list already added into your list manager, alright, you'll be able to simply select that now. So when you've added in a capture page, you know, whether you've added in a capture page from scratch, or you've used one of the templates that are already built into lead, leads leave, or you've you've added in a ship from a share code that somebody has sent you the share code or whatever, you know, like a done for you lead capture page, you know, and you've been able to import that in a form of a share code, and or whatever, if you've got a brand new page, you know, we're going to show you how to set up that page so that it's working the way you want it. All right. So let's begin. So when you've when you've, you've got a new page in here, you've either added it in from scratch, or you've used a template or even share code or whatever you're going to use see something like this, you're going to see some red text here, it's going to tell you what you need to do. Don't get overwhelmed, don't worry about it. This is just standard. First of all, it says activate this design, you know, you can click here to activate it, and then it'll go green, the pages active and that's fine.
|
|
|
|
|||
|
|
01:52 |
So when you've added a new page
|
|
|
|
|||
|
|
02:19 |
And then obviously, it says it here says click Launch editor, then to link to a list. Okay.
|
|
|
|
|||
|
|
02:28 |
You know, if a page says like, sort of, for example, Neil, or whatever redirect, Neil, it means it doesn't have, it doesn't have a redirect or a thank you page connected to it.
|
|
|
|
|||
|
|
02:38 |
In other words, that when you when you try when a lead or when a somebody who enters your page, all right in the form of you know, a hit or a traffic.
|
|
|
|
|||
|
|
02:50 |
And then they put their email address in there and the name and then they click the button, they're not going to go anywhere, they're not going to get redirected to anywhere, what you need to do is to set up a thank you page or redirect page, and we're going to show you how to do that. All right, and then that the red text will go away and everything. And it'll tell you what page you are redirecting to, it'll give you a URL there. So let's open the the editor, just click Launch editor.
|
|
|
|
|||
|
|
03:11 |
Open the page in the editor
|
|
|
|
|||
|
|
03:15 |
Okay, it'll open up into a new window.
|
|
|
|
|||
|
|
03:20 |
So this is just a demo demo page, I'll give it if you want the share code, I'll give you the share code in the notes section of the training.
|
|
|
|
|||
|
|
03:25 |
Share code to this demo page is here: page-aknHZwYVZw
|
|
|
|
|||
|
|
03:28 |
But you know, don't worry about it too much.
|
|
|
|
|||
|
|
03:31 |
You know, I'm just using this page as an example for this training purpose. Now, so you've got the page here, you know, you've set it up. Now, if you're not seeing this and you're seeing a lot of templates, just select a template or whatever or you know, if you've imported this page from a share code, then you should see you should see the design here, that's fine.
|
|
|
|
|||
|
|
03:49 |
Now over here, on the left hand side, is where you need to set up, select do the select the list, okay, so click here, and it'll give you some options. Let me just quickly go through what these options are. The first option here is to to use the built in mailing list, which is part of Leeds leap. Okay, so since deed is all part of Leeds leaf is the built in Leeds lead list system. All right, is what you will find in the list manager. So anything in the list manager above here, you know, when you've added in a list campaign, you'll see you will see it here listed here. So what you do is you enter the list ID, okay, you can also conveniently select from your existing list. If you don't see anything here it means you don't have you haven't created a list yet. So you need to go back here and then go to List Manager and create a list. All right. But if you do see one, you can just select which one you want.
|
|
|
|
|||
|
|
03:50 |
List settings
|
|
|
|
|||
|
|
04:52 |
For example, you know, whatever list you want, okay? And the redirect is optional. You know, if you don't Got a redirect here, they'll just simply get an email. All right, I will read your message anyway. But they'll get an email, you know, giving them the value that you want, or whatever, you know, that's up to you. I mean, you, you create the emails yourself.
|
|
|
|
|||
|
|
04:56 |
Set the redirect URL (to the thank you page)
|
|
|
|
|||
|
|
05:15 |
Alright, so you go into the list manager, and you create the emails. Alright, so my advice is definitely create a thank you page. And, you know, the thank you page will be an additional page that you, you create a redirect page. So you need to go back to the the page manager and add a new page. So that you have a page, you have a second page to redirect to this would be, you know, a thank you page, or you can call it a bridge page, if you like, or you can call it a redirect page, it doesn't matter. So you basically need two pages. Alright, this is the first page will be the lead capture page, which is what we're editing right now on your screen here. And the second page that you'll be creating is a thank you page. And that's the page that you need to put the full URL into there. Okay, and you can find the page by clicking this button here.
|
|
|
|
|||
|
|
06:04 |
Or you can go and get the page URL, maybe another page here or whatever, you just get the URL and put it paste it in there.
|
|
|
|
|||
|
|
06:11 |
Now Optionally, you can select the Open redirect URL into a new window. So what that will do is that when they click the button, and they put their email address and a name in the form, and they click the button, it'll open up into a new window. This is advantageous for people who are running, who are advertising on traffic exchanges, because you know, what people are doing is they're surfing the traffic exchange in a kind of a window, and advertising window. And they're just browsing websites.
|
|
|
|
|||
|
|
06:39 |
Alright, so if they come across your page, and they get interested, and they want to put their name and email address into the form, what will happen is that when they click the button, the next page will open up into a new window, which is good, because, you know, it means that they're not going to lose the page.
|
|
|
|
|||
|
|
06:56 |
So you know, that might be a good idea, if you are, you know, advertising on to traffic exchanges, okay, so you know, you can put the URL in there.
|
|
|
|
|||
|
|
07:06 |
Now, the other options would be to use a third party list manager, if you're using, for example, I don't know AWeber, get response or whatever, you know, it might be an advanced for advanced users, okay, you may not understand that I'm not going to go over that in the My training simply because I don't use third party list manager, a list manager, okay. It's just not what I do. I'm 100% all in on Lee's leap. All right. And that's the purpose of this training is is 100% leads lead training. So I don't mean to sound you know, you know, I don't mean to sound, you know, unhelpful or anything.
|
|
|
|
|||
|
|
07:45 |
But, you know, this is a leisurely training, and I don't have a third party system to, you know, to put in there as an example, whatever.
|
|
|
|
|||
|
|
07:53 |
Now, you might just choose to put in, you know, if you're creating a page, such as a thank you page, or a bridge page or redirect page, then obviously, you wouldn't need to set the list manager here, because there's no form on the page. In order to collect leads, therefore you don't need it doesn't apply, it's not applicable. So you select that, but obviously, this page is a lead capture page, and I'm using the built in auto responder. So I just select a built in list list ID from the list manager. And then you know, I could put the full URL to the redirect page the thank you page or whatever. And then once you've done that, you can close that particular window there and you obviously would click save so that's really all you would need to do in order to configure your your lead capture page.
|
|
|
|
|||
|
|
08:39 |
So yeah, there's there's nothing really to go over, you know, any, any additional things to go over really, to be honest, but that that really covers this particular training. Hope that was useful. Thanks for watching and see in the next training.
|
|
|
|
|||
|
|
08:52 |
Bye for now. You
|
|
|
|
|||
|
|
08:54 |
(End of video)
|
|
In this video you will learn how to setup a pop up.
|
|
|||
|
|
|
|
|
|
|
|||
|
|
00:00 |
(Beginning of video)
|
|
|
|
|||
|
|
00:00 |
The form pop-up manager.
|
|
|
|
|||
|
|
00:00 |
Okay, hello, and welcome back. So in this section, we're going to talk about the form pop up manager. All right, so you've probably seen a pop up before, an example of a pop up, for example, this one. So you know, if you see my mouse cursor, and I try to exit the page, or, or close the page or whatever, you see the pop up window comes up, it's got animation, all kinds of things, it's really cool. That's an example of a pop up and I created this within the LEAs leap system. Alright, that's what we're going to talk about. Another example of a pop up is, let's say you've got, you've got a pop up here in our editor.
|
|
|
|
|||
|
|
00:36 |
That's what it's gonna look like, it could be a form on there, or whatever. But let's say you've got a lead capture page. Okay, this is the page we made in the in the previous video in the previous training on learning how to create a page, let me just preview this page, I've actually set up a pop up in this page. This is another example. When you click the button, the box comes up and then they fill in the details in there in the form and they click and they go on to the next page, they can optionally close it if they want to, they click it again comes up again. Okay, so this is what we call a two step two step opt in form, it's really easy, it's really simple to do. There are a number of other ways you can create popups, such as if they scroll down the page, and at a certain point in the page, it triggers the pop up or whatever, you can use pop ups on external sites outside of Leeds leap, or you can use it on your own existing built in pages within Leeds Leeds, it's up to you where you want to put it. You can also use pop ups on other tools within leads leap such as stuff that we've already gone over such as the, for example, the tracking links, the rotator the Add bars and stuff like that, as well tracking links, you can use pop ups, okay. So anyway, let me just show you. Okay, so what you would do exactly the same as in the previous things, if you want to create a pop up, you just create a new campaign just like you would with a page or email list, you create the blue button again, and you create a page, it'll ask you for the name of the pop up, you just call it whatever you want. In this case, I've created a test form that I've already made for you. And you can open the editor, so launch editor in the same way as you would with a page and then it's all the same drag and drop editor. You just look put it in the you know, you can move everything around, you can add images, you can do all kinds of things. In this case, I've got a form in here. Now when you first enter the editor for the first time, you're going to be presented with a lightbox. Okay, see, sorry, a sorry, you're going to be presented with your template as to how your popup is going to look. You can choose lightbox you can choose a full screen option. You can choose a sidebar or a corner block. Okay, most common is lightbox. All right, so that's by default. And then the last key for a template, you can choose one of the existing templates, you can also import a share code, you would have been asked for a share code, that would have been an option. When you create the form. Just to show you how that would look. Let me just go back.
|
|
|
|
|||
|
|
01:14 |
How to create a pop-up.
|
|
|
|
|||
|
|
02:45 |
How to create a pop-up.
|
|
|
|
|||
|
|
03:09 |
So if you create a campaign, create a just whatever they just name it, whatever you want my pop up, okay, anything you want, just call it might pop up one. Okay, add that in there. And then it would ask you add a new ad have a pop up, you can add one from a template or you can add one from a share code. If you import a share code. There's something that your sponsor or or somebody you know, has created the pop up for you. And it'll import the pop up into your system and you import it's really that simple. Or you can create from a template. And what you will see on the very next page is you would simply see something like this, you know, choose a lightbox then choose a template. I've chosen this particular one I deleted the background from this and then I'm left basically, with with with this kind of simple pop up, you can decide how you want to activate it, if you wanted an exit pop up, you would need to click activate on exit, activate on exit. So there are various triggers. For this one, I'm using the manual unclick option because I want them to click a button. So I'm using this and then you know you can you can choose Animation, you can decide whether they wants to a hard bounce or or a fade in or you know whatever you want there. You can hide the lead sleep brand if you're a pro member. And the rest of other things as well, you can preview it over here, full demo or quick demo and click Save. You've got a user guide here. Really easy to use User Guide and all your elements over here. So you can add in sort of images and stuff like that into into here and drag it drag it and drag it around. I've created I've got a form in here. So that's what I've created there. So you just click Save once you're Once you're happy with it, and, and then and then it's all in here, I haven't added anything here, this so that this is what we're working with here the test form.
|
|
|
|
|||
|
|
04:35 |
Creating the demo page.
|
|
|
|
|||
|
|
05:09 |
Okay, so that's, that's, that's what we're working with. And then, you know if you've if you've got your own page already added in. So like, for example, not this page. Okay, this is the page that we were using before in our previous tutorial when we were creating pages, what I've done is I've deleted the form in here, because I want to do a kind of a, what we call a two step opt in, what this means is that there's no form on the main page. But instead, the form appears when they click the button, and a little pop up window opens up and they can fill in the form. So what you do is you'd select the form, and instead of submitting the form, because there's no form here, you go down and you select the option with initiate Pop Up campaign. Okay, and initially, it won't have the ID in there, but what you need to do, you've got a little tutorial here, that will tell you where to go. So the page, go back to the page manager, okay, and where you've got your, what we're doing here, so this is the one of the top, so my New page is one we created, you select the pencil icon, and you drop that down, and then you you select, you insert a pop up, okay, I've already selected it for this page. And I'm just selecting the test form. And I'm clicking save. So that's why that's going to work. Okay, so here's the page again. And I'm going to just preview this, okay. So you know, when you click the button, the pop up window pops up. Okay? It's as simple as that. As I've shown you already, this is, this is an exit pop up, if you wanted an exit pop up, you just, you know, it just looks like this, okay, and I click here, and I can go to a URL or whatever, you just set it in there. But how you do that. So if you wanted an exit pop up, rather than having having it there. You don't need to set that you know that, you know, this would be something else. Or let me just okay, well, an exit pop up would would just simply mean that you would have to go back to the Form Editor.
|
|
|
|
|||
|
|
06:33 |
How to use an exit pop up.
|
|
|
|
|||
|
|
07:22 |
And instead of selecting manual, you'd have to set on exit, okay, on exit. And then you click save. Okay, so in this, in this case, it'll open up. And obviously, you know, if there's an exit pop up, you probably wouldn't have the form necessarily, you'd have a button instead. But it's up to you. So you take out the form, and you just have a button there. And instead of having the opt in form, you just select, go to a website, okay? Simple as that, all right. And then, and then you would save it, but you would still have, you still need to go to the page manager, and where you've got your page, you'd need to click on the pencil icon to drop down the settings and they go to the bottom where it says Insert pop up. And you'd still need to select that. So that it knows what what pop up to have to do to deal with. And then because you've already set the pop up in the editor here as an exit pop up, instead of a manual click or pop up, you know, it's going to simply execute, you know, on exit instead. All right. So that's that's basically how the pop up system works, it's really that simple.
|
|
|
|
|||
|
|
08:28 |
How the pop-up form system works.
|
|
|
|
|||
|
|
08:33 |
And it's a great way to get extra leads to draw more attention to your leads. So that you know, you can potentially get more, you know, likelihood that they're going to, you know, take action with your offer. I'm not going to go over the cookie generator there because that doesn't mean anything. And I don't believe that there's anyone who's actually using that I don't even know why they've got that in there. There are reasons for it, but I don't use that system. So that concludes this particular option. You can also get the code from here. I hope not there. So this is a pop up that we've created. So you can get the code from here. And then you can select an external system as if it's another another website that you want that you're managing, you can simply drop that down and you can simply copy the code here and put it on an external website. If you're using WordPress. You know, you can download the plugin and then instal the plug in into your WordPress back office. And then you can use the popup on your WordPress site. That's for people who are using external websites. But if you're not using an external website, just forget about it. Just ignore that. So so that's really it. I mean, you can check you know, there are other things like Yeah, I mean, you know, just just, you know, there are a few other things like you use on click or whatever, you can put that into a specific button or something like that, but there are a few other things. Now what I recommend you do is you go to the tutorial And then just go go over this, you know, how to import it with a share code, how to create a form pop up, how to create an inline form, how to how to link a pop up form to a, you know, a sensity list or whatever. There are so many things that you can do you know, whatever you need. You don't need to go through all the tutorials only if you've got something that you need to figure out or understand. You can just search for something and it'll explain what that how that thing works, whatever. But that's basically how a form pop up form system works. Alright, see you in the next training guys. Thanks for watching and bye for now.
|
|
|
|
|||
|
|
10:36 |
(End of video)
|
|
In this video I will show you how to use the image hosting and PDF hosting area.
|
|
|||
|
|
|
|
|
|
|
|||
|
|
00:00 |
(Beginning of video)
|
|
|
|
|||
|
|
00:01 |
Okay, hello, and welcome back. And this video is going to be very short, because, you know, I figured I'd just do a quick video just to talk about this particular section. Now obviously, this section is basically for paid members, pro members, but even free members, if you're curious about what this section is, and you're considering to upgrade this particular section is to host your images and or PDF files. So all your images will be hosted here. As you can see, I've got all my custom images that I upload. And it really is a time saver, you know, having everything you need it up here.
|
|
|
|
|||
|
|
00:36 |
This also exists on on every, you know, whenever you click create a page, it exists in there. So for example, if I'm in the PAGE PAGE manager, and I've been creating a page, or whatever, I'm in the launch, you know, editor
|
|
|
|
|||
|
|
00:58 |
and, you know, I want to, you know, import an image or whatever, okay, so I add an image, and I select that, and then I open on the right hand side there. If I go to my gallery, I see everything in here, all my all my images that I've uploaded, you can either upload them right directly into here by dragging and dropping them straight onto this panel.
|
|
|
|
|||
|
|
01:19 |
Or you can click here to upload, or you can add and manage your images right in here as well. And you can also delete them, you can get the link, you can add a new image here. And it tells you what how much you're, you know, what sort of space you've got, and so on. Same applies to the PDF manager.
|
|
|
|
|||
|
|
01:38 |
Like, if you're like me, and you've got a lot of PDF files, you know, that you'd like to you know, allow your leads to download and you're in, you're creating funnels, with lead magnets and you want to you know, to give people a nice you know, download, okay, you can upload your and manage your PDFs right in here. So this is the PDF manager, that's the image manager. And, and that's, that's all you really need to know. So this is as this is a pro member feature. But it is really great to have because, you know, I see a lot of people, you know, who don't have access to this, or uploading their images or files or PDF files on to, you know, Google Docs or other places and it's, it looks, it doesn't look very good. I mean, it's not it gets complicated when you're trying to download a file from Google Docs. So this is just a direct place where you can get people to download in a really easy way. Alright, thanks for watching. See in the next training Okay, bye for now
|
|
|
|
|||
|
|
02:34 |
(End of video)
|
|
In this video I will teach you about the money side such as how to get paid etc.
|
|
|||
|
|
|
|
|
|
|
|||
|
|
00:00 |
(Beginning of video)
|
|
|
|
|||
|
|
00:00 |
Okay, hello, and welcome back. So in this section, we're going to talk about money. Okay, the money section. Very important part. So before we get started with this, make sure that you do go back to your profile, I did cover this in the previous video, one of the one of these first videos I did in the training, just to make sure that you go through the profile, particularly the section where you're going to select how you want to get paid either by PayPal, Bitcoin or using wise, and then go back here, because we're going to talk about money.
|
|
|
|
|||
|
|
00:01 |
How to get paid.
|
|
|
|
|||
|
|
00:29 |
And obviously, you want to know how you're going to get paid, and get that all set up. But go through the tutorial, click here and check out the tutorial, it'll tell you about this section. And here is the same same one there, mouse over the question marks just to understand a bit more about what that this will means but it basically means your daily active, but bonuses, you know, when you click on ads and stuff like that, you've got a little stats as to what what you've what you've what you've been awarded here. 10 personal clicks 10 Personal clicks. So, you know, you know, if you're clicking your ads, you know, you're staying active and you're getting credits for your, for your, for your websites, so that you can get traffic, the credits, encashment this is where, you know, I haven't really done much with this. But obviously, if you're if you're getting credits, and you want to convert them the credits into cash, then this is a way you can do that. Personally, I'm you know, I've earned over you know, in total within the entire leads leap system way, you know, sponsoring people building a team, and other things. I've quite a lot of money with this. So that's what I'm focused on.
|
|
|
|
|||
|
|
00:59 |
How to convert credits into cash?
|
|
|
|
|||
|
|
01:38 |
But with this particular this particular section is different this is where you can potentially earn from, you know, what your activity is based on the the clicks and stuff and the credits that you earn, you can convert them into cash. But as I say, this is not something I'm really focused on. Because I'd rather you know, keep those credits so I can get traffic instead. But there's a little tutorial here, you can check out the tutorial, how how to in cash, and so on. Like that. So check that out. This is a new, a new thing here. The coop, okay.
|
|
|
|
|||
|
|
02:13 |
Again, I haven't really used much with this, as you can see, but it's a new system where you set up your link in here. And then this is actually your link to promote with this. And if you if you share this out on traffic exchanges, if you've got credits, or if you're getting traffic to this particular link, what you're technically doing is you're is it's kind of like a rotator, and it rotates other people's ads, okay. But it actually it actually gives you credit. All right, so you know, so you can earn payable, Co Op earnings, total Co Op earnings.
|
|
|
|
|||
|
|
02:48 |
As you see I haven't done anything because I'm not really focused on this. But it's something you can set up, you can customise your link with your own ads. So you can put your ad your ads in there, like an ad bar and add widget, that thing, that kind of thing, you can click Save. Also the PPC Pay Per Click earnings. This is another section if you've put in your you can you can set it up, it's a little bit like Google AdWords. Or if you've seen the AdSense that's, you know, if you if you visit a random blog, and you might see kind of like Google ads, that's kind of what this is. But it's not Google ads, it's Leeds Leeds own system, where they allow you to host ads of other members that are hosted on your other sites, like your blogs, and you can you can get a code, you can insert it into a blog or something like that. And then when people click on those ads, you get paid, basically, but it's very, very small. I've had it, you know, used and I've learned a small amount, you know, but it's something that some people might want to do. So you can check that out. And so what you can do is if you want to use this, this is this the stats area. But if you want to get the code, you just go here and you can just customise the code as to what it looks like. And then you can set the colours and then you can get the code and you can simply copy this JavaScript code and insert it into your own blog or whatever external website the affiliate commissions as as you can see, you know, quite quite active I've got over 3000 members plus in my downline As of recording this video. So I'm earning a good income with this and I've got 101,187 pending Okay, what does that mean? It means that I think it's 60 days they withhold your earnings. Yes it is it's due in 60 days when I when I earn and the reason for that is in case of any possible cash any any possible kind of issue with with the payment or people are requesting a refund or whatever. Then they have to withhold the Commission's so that they don't end up paying commissions and then end up having to pay you know get a refund or whatever. So they hold that for 60 days before you get paid. So that's the way that works. And so I've been, I've been paid in total over, you know, almost $7,000, within leads leap. And now I've built things up by mining probably, approximately almost $1,000 a month with this platform alone.
|
|
|
|
|||
|
|
02:51 |
Setting up affiliate links and Ppc.
|
|
|
|
|||
|
|
04:25 |
What does it mean to be paid in 60 days?
|
|
|
|
|||
|
|
05:21 |
So it's very nice. I'm grateful for that. So make sure that you do set up your settings in the profile area, so that you're stating how you want to get paid either by PayPal, wise, or Bitcoin, okay. And you can make your request, just make sure that you go to, actually, I'll cover it in a sec. If you go to my earnings here, and it'll show you total payable, I could just do a quick withdrawal. Now I could click this button. And I've already set up in the in, in pay in the profile area.
|
|
|
|
|||
|
|
05:25 |
Setting up your settings in the profile area.
|
|
|
|
|||
|
|
05:56 |
Okay, so if you go to the profile area, my profile, make sure that you set how you want to get paid. Okay? Whereas That's right, it's here. So either if you wanted to get paid by PayPal, you just put your paypal email address, if you want to get paid by why'd you put your wife's email address?
|
|
|
|
|||
|
|
06:13 |
If you want to get paid by Bitcoin, you put your Bitcoin email address, click Save. And then and then when once that's saved, you can go here, and if you've if you're eligible, okay, I can't remember how much the minimum is, but there probably is a minimum, but you can withdraw. I think it says it down here, minimum withdrawal is $10. Okay, so read the sections down here. It talks about fees, and you know, the information there. When you click withdraw, I can you can make a withdrawal says max, maximum withdrawal is this amount, because that's what I've got. I've done a recent withdrawal anyway, I can select this, because that's what I like to get paid, it'll pay straight into my bank account. I have nominated a primary ways account, that's fine. Or bitcoin is up to you. Okay, anyway, I'm not going to do that now. But once you've done that, the money will be paid straight into your account. I've got that amount of pending commissions. As I've mentioned already, this is the amount I've taught in total, I've withdrawn already over $5,000 into my bank account, which is wonderful. And nothing is in progress. Again, you can read the details there. You can also edit the payment method here. And this is a summary of what your account looks like. Okay, so you can view the various bits and pieces within your account, like how much you've withdrawn. You've got the details there. You want more details there for tax purposes, expenses and stuff like that. I think I've covered the those things. That's fine. Yeah. So that's really what it is. Again, you can click the tutorial, it'll go over, you know, what is the minimum withdrawal? Why can't I make a withdrawal? Why is there a pending commission, how to increase my earnings, okay. And it will talk about those key key aspects. So you've got everything you need to know within this section. That concludes this video. Thanks for watching, and see you in the next training. Bye for now.
|
|
|
|
|||
|
|
06:17 |
How to withdraw from your account.
|
|
|
|
|||
|
|
08:11 |
(End of video)
|
|
In this video you will learn about the followers area, this is where you see all your team and downline.
|
|
|||
|
|
|
|
|
|
|
|||
|
|
00:00 |
(Beginning of video)
|
|
|
|
|||
|
|
00:00 |
What is a downline?
|
|
|
|
|||
|
|
00:00 |
Okay, hello, and welcome back. So in this section, we're going to talk about our followers. Okay, this is actually what this actually technically means is your downline, basically. But the reason why they word it like this is probably because, you know, we don't want to associate ourselves with a multi level marketing structure or system, whatever. Not that that's a bad thing. It's just that sometimes, you know, you have to abide by certain rules and laws if you are coming across as being that kind of entity. And that's why they pay in the way they pay.
|
|
|
|
|||
|
|
00:31 |
And for that reason, you know, they don't need to abide by certain laws and rules and everything that is so strict within the multilevel marketing. Like I say, there's nothing wrong with network marketing, I'm a part of it, I love it and my primary business as a network marketing company is fabulous, but leads leap, they operate in a different way so that they can be absolutely global, without any, you know, issues within certain jurisdictions. So so just follow the on screen instructions. The tutorials again are up at the top here so click here and the you can understand every single section within this section. And then you can you can mouse over some of the some of the areas here to understand I've actually there's not any there's nothing to I think it's all very self explanatory, but these are all the stats. As you can see. This week already I've got four people and it's the beginning of the week, in my downline in other other levels I've I've import I've recruited 12 People in my downline in other levels, but personally referred for people this week, total 392 But in my downline as a whole 303,039 people I have in my entire team downline down seven levels. Now what does the ESS here mean? It means that as a pro member, if you're a pro member, you will notice that your spillover, okay, level will grow automatically. Our system will automatically allocate followers to you. These are members with vacant upline slots. So this is kind of what they call spillover. You know, members who joined your team, because they had vacant upline slots, okay. Now, I don't want to show too much private information for other members who have joined my team. But this is where you'll see all the members underneath you in your downline. Okay, so there are quite a lot of Prime members, and there are quite a lot of free members. But that's where you can see the information about your team, and how to communicate with them and how to reach out to them. And just to see who's in your in your frontline. You can't see information about people in your downline. One thing I will just cover, which I've kind of covered before on your main dashboard, if I just open that into a new window, something that you might want to look at is down here, right at the bottom it says surf and earn associate message. Okay, so this is these are messages from your upline? This is my direct sponsor, Dennis, he's a pro member. And this is his message a little bit about him. Okay, so this is what your downline will see about you, if you want to set up a message, like, you know, these people are promoting and I can see what they're promoting. They're promoting this to their downline members.
|
|
|
|
|||
|
|
00:59 |
Tutorials and stats.
|
|
|
|
|||
|
|
01:49 |
Spillover level will grow automatically.
|
|
|
|
|||
|
|
03:07 |
Set up a message.
|
|
|
|
|||
|
|
03:17 |
Okay, you can set up a message right here. And you can add in, you know, view follow followers stats, okay, and it goes back to this page that we were on before. And, you know, people will, you know, in your downline are going to see this, you can see last seven days, 42 people have seen this real visits, you know, since this date, I've had quite a few visits. You know, it's still active, which is good. And I'm talking, you know, I'm promoting live good, basically. So if I click this, and I want to edit it, I can, you know, I can put their first name here, lock in a top position in my powerline, okay, blah, blah, blah. And talking about that, and it's going to my website. So that's the reason why I'm sharing that with you is because we're on this section, we have a minute, where are we?
|
|
|
|
|||
|
|
04:04 |
Okay, we're on this section, where they're going to be, you know, these people in your downline are going to be able to see all this. And, you know, so it's worth setting that up. And so yeah, these are these are your stats. Okay, so, let me just, I've already covered this, this is another another area where you can set that, you know, message followers, okay, so click here. Again, we've already just covered this. So this is that that section, they're the same section. And, you know, you can manage everything in that again, you can click on tutorial, and it'll go through exactly what you need to understand there. Okay. You can check out your stats, you can reset everything, you can put everything you can put this message on pause, you can delete it, or you can edit it. Okay. So that's how that works. All right. Well, thanks for watching guys. See you in the next tutorial. That covers this section. Bye for now.
|
|
|
|
|||
|
|
04:59 |
(End of video)
|
|
In this video I will show you the Affiliate Resources.
|
|
|||
|
|
|
|
|
|
|
|||
|
|
00:00 |
(Beginning of video)
|
|
|
|
|||
|
|
00:00 |
Affiliate Resources.
|
|
|
|
|||
|
|
00:01 |
Okay, hello, and welcome back. So in this section, we're going to talk about the affiliate resources. This is what you have access to in order to promote your leads lead business, this is essential, because you want to be able to earn a commission by helping your team gets set up and started with Leeds leap. So this is what you have access to, in order to get people on board with you in your team within Leeds leap. So first of all, the thing that I use most is just sending people directly to the homepage, when you click here, it'll select the entire URL, you can copy it to clipboard, and set, share it out with somebody, okay, so you can have it in in your funnels, get people to click on your button within a funnel or whatever or within a landing page and get them to join you in leads lead under you enter so you can build your team. We've got other sections where you can promote directly to the Social Review area, just preview here, and it'll show you information about that section.
|
|
|
|
|||
|
|
01:00 |
There are other things I don't use most of these links, all I really use is the homepage link, just read the description, and preview it and choose which one you want to use. Again, you can click the tutorial, and it'll tell you information about this section. Now, so you can go straight to the bits further down by clicking here, or how to promote it gives you details on how to promote. So for example, I have a list and it gives you some good tutorials on how how to do that. I have a blog how to promote on using using your blog gives you some advice on that.
|
|
|
|
|||
|
|
01:16 |
How to promote using your blog.
|
|
|
|
|||
|
|
01:38 |
And some some other things. You've got some swipes, emails, email swipes, to promote leads, leap subject lines. So use these different subject lines to promote your leads lead business. And you've also got banners and they're really cool, they're animated. So you can use those on your blog or on your websites or on your pages, it's up to you. So you know, add them in there. Okay, the banners for example, you can add in using the check using the source code, or the direct link to the to the actual image file itself. So it's really, really that simple.
|
|
|
|
|||
|
|
02:14 |
And next, hold a minute. Okay. And you can also look at your affiliate stats. So as you can see, in the past 30 days, you can select, you know, past 30 days or whatever, show all the information about where your stats are coming from. And as you can see, you know, I'm getting a lot of signups from in from different sources. So this just shows you what what your activity is like on a certain day. So on the January 29, for example, I got a total of 69 hits and seven uniques. So, you know, obviously, a lot of people, a lot of the same people are viewing my website, or whatever. But you know, that just just depends. Anyway, so that's that's information about your stats again, you can well, there's no two tutorial on this section, but it's very self explanatory. I'm going to just cover the last part of this of this section here. I'm going to walk you can also go to the Learn section here. Actually, I'm going to cover that in the next video sorry, I'm going to cut this video now and then we're going to go to that in the next index video. So just separated up okay, so that concludes this video. Thanks for watching. See in the next training bye for now
|
|
|
|
|||
|
|
03:35 |
(End of video)
|
|
In this video I will show you some extra training and nice ways to promote leadsleap using the free giveaways that leadsleap have created for us.
|
|
|||
|
|
|
|
|
|
|
|||
|
|
00:00 |
(Beginning of video)
|
|
|
|
|||
|
|
00:00 |
Introduction of the video.
|
|
|
|
|||
|
|
00:00 |
Okay, hello, and welcome back, this will be the last video of this entire training, we're right down at the bottom here, I'm gonna just move myself out of the way, we're down to the bottom here where it says, Learn, okay, so there's a lot you can learn here. In these two sections here, I'm going to cover that in this tutorial. This is a great resource. And, you know, the great thing is it's also rebrandable. So, I mean, what I what I mean by rebranded was not, it's rebrandable, in the sense that you've got your link that you can promote, okay, so this is your link that you can share out to this report. Alright, meaning that if they, if they go to this report, you know, they're going to be able to sign up through your link. But it's a good resource in itself, okay, so you can either read it, or you can read it online, okay? And learn, or you can promote it. Okay. So same with, same with this section, as well, down below, it says, One One signup a day, you might have already seen this, you've got the Download PDF version, or you've got the read it online version, you can also share your link to this section as well. So if you click here, and go to the link, which has got your username at the end there, when they don't, they can download the PDF, or they can read it online. So you know, if they click here, they can, they'll join through your link, okay. So it's your link that's going to be in here, it's a great resource, it's, it's a great way to get people are excited about running their business, and then they can join you in in lazily, okay? Or they can download it as a PDF, optionally. And if they, if they click here, the link goes to your sign up link, okay, if you, you can test the links, it goes to your link, if you open up into a new tab, it's got your username at the end there. And then when they then they get a free, they get an account, you're the you're going to be the referred user. So that's how that works. It's a it's a page in itself, it's kind of a funnel, where, you know, they can download a great piece of value that's provided by you, in a sense, because it's got your links in there. So this is a great way to promote your leads lead business. And it's a great read for yourself. So you can learn how to you know, run a run a business or generate leads or get signups or whatever. So that really concludes everything, guys, it's really that simple. All you need to do moving forward, go back to your dashboard. And when you log in, I mean, most of the things that you're going to be focused on is viewing ads on a daily basis. So you can get credits and in turn that those credits will convert into hits for your ads that we've already covered. And then you know, the other thing you're going to be doing is it whenever you set up a page or whatever, or you know, managing your your email list, broadcasting and stuff, these are probably the sections you're going to be mostly focused on. But use the platform, you know, you've got a way to advertise your business, you've got a way to market your business, you've got a way to network with people. Because you know, you're going to be able to bring people into this and build a team and get paid. And it's going to be a great way to earn money. Alright, you can see what other people are doing.
|
|
|
|
|||
|
|
01:06 |
How to download the pdf.
|
|
|
|
|||
|
|
02:15 |
How to promote your lead generation.
|
|
|
|
|||
|
|
03:20 |
Sometimes you'll get to see ads, sometimes you'll get to see other people's reviews. And you can you can learn a little bit about what other people are promoting. So it's a great platform to be running your entire business around. You can go to the you know, checkout support here, the support section, you can talk to the support, you can visit the blog, and the owner of the blog of the leadership system. His name is Kenneth he will be he'll be updating new things all the time. And you can read all the posts about how leads lead has progressed. And other things. They're always updating and adding new things. You know, a good idea would be to whitelist that leads leap support email because they do email out periodically about updates and things like that and reviews and Kenneth has a an excellent email mailing list that you'll automatically be a part of. So you don't need to subscribe anywhere but you can you can unsubscribe if you want to but he's he's talks about a great you know, a lot of great things he's got a lot of experience. So all in all, this is a fabulous platform. I love it and I've been using it for several years now and it's my number one go to tool for marketing all my businesses in one place. Anyway you guys thanks for watching. I really appreciate you and welcome aboard. Okay, see you on maybe on the next training. If we add to this I'm sure we will.
|
|
|
|
|||
|
|
03:34 |
How to get in touch with the leadership system.
|
|
|
|
|||
|
|
04:48 |
So thanks for watching. Bye for now.
|
|
|
|
|||
|
|
04:50 |
(End of video)
|
|