Main Menu
During the ScreenPal Innovative Learning Summit, Georgian College Instructional Design Technologists Karina Mejia and Ashley Priest tackled a challenge that will sound familiar to many educators: we have plenty of content, but how do we make that content easier for students to actually engage with? Their answer was not simply “make shorter videos.” In their session, Micro Lessons and ScreenPal, Karina and Ashley explored a more intentional approach to breaking learning into focused, manageable experiences.
They demonstrated a practical workflow for taking existing or newly recorded video, turning it into bite-sized learning, adding accessibility and structure, and building in opportunities for learners to interact with what they are watching.
The session offered a useful shift in perspective. A micro-lesson is not just a shortened lecture. It is a deliberately focused learning experience built around a specific objective, instructor presence, and an opportunity for the learner to do something with the information.
And with ScreenPal, much of that workflow can happen in one place.
Keep reading to dive deeper into their session, including:
- What actually makes a micro-lesson “micro”?
- Why smaller learning experiences matter
- The interaction is where the learning happens in your micro-lesson
- A micro-lesson can fit almost anywhere in a course
- The workflow: start your micro-lesson with content you already have
- Step 1: Give existing video more structure
- Step 2: Find the natural “cut points”
- Step 3: Trim to one focused learning moment
- Step 4: Generate and review captions
- Step 5: Turn the video into an interactive lesson
- Step 6: Design the feedback loop
- Step 7: Bring it into the LMS
- Existing resources don’t have to stay in their existing form
- Smaller learning, intentionally designed
- About the speakers
What actually makes a micro-lesson “micro”?
Ashley began by asking participants what came to mind when they heard the term micro-lesson. The chat quickly filled with ideas: short illustrations of concepts, mini-lessons, focused topics, breaking lessons into chunks, short-form videos, and tightly packaged “nuggets” of information.
Those responses captured the basic idea, but Ashley added an important distinction.
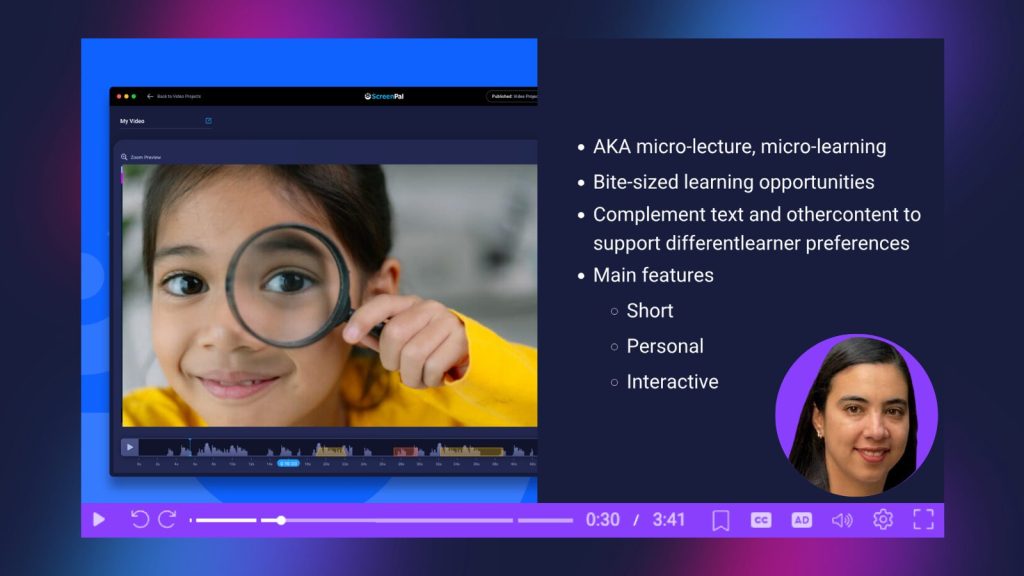
Drawing on research into microlearning, she described micro-lessons as targeted, action-oriented, bite-sized content designed to accomplish a specific objective within a short period of time. In practice, that often means videos of no more than 10-15 minutes, and ideally shorter.
But length alone does not make something a micro-lesson.
Ashley emphasized three qualities throughout the session:
- It is short and focused around a specific topic or objective.
- It is personal, maintaining instructor presence and connection.
- It is interactive, asking learners to respond, reflect, practice, or check their understanding.
That final element is particularly important.
Educators are already getting better at producing engaging instructional videos. They may appear on camera, explain concepts conversationally, demonstrate a process, or walk students through a resource. But, as Ashley pointed out, many videos stop just before the interactive step.
That is often the difference between a short video and a true micro-lesson.
A learner shouldn’t simply reach the end of a video and move on. Somewhere in the experience, there should be an invitation to think: Do I understand this? Can I apply it? What would I do next?
Why smaller learning experiences matter
The case for micro-lessons isn’t simply that students have shorter attention spans.
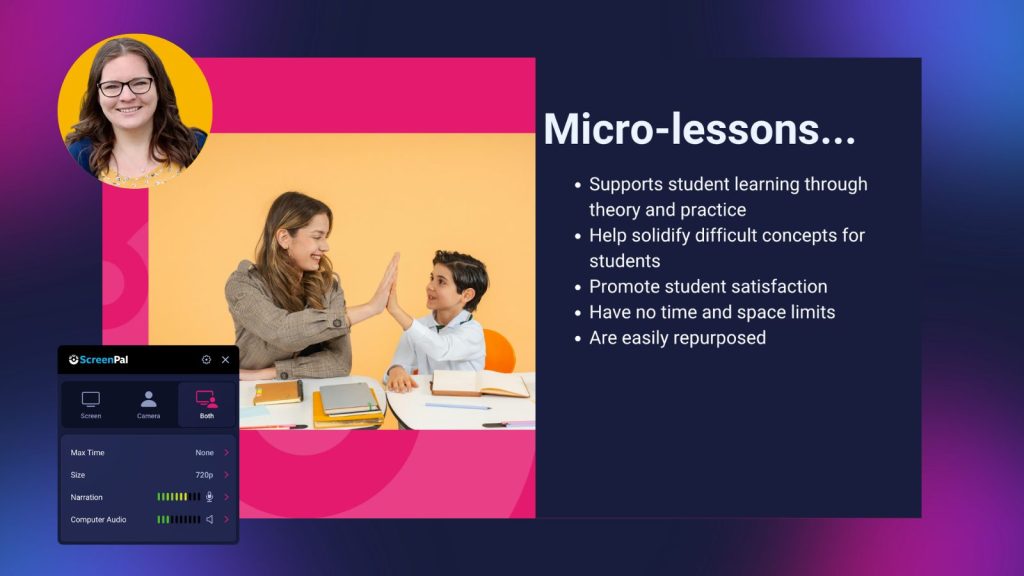
Karina and Ashley positioned microlearning as a way to make learning more manageable while giving students greater control over how and when they engage with course content.
Consider the difference between asking a student to revisit a three-hour lecture recording and asking them to revisit a four-minute explanation of the exact concept they are struggling with.
With the three-hour recording, even finding the relevant information can become a task in itself. Students have to scrub through the timeline, remember where a topic appeared, and worry about skipping something important.
A focused micro-lesson changes that experience.
Students can see a short resource and reasonably think, I have time to do this.
That becomes particularly important when learners are balancing school with work, family responsibilities, commuting, and other demands on their time.
Ashley also connected micro-lessons with Universal Design for Learning (UDL). A short video can complement written instructions, readings, demonstrations, or other course resources, giving students another way to engage with the same content. Rather than assuming everyone will learn best from a long block of text, or a long lecture, faculty can offer students multiple pathways into the material.
Micro-lessons can also be replayed whenever needed. When a concept is difficult, returning to a five-minute explanation is realistic. Returning to an entire class recording is considerably less inviting.
The interaction is where the learning happens in your micro-lesson
One of the strongest ideas from the session was that micro-lessons can connect theory with practice.
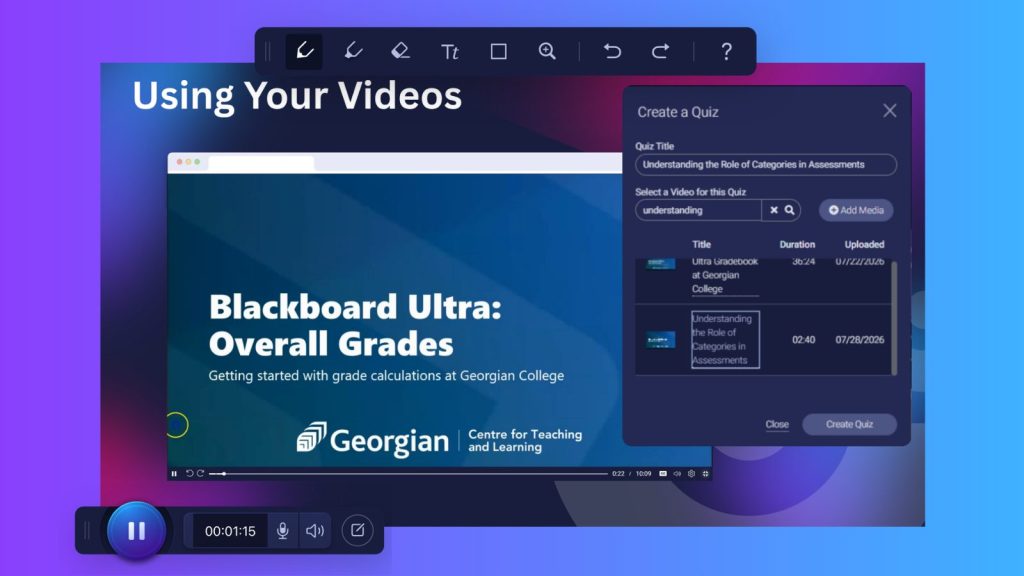
A video might introduce or explain a concept and then stop to ask the student a question. ScreenPal can place those interactions directly into the video experience.
For example, an instructor might explain a difficult concept and then present a multiple-choice question. If the student answers incorrectly, the experience can direct them back to the relevant portion of the video to review the explanation before trying again.
Karina and Ashley noted that this is one of the features that tends to generate excitement when they demonstrate ScreenPal to Georgian College faculty.
It transforms video from something students simply consume into something they actively work through.
And those interactions do not always need to feel like tests.
ScreenPal supports multiple-choice and true/false questions, but instructors can also add short-answer responses, polls, and ratings. A poll might ask students for their perspective on a topic. A rating could ask how confident they feel completing a task after watching a demonstration. A short response could ask them to reflect on how they would apply an idea.
The goal is not necessarily to grade every interaction. Sometimes the purpose is simply to create a pause for thinking.
A micro-lesson can fit almost anywhere in a course
One of the most practical parts of the session was Ashley’s discussion of where faculty might use this approach.
A micro-lesson could provide a course or LMS orientation, walking students through the syllabus or course shell and using questions to draw attention to important information such as policies or expectations.
It could introduce a new topic or provide a focused review of a particularly challenging concept.
It could become assignment feedback. Rather than repeating the same comments individually, an instructor could record a short class-wide explanation of an area where students struggled and then add a question asking learners how they might improve their approach next time.
Faculty could also create a short review or commentary on an assigned resource and invite students to compare their own interpretation with the instructor’s in a ScreenPal Channel.
Or a micro-lesson could simply offer a well-timed hint, tip, or nudge: a walkthrough of assignment requirements, a reminder about a commonly missed step, or guidance on where students should focus their studying before an assessment.
The format works because the lesson does not try to accomplish everything.
It does one useful thing at the moment a student needs it.
The workflow: start your micro-lesson with content you already have
When Karina took over the demonstration, the session shifted from why micro-lessons work to how Georgian College faculty actually build them.
Importantly, the workflow does not require starting from scratch.
Karina demonstrated several entry points into ScreenPal. Faculty can record something new, work with videos already stored in ScreenPal, upload an existing video, or even use supported YouTube content as the basis for an interactive experience.
That flexibility matters because many instructors already have years of useful video resources.
The challenge is that those resources may not be in an ideal format.
Karina demonstrated this with an existing Georgian College resource about the Blackboard Ultra Gradebook. The original video had problems: its audio cut in and out, and it lacked closed captions. In its existing form, the team had not been able to use it as effectively as they wanted.
Instead of discarding the resource and starting again, they used ScreenPal’s tools to give it a second life.
Step 1: Give existing video more structure
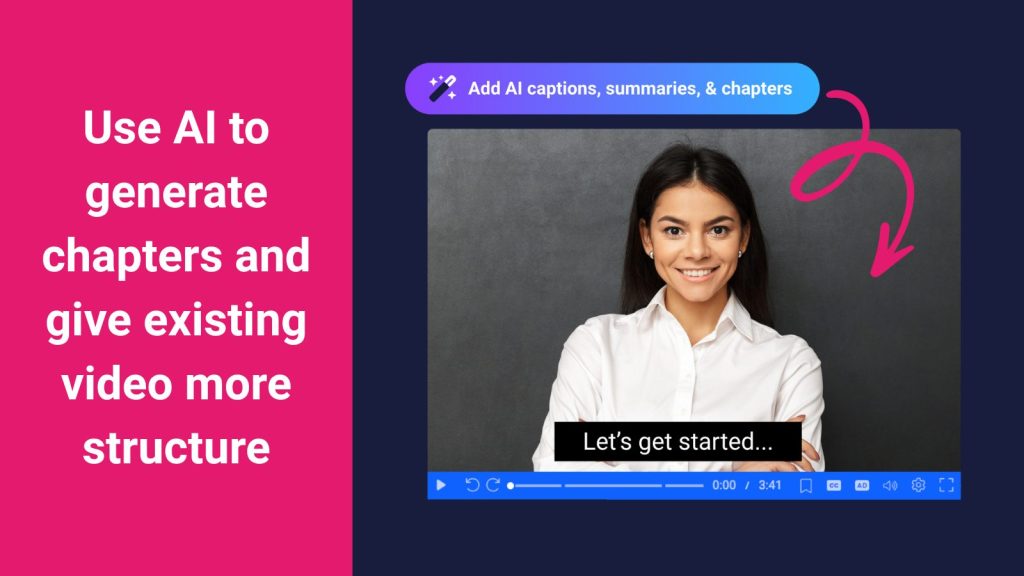
Using ScreenPal’s AI tools, Karina demonstrated how an uploaded video could generate several useful pieces of supporting information, including a suggested title, summary, and captions.
Those captions are more than an accessibility add-on.
They become part of the workflow that makes the rest of the micro-lesson possible.
Karina emphasized the importance of reviewing AI-generated material rather than assuming the output is automatically ready to publish. Captions can be edited, and instructors should check that generated information accurately reflects what was actually said.
From there, faculty can add chapters to longer videos.
Chapters immediately make an existing resource easier to navigate. But for Karina and Ashley, they can also serve as a bridge toward something even more useful: identifying the natural boundaries where a longer video can become a series of smaller lessons.
That is exactly what they planned to do with their Blackboard resource; break the original video into focused pieces and organize those pieces into a ScreenPal channel so faculty could quickly access the specific topic they needed.
Instead of one long resource about the Gradebook, the result becomes a library of targeted support.
Step 2: Find the natural “cut points”
This was one of the most practical workflow ideas of the entire session.
Once a longer video has been identified as a candidate for microlearning, don’t simply start cutting randomly.
Watch it with a different purpose: look for the moments when one idea ends and another begins.
During the demonstration, ScreenPal’s Sarah Eiler added a useful production tip from her own experience converting webinars into micro-lesson-based certification content.
Her workflow is to watch the original video all the way through once and record the timestamps where each new micro-lesson should begin and end. Then, when editing, she can return to a fresh copy of the video and go directly to those timestamps.
That small planning step prevents a common editing headache: once sections are cut from a video, all the remaining timestamps change.
For faculty repurposing a 30-, 60-, or 90-minute recording, this is an especially useful takeaway.
Watch first. Mark the boundaries. Cut second.
Step 3: Trim your micro-lesson to one focused learning moment
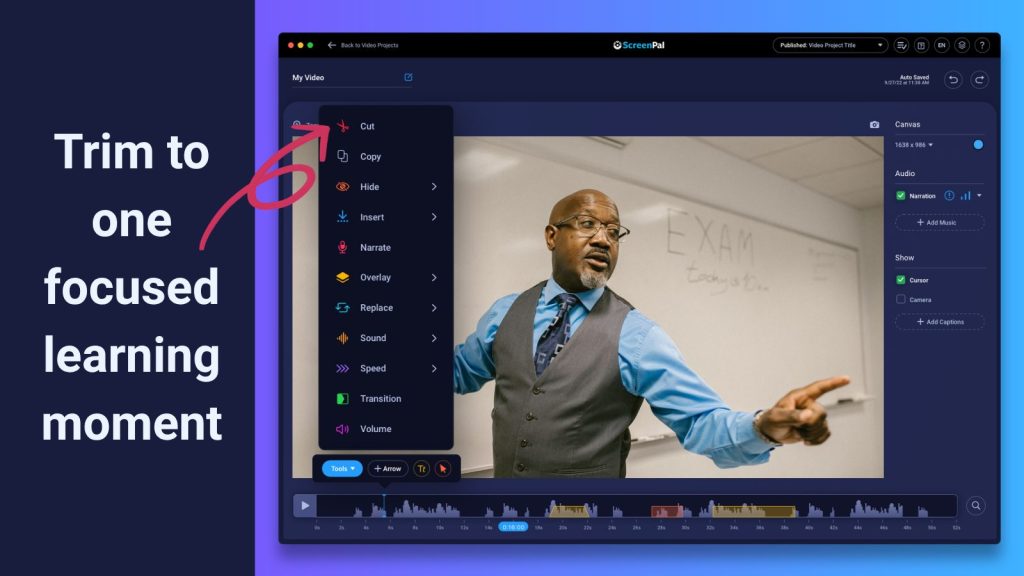
Karina then demonstrated the actual transformation from long-form content into a micro-lesson.
Using ScreenPal’s desktop editor, she isolated one section of the larger video, removed the material around it, and was left with a short video focused on one topic.
That simplicity is worth emphasizing.
Microlearning doesn’t necessarily require recording dozens of brand-new videos. An instructor may already have the raw material sitting in lecture recordings, webinars, demonstrations, or tutorial videos.
The work is often about identifying the useful moments hidden inside that longer content.
A 36-minute video might not be an ideal learning object.
But inside it could be six excellent five-minute learning objects.
Step 4: Generate and review captions
Once the shorter video was published from the ScreenPal desktop application to the cloud, Karina returned to the AI workflow.
ScreenPal could generate a title, summary, chapters, and captions for the new video. Again, Karina stressed the need to review what was generated and make corrections as necessary.
This step also connects accessibility with instructional design rather than treating accessibility as something to address at the very end.
The captions make the resource more accessible, but they also enable another major part of the ScreenPal workflow: AI-generated interactive questions.
Step 5: Turn the video into an interactive micro-lesson
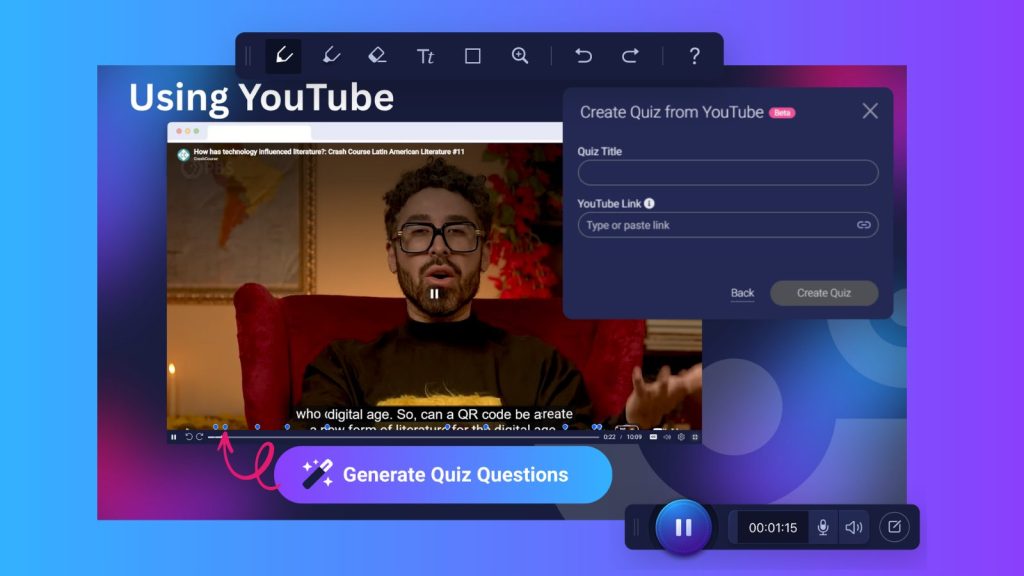
With captions in place, the short video can become an interactive quiz.
Karina demonstrated selecting the video and using ScreenPal to generate questions based on its content. For a video under approximately five minutes, the tool may generate around five questions; longer videos may produce around ten.
Those questions are a starting point, not a finished assessment.
Faculty can review the generated questions, remove anything that does not fit the learning objective, and add their own interactions afterward.
Karina shared a useful workflow tip here as well: if you want ScreenPal to generate questions with AI, generate those questions first and then add your custom questions.
The automatically generated questions include multiple-choice and true/false formats, while faculty can supplement those with short-answer, polling, and rating questions.
Questions can also be positioned at specific points in the video’s timeline.
That is where the experience starts to become a lesson rather than a video followed by a quiz.
An instructor can explain something, pause at exactly the right moment, ask the learner to apply it, and then continue.
Step 6: Design the feedback loop
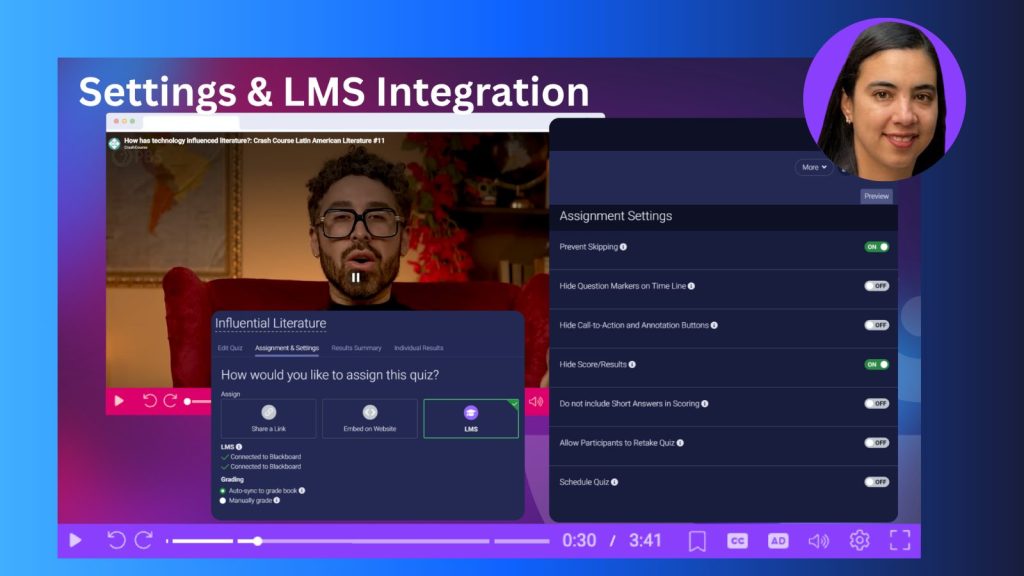
ScreenPal’s quiz settings add another layer to the workflow.
Faculty can decide whether students may skip questions, whether results or scores are visible, whether learners can retake the activity, and how different response types contribute to scoring.
Most interestingly, students who answer a question incorrectly can be given an opportunity to rewatch the relevant portion of the video.
That creates a small but meaningful learning loop: Watch → Respond → Review → Try again.
For low-stakes practice, that can be far more useful than simply telling students that an answer was wrong.
Karina also highlighted the value of allowing multiple attempts when micro-lessons are being used as study resources. A short video preparing students for a lab, for example, could remain available throughout the course so students can revisit the demonstration and check their understanding as many times as necessary.
Step 7: Bring your micro-lesson into your LMS
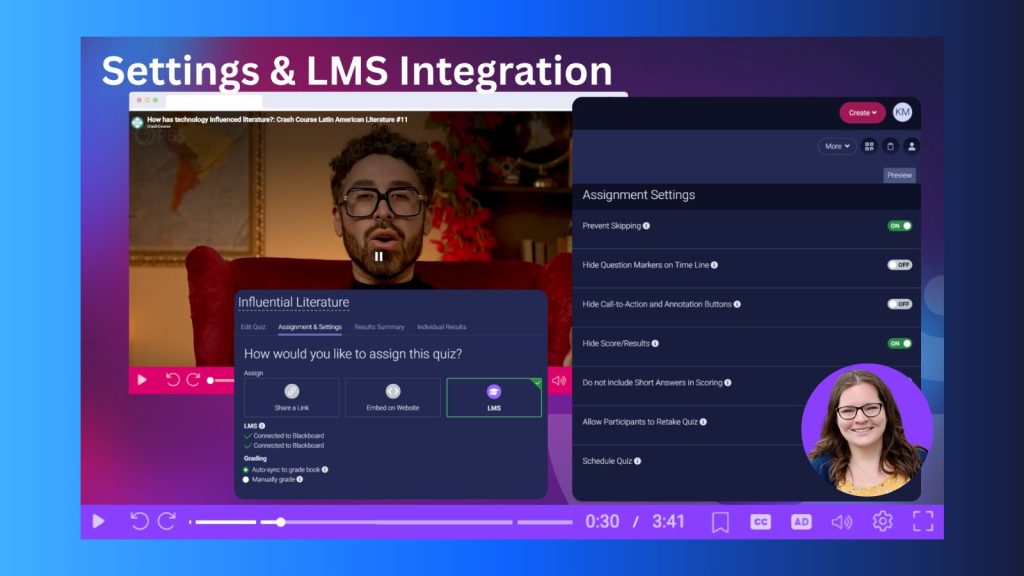
The final piece is getting the micro-lesson to students where they are already learning.
Karina demonstrated how ScreenPal can integrate with an LMS. At Georgian College, that includes using ScreenPal with Blackboard.
Depending on the purpose of the activity, an instructor can connect an interactive quiz with the LMS gradebook and choose automatic or manual grading options. For low-stakes or ungraded practice, the lesson can also be embedded directly into LMS content.
That flexibility makes the same workflow useful across very different scenarios.
A faculty member could build a graded knowledge check, an ungraded exam review, an assignment walkthrough, a pre-lab activity, or a simple confidence check, all from the same underlying approach.
Existing resources don’t have to stay in their existing form
Perhaps the most compelling part of Karina and Ashley’s session was not any individual ScreenPal feature. It was the workflow those features make possible.
Higher education has accumulated a tremendous amount of digital content: lecture recordings, pandemic-era videos, webinars, software demonstrations, orientation materials, assignment walkthroughs, YouTube resources, and more.
The question does not always need to be, What new content should we create?
Sometimes the better question is: What useful learning experiences are already hiding inside the content we have?
Karina and Ashley’s Blackboard example illustrated that perfectly. A video that had accessibility and usability limitations could be uploaded, captioned, structured, divided into focused topics, and transformed into a collection of short, interactive learning resources.
That is not simply video editing. It is instructional redesign.
Smaller learning, intentionally designed
Karina and Ashley’s session offered a practical reminder that making learning more manageable doesn’t mean making it less meaningful.
Micro-lessons still require instructional decisions.
- What does the learner need to know or do?
- Where does this topic naturally begin and end?
- Where should the learner stop and think?
- What question would actually demonstrate understanding?
- Should the activity be graded, or is this a space to practice?
- What happens when a learner gets something wrong?
Those questions matter far more than an arbitrary video length.
ScreenPal helps reduce some of the production friction around the answers. Existing videos can be repurposed. Captions and summaries can provide a starting point. Long recordings can be divided into targeted resources. Interactive questions can be generated and customized. Lessons can be embedded in the LMS or connected to the gradebook.
But the technology is ultimately supporting a larger instructional goal: giving students focused opportunities to learn, practice, review, and try again.
For faculty who look at their collection of long recordings and wonder where to begin, Karina and Ashley offered a refreshingly achievable workflow:
Start with one video. Find one useful concept. Cut it down. Make it accessible. Add one meaningful interaction. Give students a reason to engage with it.
That’s a micro lesson, but potentially a significant improvement to the learning experience.
About the speakers
Karina Mejia and Ashley Priest are Instructional Design Technologists with the Centre for Teaching and Learning at Georgian College. They support faculty in designing engaging, accessible, and effective digital learning experiences while helping educators make thoughtful use of technology in their teaching.
Through their work with ScreenPal, Karina and Ashley help instructors create practical video-based learning experiences, including focused micro-lessons that make complex concepts more approachable for students. Their approach combines instructional design best practices with tools such as video, interactivity, and AI to help faculty create meaningful learning experiences without adding unnecessary complexity to their workflows.