Main Menu
POV: What makes you stop scrolling through short form videos? Maybe it’s an engaging opening. A funny, relatable moment. A quick camera change. Text popping onto the screen. A perfectly timed GIF. Or simply the feeling that the person talking is speaking directly to you.
That’s the language of short-form video; the engaging TikToks, Reels, and YouTube Shorts designed to earn your attention in seconds.
And while educators don’t need to become influencers, there’s a lot to learn from the way these videos are made.
That was the idea at the center of educator, speaker, and Make EdTech 100 podcast host Lindy Hockenbary’s, session at the ScreenPal Innovative Learning Summit.
In “BINGO Your Way to Better Videos: 12 Techniques That Actually Keep Students Watching,” Lindy challenged educators to look differently at the short-form videos filling TikTok, Instagram Reels, Facebook Reels, and YouTube Shorts.
Instead of dismissing the scroll, what can educators learn from it?
And more importantly: How can we borrow the engaging techniques that make short-form video engaging without trying to become influencers ourselves?
Lindy’s answer is surprisingly practical. You don’t need expensive equipment, advanced editing skills, or hours of production time. You need to understand what holds attention, and then make a few intentional choices when filming and editing.
Here are the biggest lessons from her session, including 12 techniques educators can start experimenting with right away.
Before creating more engaging videos, understand why students watch
Lindy began with an experiment.
She played several short-form videos and asked attendees to imagine they were scrolling through their feeds. What would make them stop instead of swiping to the next video?
The responses were familiar:
- Relatable
- Funny
- Entertaining
- Facial expressions
- Storytelling
- Captions
But Lindy encouraged attendees to look one layer deeper.
In one example, the creator changed backgrounds and camera angles. He used quick jump cuts between lines. Text appeared on screen. Captions reinforced what he was saying. Another creator repeatedly zoomed in and out, changing the visual composition several times in only a few seconds. Other examples used voiceover, sound effects, background music, animated elements, GIFs, changing layouts, and other subtle production choices.
Individually, none of those techniques seemed revolutionary. Together, they created something critical: movement.
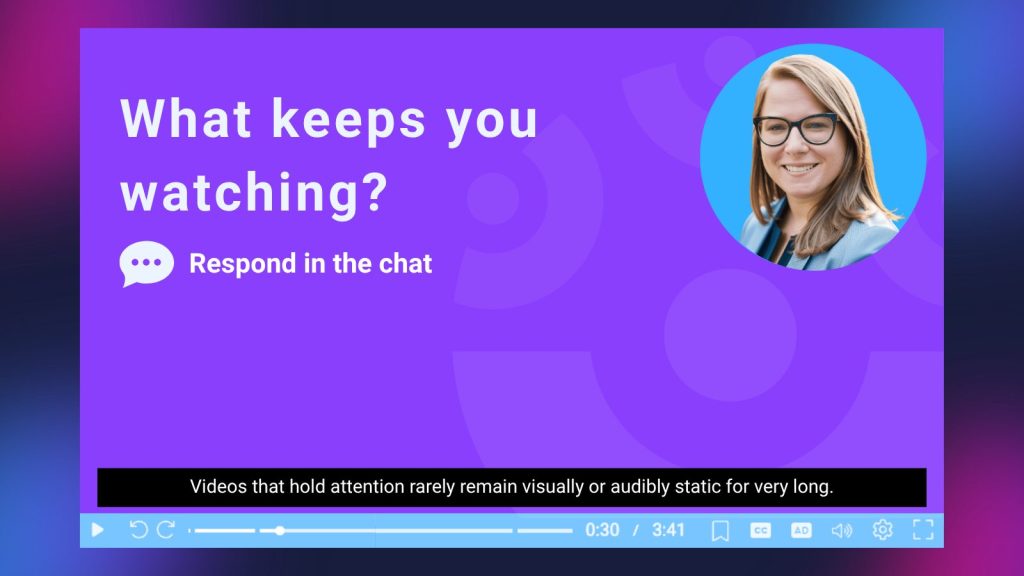
That became one of Lindy’s central points. Videos that hold attention rarely remain visually or audibly static for very long. Something changes. The camera moves. The framing changes. Text appears. A new visual comes on screen. A pause disappears. The pace accelerates. A sound effect punctuates a moment.
You may not consciously notice those changes while watching, but they continually give your brain something new to process. For educators, that observation creates an opportunity.
Short-form video matches the world students already live in
Short-form video isn’t limited to one social platform anymore. TikTok popularized the format, but Instagram, Facebook, and YouTube have all embraced similar experiences. Across platforms, viewers are increasingly accustomed to videos that are brief, vertical, personal, and constantly moving.
That matters because the overwhelming majority of today’s K-12 and higher education students are members of Gen Z and Gen Alpha. These learners have grown up engaging with video.
But Lindy’s message wasn’t that teachers should copy TikTok or turn every lesson into social media content. Instead, educators can pay attention to what these formats have taught viewers to expect.
Short-form video is often authentic rather than highly polished. It gets to the point quickly. It uses visual changes to maintain attention. And it frequently lets personality show through.
Those same principles can make educational video more engaging. The goal isn’t to fight the scroll. It’s to understand it.
“Spend some time engaging in the scroll”
One of Lindy’s assignments for educators was wonderfully simple: spend some time scrolling. Not mindlessly. Analytically.
Open Instagram Reels, Facebook Reels, YouTube Shorts, TikTok, or whichever short-form platform you’re comfortable using. Then stop thinking only about what people are saying and start studying how they’re saying it.
Ask yourself:
- How is the person delivering the message?
-
- Are they using humor? Storytelling? High energy? A conversational style?
- What makes you keep watching?
-
- Is there suspense? Relatability? Emotion? A question you want answered?
- What is happening in the production?
Watch for camera changes, jump cuts, zooms, on-screen text, images, GIFs, B-roll, music, sound effects, and changes in pace. Once you start looking for these techniques, Lindy noted, you see them everywhere. And that’s where her BINGO framework comes in.
Lights, Camera, BINGO: Don’t try everything at once
Knowing that movement matters is one thing. Knowing how to create it is another.
“Add more movement to your videos” isn’t particularly useful advice to an educator who already has a full schedule.
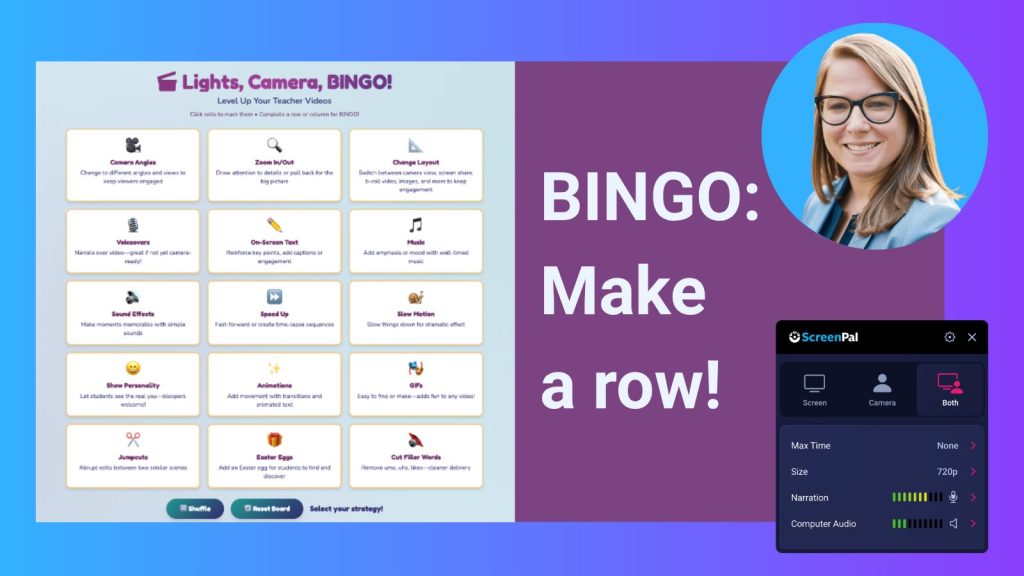
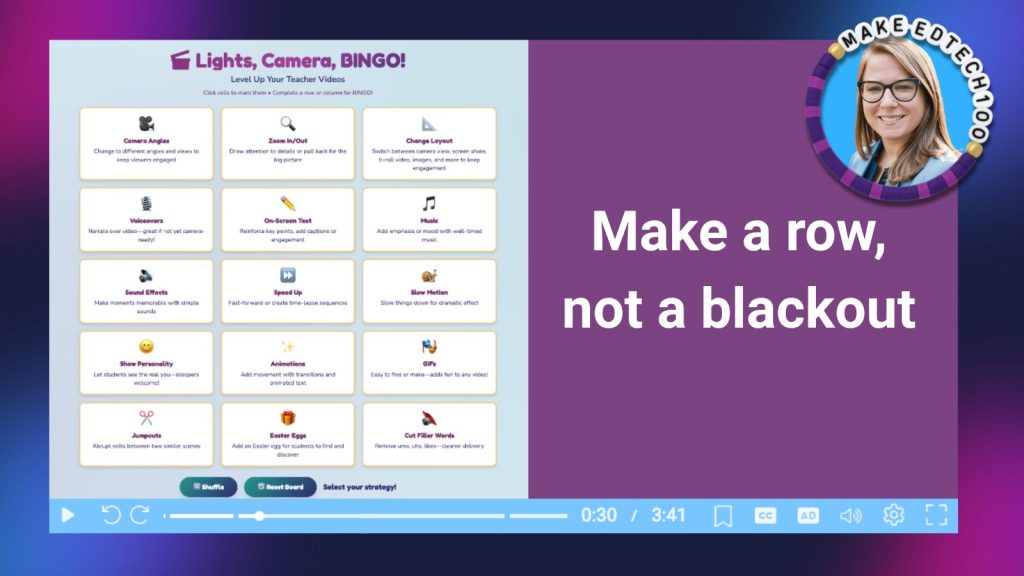
So Lindy turned the idea into something tangible: a BINGO board of video techniques.
The board contains different ways educators can make their videos more engaging. Instead of attempting every technique at once, the goal is to start small.
Change a camera angle. Add a zoom. Try some on-screen text. Complete a row. You have BINGO!
It’s a simple framework, but it addresses one of the biggest barriers educators face when learning video production: the feeling that they have to become expert editors before they can make something better. Spoiler alert: They don’t have to be expert editors.
Lindy walked attendees through 12 techniques from the board, beginning with changes you can make while filming and moving into simple edits you can make afterward.
1. Change your camera angle
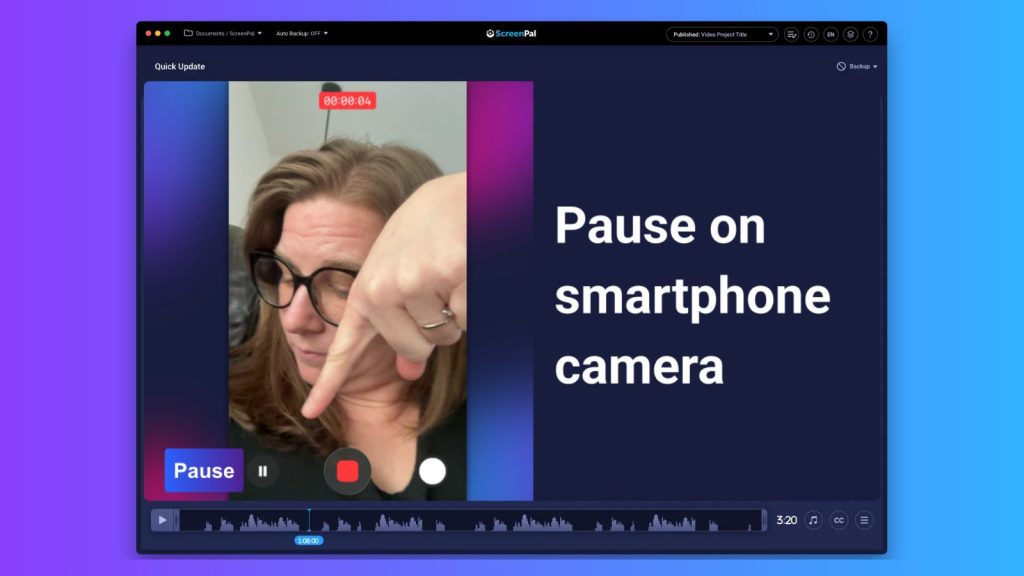
The easiest editing technique may actually require no editing at all. While recording on your smartphone, change your camera angle. Pause your recording, reposition the phone, and continue.
You might start with the camera directly in front of you, then move it slightly to one side. Change your location or background. Bring the camera closer.
When those clips are combined, the viewer experiences a visual change even though you’re still delivering the same message. It’s a simple way to create movement without learning an editing technique. And because modern smartphones already have excellent cameras, educators don’t need a complicated recording setup to get started.
2. Zoom in and out
Another easy way to create visual movement is to change the framing.
On a smartphone, this can be as simple as pinching the screen to zoom in or out while you’re recording. Think back to social videos you’ve watched. A creator might suddenly zoom in on their face to emphasize a reaction, then zoom back out. The content hasn’t changed, but the visual shift resets the viewer’s attention.
Educators can use the same technique strategically:
- Zoom in on an object you’re discussing.
- Get closer when emphasizing an important point.
- Change the framing during a story.
The important part isn’t the zoom itself. It’s the change.
3. Let your personality show and engage learners, even through bloopers
Authenticity was another recurring theme in Lindy’s session. Educational videos don’t need to feel like television productions. In fact, sometimes the little imperfections make them better.
Lindy suggested leaving an occasional blooper in the video, particularly when it reveals some personality. If you stumble over a word, laugh at yourself, or have a harmless interruption, you don’t necessarily have to remove every trace of it. Students often enjoy those moments because they remind them there’s a real person behind the lesson.
Lindy also shared a clever recording workflow that makes mistakes easy to find later. When she makes a mistake, she says a designated word such as “cut,” starts the sentence again, and keeps recording. Afterward, she can search the transcript for “cut” and quickly locate every mistake. No scrubbing endlessly through the timeline. And if one of those bloopers happens to be funny? Maybe it stays.
4. Remove filler words with transcript-based editing
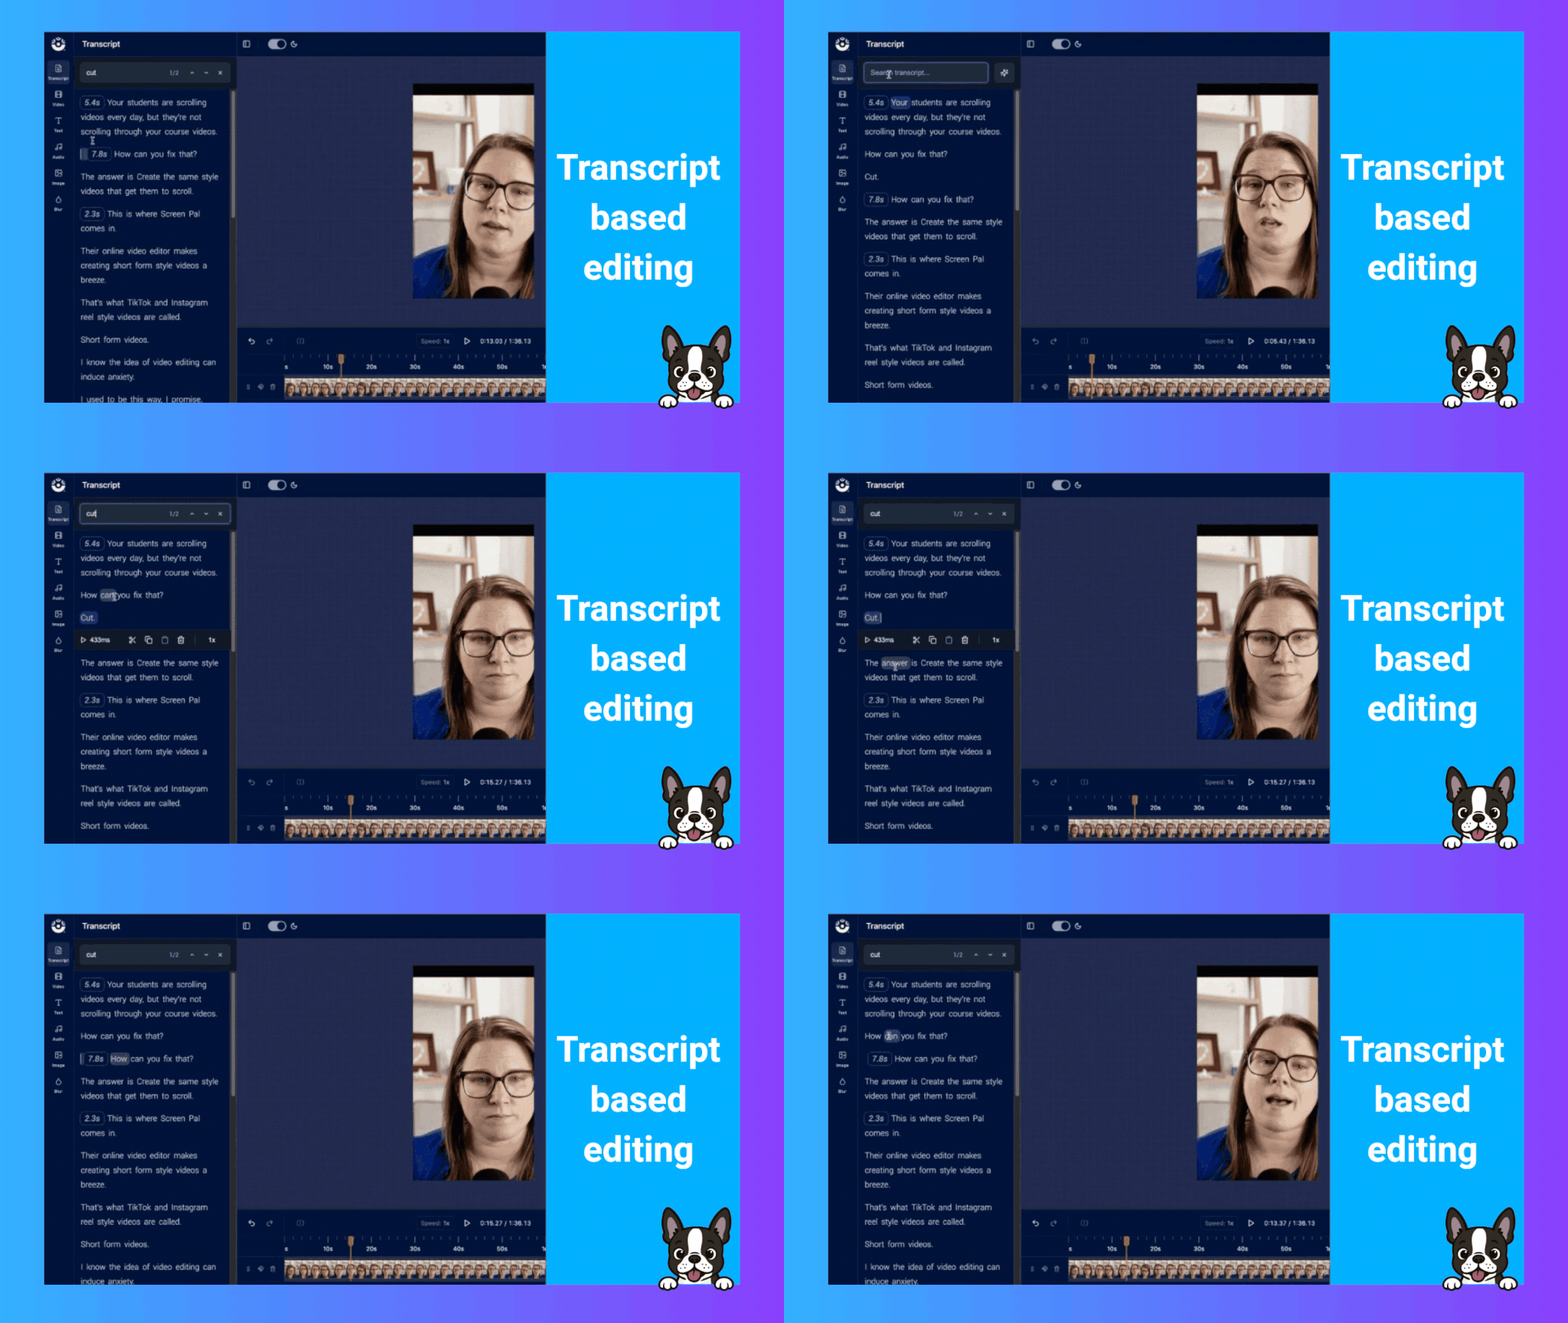
Even experienced speakers use filler words like um, uh, so, like, and right.
Removing those manually used to mean listening through an entire recording and making individual timeline edits. Transcript-based editing changes that.
In ScreenPal’s online video editor, Lindy demonstrated how AI can identify common filler words in the transcript so creators can quickly find and remove them. She also pointed out that everyone develops their own verbal habits.
If the automatic tool doesn’t flag your favorite filler word, you can search for it yourself. Lindy, for example, knows some of the words she personally tends to overuse. Searching the transcript lets her clean those up without watching the entire video again.
The result isn’t simply a more polished video. It’s a tighter, faster, more engaging video, with fewer moments where the viewer’s attention can drift.
5. Turn silences into engaging quick jump cuts
One of the defining characteristics of short-form video is the jump cut. A jump cut occurs when the camera angle and background remain essentially the same, but the video makes a sharp cut forward.
Traditional video production might try to hide that edit. Short-form video often embraces it.
Why? Because it keeps things moving.
Lindy demonstrated one of the fastest ways to create this effect in ScreenPal: search for silences in the transcript. The editor identifies moments where no one is speaking. From there, you can shorten those pauses.
Lindy sometimes reduces them dramatically, even down to around 0.1 seconds for a fast-paced short-form style.
That may feel too aggressive for every educator or every audience, and she encouraged attendees to experiment. Try one second. Try half a second. Ask students what feels right.
The larger lesson is that you don’t need to manually create dozens of jump cuts. Removing or shortening unnecessary silence can create that faster pacing almost automatically. And for an educator looking for one easy place to start, this was one of Lindy’s strongest recommendations.
6. Speed up the parts that feel like “watching paint dry”
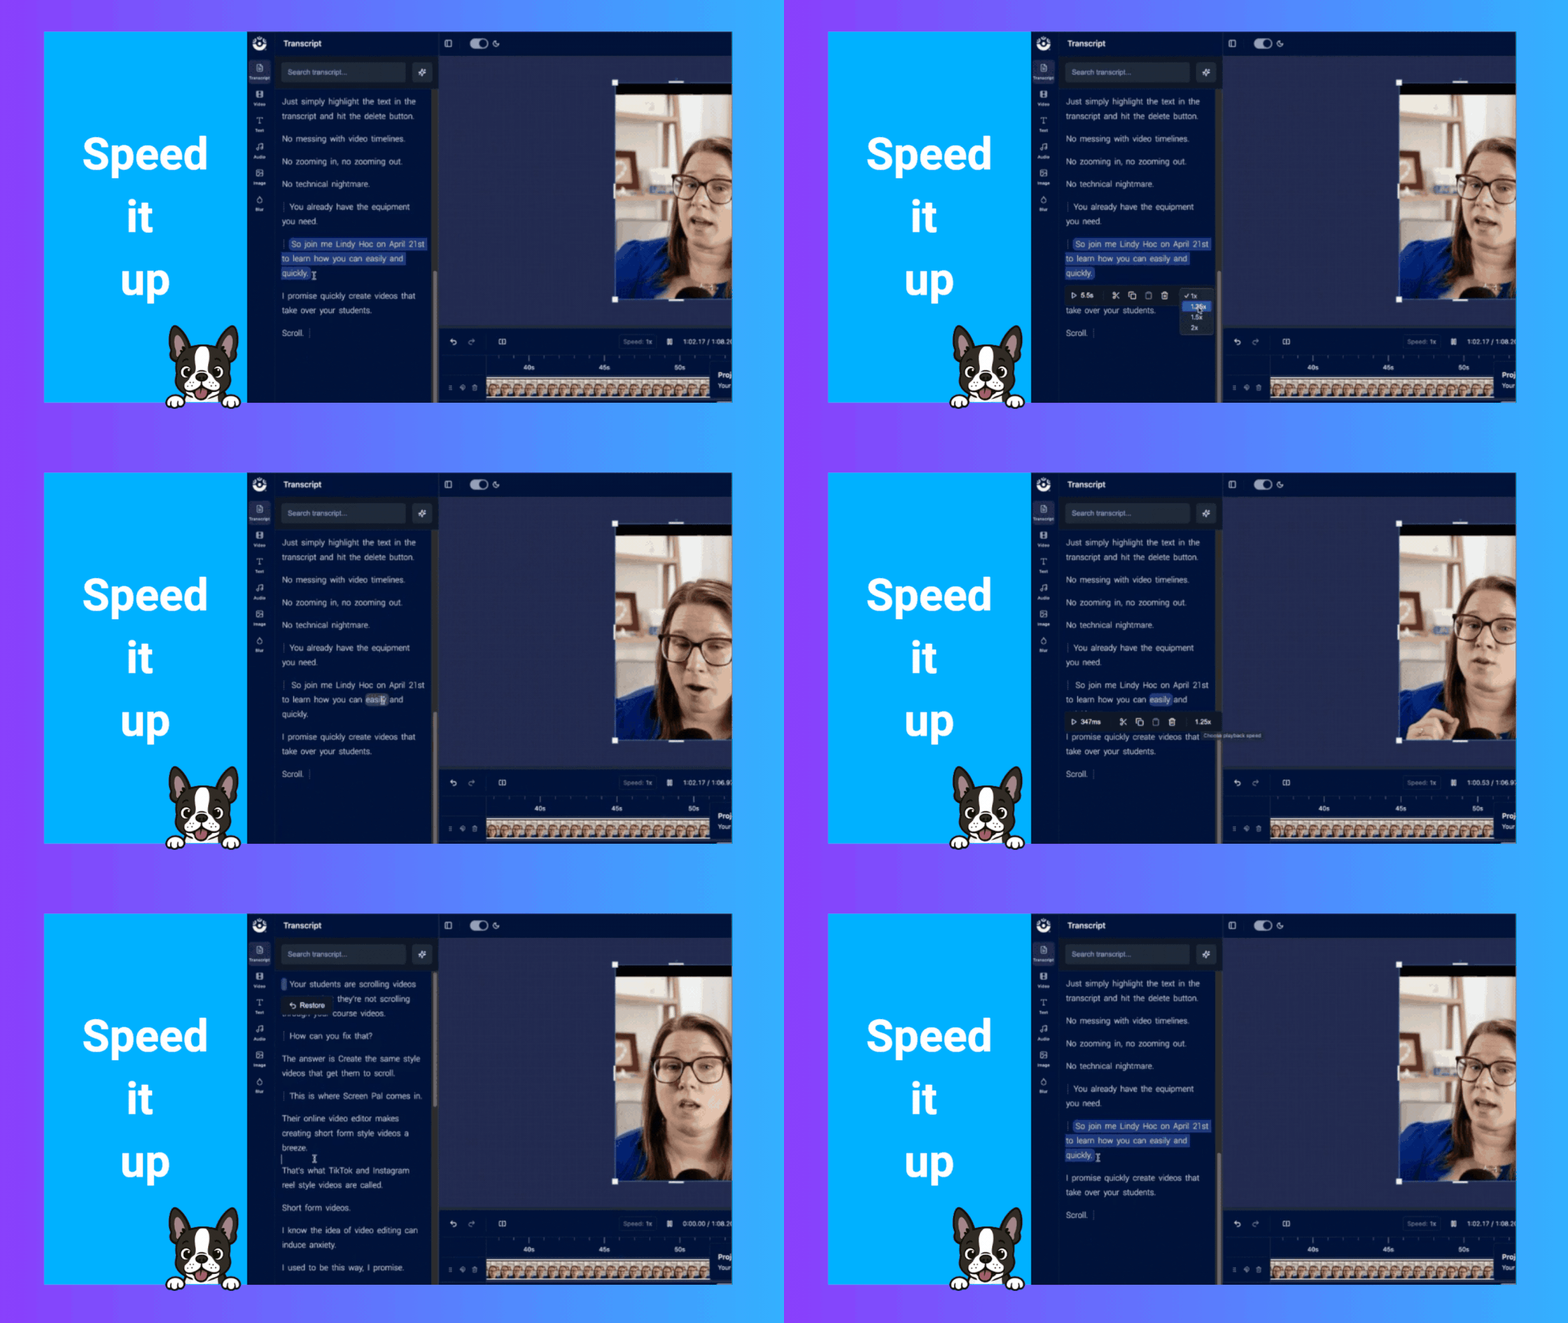
Not every part of a demonstration needs to happen in real time. Lindy borrowed a memorable phrase from a fellow video educator: nobody likes to watch paint dry.
Imagine you’re demonstrating a process. Maybe you’re writing something out, assembling an object, navigating a repetitive series of steps, or waiting for something to load.
The action matters, so you don’t necessarily want to remove it. But does the viewer need to watch every second? Probably not.
Instead, speed it up.
Using ScreenPal’s transcript-based workflow, Lindy showed how a creator can select a section of the video and increase its playback speed. The learner still sees what happened. They just don’t have to wait through it.
That makes speed another form of movement, and another tool for respecting the viewer’s attention.
7. Change the layout with engaging B-roll, images, and additional recordings
Sometimes the best way to maintain attention is simply to give the viewer something else to look at. That’s where B-roll comes in. B-roll is supplemental footage shown while the main narration continues.
You’ve seen it constantly in documentaries and news stories. Someone is being interviewed, but instead of staring at that person for several minutes, the video cuts to footage related to what they’re describing while their voice continues.
Educators can use the same technique:
- If you’re discussing smartphone use, show footage of someone using a phone.
- If you’re explaining a physical process, show it.
- If you’re describing a location, display a relevant image or clip.
ScreenPal’s editor includes stock media, making it possible to search for supporting footage without leaving the editing workflow. You can also upload your own video, images, or additional recordings.
Lindy demonstrated how creators can resize and position these elements on screen, effectively creating a video within a video when appropriate. Again, the goal isn’t decoration for decoration’s sake. It’s a movement with purpose.
8. Add GIFs and engaging animated elements
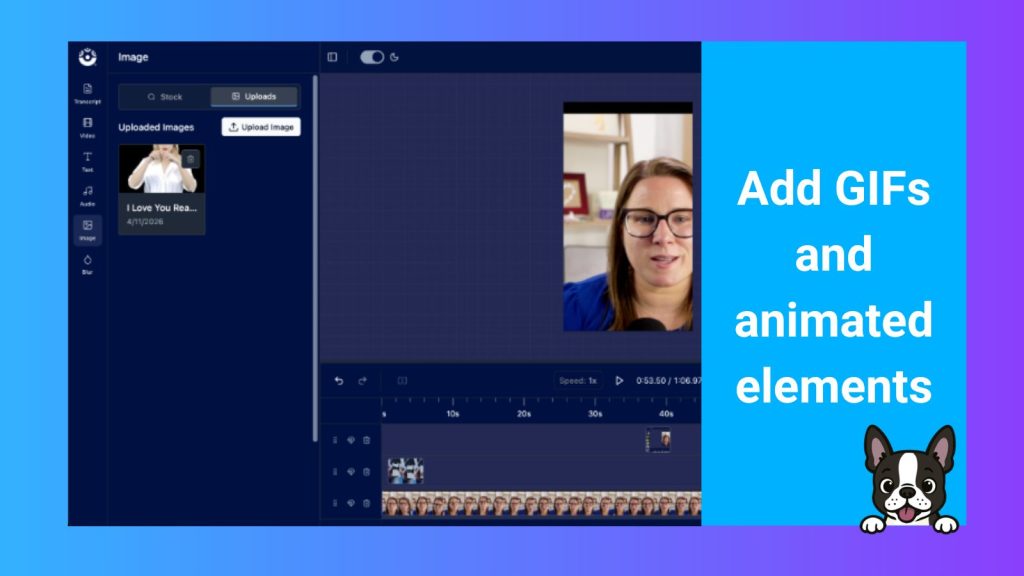
GIFs offer another easy way to introduce movement.
Because a GIF is technically an image file, even though it moves, it can be added as an image in the video editor.
Lindy demonstrated finding GIFs through GIPHY, uploading them, and placing them over the video. She also shared a useful tip: look for stickers with transparent backgrounds when you want an animated element that can sit naturally over your existing video rather than occupying a large rectangular area.
A strategically placed GIF can emphasize a joke, illustrate a reaction, reinforce an idea, or simply introduce a quick visual surprise.
It can also make a relatively simple video look much more sophisticated than the amount of editing effort involved.
9. Use sound effects to regain attention
Movement doesn’t have to be visual. Sometimes the fastest way to recapture attention is through sound.
Lindy demonstrated adding sound effects from ScreenPal’s audio library:
- A ding.
- A game-show sound.
- A short effect that emphasizes a transition or important point.
Used sparingly, these sounds can act like an audio highlighter. The key word is sparingly. The goal isn’t to fill every second with noise. It’s to use sound intentionally when you want the viewer to notice something.
10. Use music to create emotion, not just background noise
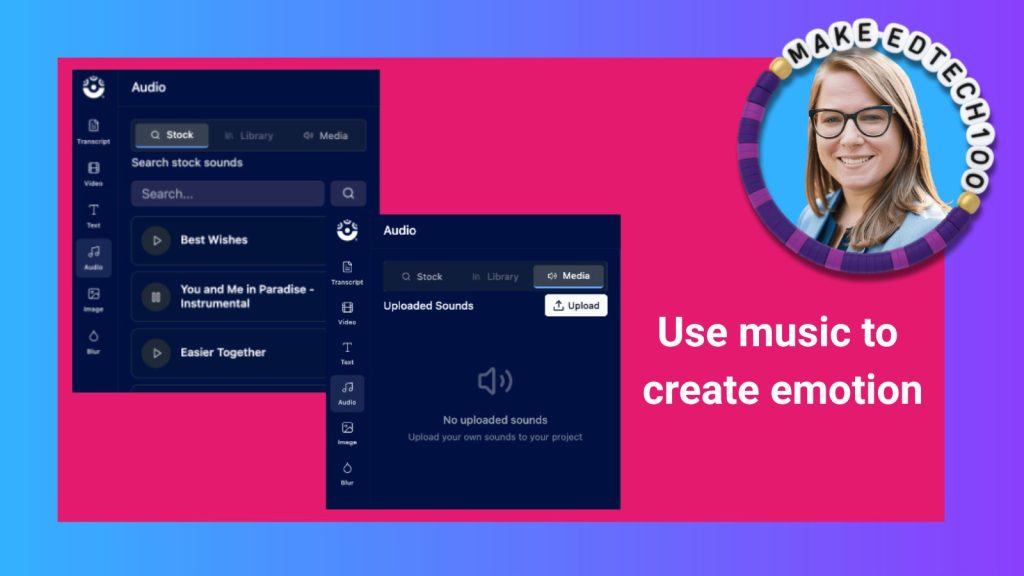
Music can also change how a video feels. But Lindy made an important distinction.
She isn’t necessarily a fan of playing background music continuously throughout an educational video. Instead, she recommends using short pieces of music at strategic moments.
Think of music as an emotional cue. A brief clip can make a reveal feel more dramatic. It can add energy to an introduction. It can signal a transition. It can make a humorous moment even funnier.
ScreenPal’s audio tools allow creators to add music much like they would add a sound effect, while external royalty-free music libraries can provide additional options.
The important part is intentionality: music should serve the message rather than compete with it.
11. Reinforce key ideas with on-screen text
One of the simplest techniques in Lindy’s toolkit may also be one of the most useful for educators: put important words on the screen.
On-screen text gives the learner another way to process the message. It can introduce the topic, emphasize a key term, highlight an instruction, call attention to a deadline, or reinforce the one thing students absolutely need to remember.
Lindy shared a practical example involving a teacher who needed students to remember to bring their Chromebooks charged. A short video reinforced the instruction visually with text. The result? Far fewer students arrived needing to borrow devices.
That example captures why these techniques matter. The goal isn’t simply to make a video look cooler. It’s to communicate more effectively.
12. Hide Easter eggs in your videos
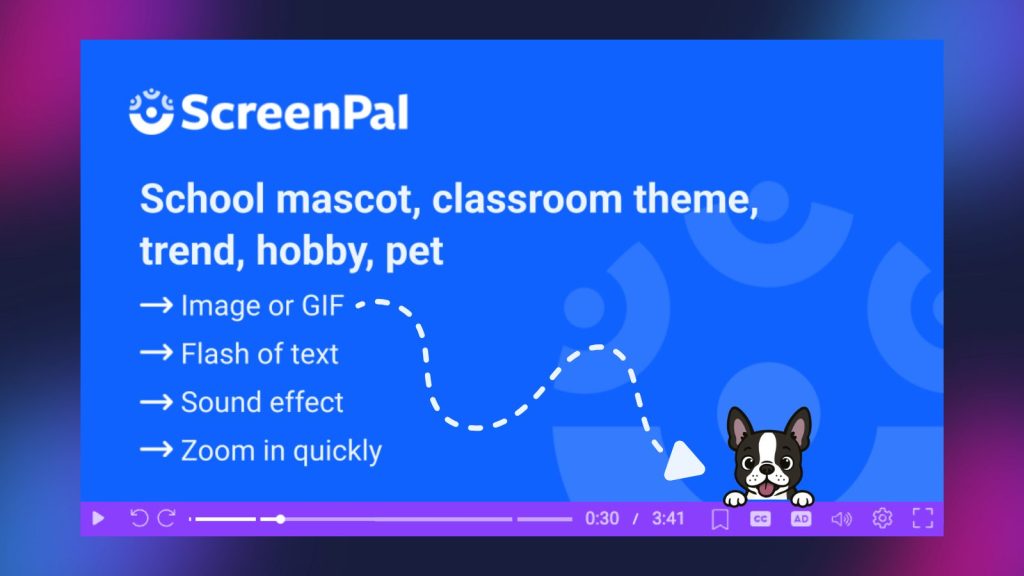
Lindy saved one of the most playful ideas for last: Easter eggs. An Easter egg is a small hidden element that viewers can look for. And once students know your videos contain them, they have another reason to pay attention.
The best part is that Easter eggs don’t require another editing skill. They can use all the techniques you’ve already learned. Flash an image briefly, put your school mascot in the corner, add a GIF, display a quick piece of text, use an unexpected sound effect, or zoom in on something for a second.
Then challenge students to find it.
It’s a small dose of gamification that can transform watching from a passive activity into a more attentive one.
You don’t need all 12 techniques in every video
At this point, it would be easy to look at the list and think: Now I have to add camera changes, zooms, bloopers, jump cuts, B-roll, GIFs, sound effects, music, text, and Easter eggs to every lesson?
Absolutely not. That would defeat the purpose of Lindy’s BINGO framework. Her advice was to start with one thing.
Maybe this week you shorten the silences in one video. Next time, add some on-screen text. Later, experiment with B-roll.
Eventually, you’ll discover the techniques that feel natural for you and useful for your students. And as you repeat them, they become faster.
During the session, an attendee asked how long it takes to create a more heavily edited video.
Lindy estimated roughly 10-20 minutes of editing for a five-minute video, while emphasizing that five minutes itself is relatively long for the type of video she was discussing. ScreenPal Community Engagement Manager Sarah Eiler shared that some one- to two-minute Summit videos she edited with overlays and GIFs took around 20-30 minutes, in part because finding the perfect GIF can become its own rabbit hole.
Both emphasized the same point: you get faster with practice.
You also develop favorites. Lindy gravitates toward GIFs and on-screen text. Another educator might rely more on B-roll and jump cuts.
You don’t have to use every square on the BINGO board. Find the techniques that work for you.
Better educational video doesn’t require better equipment
Perhaps the most encouraging takeaway from Lindy’s session is how accessible these techniques are.
The filming demonstrations started with something most educators already have: a smartphone. Camera changes can happen while you record. Zooming can happen with your fingers.
And once the recording is finished, transcript-based editing can remove much of the tedious work that once made video editing intimidating.
Instead of spending hours searching a timeline for mistakes, search the words. Instead of manually hunting for every “um,” let AI find them. Instead of creating dozens of jump cuts one at a time, search for silences and tighten them. Then add visual elements only where they help.
Technology should reduce the friction involved in creating better learning experiences, not give educators another enormous production task.
What should you try first?
Near the end of the session, Lindy asked attendees a simple question: Which BINGO element are you going to try first?
That may be the best way to approach everything in this session. Don’t redesign your entire video workflow tomorrow. Pick one square.
If you want the easiest possible starting point, Lindy suggested experimenting with searching for silences and filler words in ScreenPal’s online video editor.
Those two changes alone can make a video feel tighter and more engaging, and they can be completed in minutes.
Then keep experimenting. Change an angle. Add a GIF. Insert some B-roll. Put the most important instruction on screen. Hide an Easter egg. See what your students notice. Ask what they prefer.
And build from there.
The real homework: learn from the videos people already watch
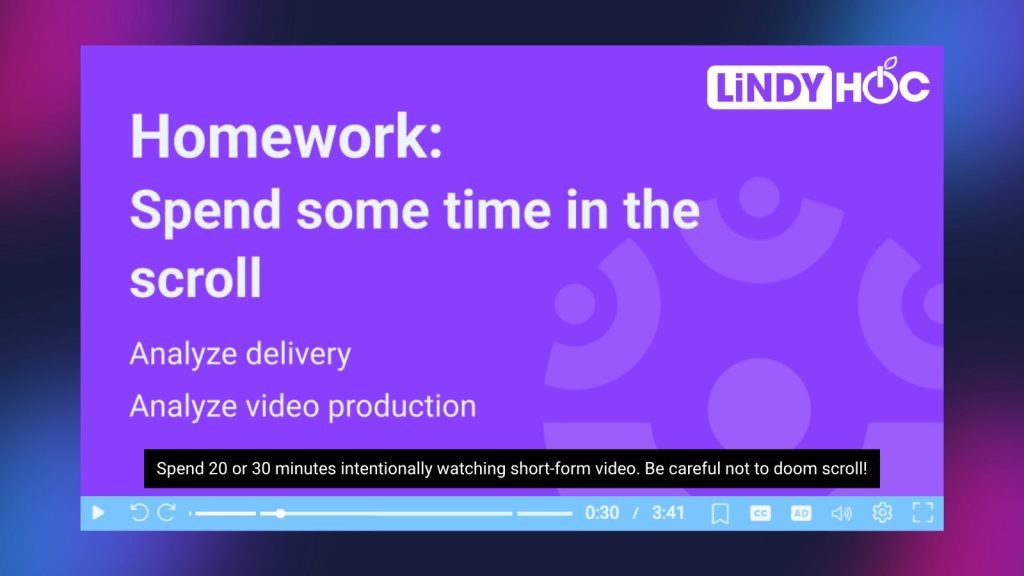
Lindy ended her session by returning to the same place she started: the scroll.
Her homework for educators wasn’t to master professional video production. It was to spend 20 or 30 minutes intentionally watching short-form video. Study the delivery, study the production, and notice what changes. Notice when your attention starts to wander, and what brings it back.
You don’t even have to use TikTok. Instagram Reels, Facebook Reels, and YouTube Shorts provide plenty of examples of the same short-form techniques. The point is to become a more observant viewer.
Because once you recognize the patterns, creating engaging educational video becomes less mysterious.
Short-form creators have learned how to earn another few seconds of attention in an environment where viewers can leave with a single swipe. Educators don’t need to imitate everything about that world. But there’s plenty they can learn from it. And the next time you create a video for your students, you don’t have to change everything.
Just pick one square and go for BINGO.
About the speaker
Lindy Hockenbary (aka LindyHoc) is a K-12 EdTech expert, speaker, trainer, and author who helps educators and school leaders bring technology and teaching together so every student can thrive. A former classroom teacher, curriculum writer, technology integration specialist, and professional development manager, Lindy brings a pedagogy-first approach to technology, helping educators move beyond simply learning which buttons to click and instead use technology purposefully to create meaningful learning experiences.
Over the past decade, Lindy has led more than 1,300 professional learning sessions, reaching 30,000+ educators across all 50 states and more than 10 countries. She is a Google for Education Certified Trainer, holds a graduate degree in Educational Technology from Boise State University, and was named a 2025 Leading Woman in AI by ASU+GSV. Her work focuses on practical, engaging strategies for EdTech and emerging technologies, including helping schools navigate AI and its impact on teaching, learning, curriculum, and assessment.
Learn more about Lindy and her work at LindyHoc.com.