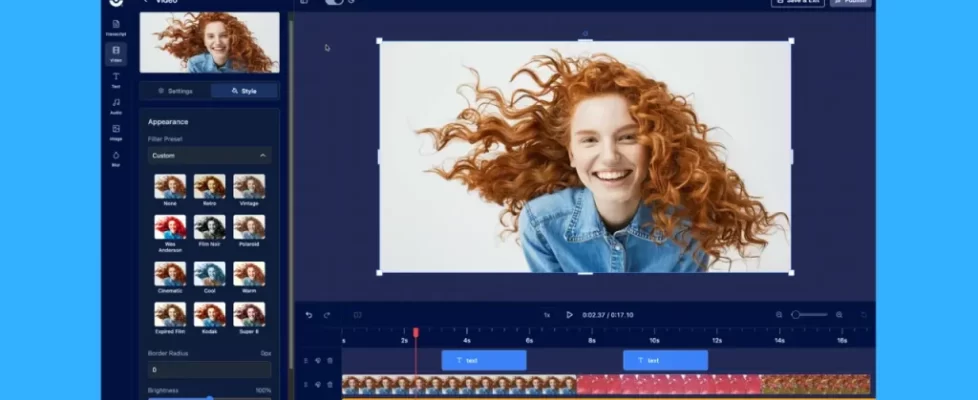
Screenshots are beneficial visual aids. You can capture screenshots from your phone, tablet, or desktop in seconds and add them to videos or slideshows. It’s easy to capture your screen with ScreenPal.
So why should you care? Studies show that 65 percent of people are visual learners, and Psychology Today reports that visual aids help the human brain comprehend and store information more effectively.
Whether you’re creating a presentation for elementary school students or company executives, visuals will improve comprehension and help your audience reach that pivotal lightbulb moment. Read on to learn how to use screenshots to level up your presentations.
How to do a screenshot with ScreenPal
You can screenshot Mac or PC screens. First, log into your ScreenPal account, or register for free if you don’t already have one.
Log in and click the camera icon in the upper right corner of the window. Choose whether to screenshot PC or Mac full-screen or capture the entire screen, select an active window, or click and drag to select a specific area. For more in-depth help, follow along with this video tutorial on how to take a screenshot.
Next, you can use the Image Editor to crop your screenshot, blur sensitive information, or add text, arrows, highlights, arrows, or other shapes to help viewers understand your image.
You can also create a video using your image captures. With the video maker, you can use the timeline edit tools to add images. Click on ‘Overlay’ then ‘Image’ to add them to your videos.
How to use screenshots effectively in your videos and presentations
 There’s nothing worse than a grainy or overly busy screenshot. A poorly prepared image can end up distracting viewers rather than adding valuable context to your video. Follow the tips below to achieve the highest quality screenshots with ease.
Tip: Get a clear closeup
Even if you only need to capture a small portion of your screen, it’s best to take a bigger screenshot and crop it later. If you start with a too-small area, your final image will look grainy and pixelated, and there won’t be a way to fix it.
If, for instance, you’re giving a presentation on the solar system, so you open a photo of all nine planets on your screen. When it’s time to talk about Mercury, in particular, take a wide screenshot and then use the image editor to crop the image to focus on Mercury. This way, you’ll get a clear, crisp image.
Tip: Go deeper with multiple screenshots
Don’t rely on one big screenshot to demonstrate a complex process with numerous steps. Instead, take as many screenshots as you need so you can zoom in or out and show each step in precise detail. Now your presentation won’t look too busy, and your audience will follow along with you. Taking it one step at a time also prevents viewers from skipping too far ahead of you in your presentation, giving your material more of a chance to sink in.
A screenshot demonstrating how to navigate customer service software would look chaotic once you’ve added text explaining all the necessary steps. Instead, take more than one screenshot and cover only one step at a time. You’ll be able to put less text on the screen, and your presentation will be easier to comprehend.
You’ll also be able to show close-ups of essential points, rather than directing everyone’s eyes around one large photo.
Tip: Bring your screenshots to life with transitions
To keep your audience interested in your presentation video, add animated transitions between screenshots. Our video editor offers a selection of eye-catching transitions that can make your screenshots gracefully fade into the screen or pop up with more excitement. Transitions are a quick way to add flair and a professional feel to your videos.
Sometimes a quick edit is all it takes to make your video more interesting. If you’ve ever given a presentation and noticed your audience losing focus, transitions will help.
Tip: Get creative with limitless overlays
Overlays offer endless ways to make your screenshots more engaging and informative. Add context by overlaying text, titles, arrows, shapes, and even photos or video clips on top of your screenshot.
For example, if you took a screenshot of the ScreenPal homepage, you could overlay text explaining how to download the Screen Recorder. Then add a brightly-colored arrow pointing to the download button. Now you’ve turned your basic screenshot into a helpful how-to guide.
Countless ways to use screenshots
Videos and slideshows aren’t the only ways to use your screenshots. EdTech expert Leslie Fisher relies on them to enhance her blog posts. “Words and I do not work out well. I would rather talk and show. So every blog post that I have uses ScreenPal,” she says.
You can add screenshots to your blogs too. Capture your screenshot using the instructions above, edit image with the easy-to-use Image Editor, then save and upload it to your blog. Easy!
Now you know how to do a screenshot and use it to your advantage. Are you ready to make your first screenshot video or presentation?


