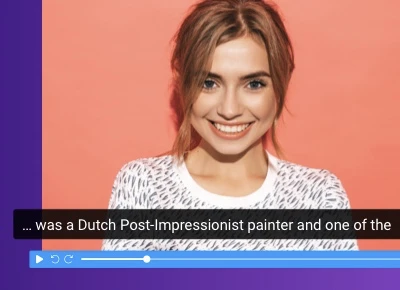
Accessibility plays a huge role in allowing everyone an equal opportunity to understand and engage with your topic. To create an accessible video that reaches every person effectively, we need to ensure your content is both ADA and Section 508 compliant.
When creating accessible videos, there are three main factors to consider.
- Captions: Your video’s audio should also appear as captions text, appropriately timed with the flow of the video. This assists deaf or hearing impaired users.
- 508-compliant video player: All viewing videos must be accessible for use.
- Audio transcriptions: An audio file describing the important visual information from the video is a big help for blind or vision-impaired users.
Adding captions to your videos is a much better user experience for your entire audience. Captions are essential for those who are deaf or hard of hearing. Without captioning, the 360 million people with hearing loss around the world would be unable to understand and engage with your video content.
All ScreenPal users have the ability to add caption files to a video during the publishing process. There are four ways to add captions using ScreenPal’s video creation tools. Let’s take a look at how to create captions quickly and easily in ScreenPal’s video editor.
1. Captions from file
This option allows you to upload your captions from an existing file on your computer.
All ScreenPal free and paid users have the ability to add captions files to the video during the publishing process.
A standard captions file (format as .sbv or .srt) can be created and added to your video file.
2. Speech-to-text
The Speech-to-Text auto captions option automatically transcribes and generates captions for your video. The tool picks up the audio from your video and creates captions.
If you select this option, use the dropdown menu to select the correct language for your captions. This transcribe video to text option is available with all paid plans.
3. Interactive captions editor or blank captions
Blank captions let you start from scratch, manually creating your own captions in the video editor.
On the ScreenPal app, choose blank captions and then press “Start” to continue creating your own personalized captions. A list of audio sections from your video will appear. Click the play button on the first section to hear the audio from a part of the video. Then type the corresponding caption in the textbox. The audio will pause when you start typing, so just hit enter to resume.
This option is available with the all paid plans.
4. Stories
 If you are creating video tutorials or lessons, one great feature to use is ‘Stories,’ which allows you to easily create videos using storyboards or scripts. Scripts are a great way to create videos with narration. It keeps your video organized in a thought-out process. This feature enables you to create a video in a structured way and it also creates a captions file.
Here are the steps to create with ‘Stories.’
- Import or type in a script file. With this feature, scripts are separated into sections for easy organization. You can review the text and change it from within the tool.
- Record audio narration straight from the tool. The feature can pick up a microphone source. Hit ‘Rec’ to start recording audio narration in sections of your text.
- Add video within each section. You can add video with audio by simply clicking on ‘Record Video’ next to the text section.
Here’s a full list of helpful video tutorials to get you started on Stories and scripts.
Stories: Streamline Video Creation with Storyboards and Scripts
Import a Document to Create a Story
The Scripted Recordings feature is available with the all paid plans.
Tips for Captioning
You can always go into your captions and make quick edits to it so that the audio lines up with the text. To do this, go into the captioning tool and hover over the point on the video timeline where you’d like to put your caption and click “+ sync point.” This highlights the section of text you want to edit. Then place your cursor right before the text you’d like to show at that time, and hit enter. This will sync your caption with the audio.
If any silent parts of your video weren’t detected by the video editor, you may need to add a section to sync it.
Closed vs. Open Captioning
After you’ve added captions to your video, you can choose how to incorporate them. Closed captions give viewers the option to show or hide your text, while open captions will always be visible in the video. You can check ‘Captions’ on and off in both the video editor or the recording itself.
Right before publishing, you’ll notice the ‘CC’ option is colored blue. This indicates that you have included captions in your video. If this is white and you want to add captions, ensure that you’ve enabled captions on your video.
These powerful captioning tools make working with captions easy. It enables you to deliver a better user experience while supporting your compliance needs. Accessibility is extremely important for everyone. ScreenPal has made it easy to create accessible videos with caption features. By adding captions, it helps your audience access, understand, and engage with your videos.
 Make every video accessible with ScreenPal
Save time and create accessible content with automated Speech-to-Text captions, interactive captions editing, and Stories.


