Videos are a great way to tell a story. It’s a powerful way to engage your audience. However, several common video editing mistakes can distract from your message.
We all make mistakes, especially beginners. There are some we make early in the video production process and others in the final edits. Thankfully, there are ways to fix our errors and with practice, you can prevent common editing mistakes.
Avoiding and fixing these six common video editing mistakes will improve your videos.
Video Editing Mistake #1: Poor Organization
First and foremost, you want your audience to understand your message. Like all stories, it should have a beginning, middle, and end with a clear takeaway.

Another way to think about this is the AIDA formula: Attention, Interest, Desire, and Action.
For example, you could generate attention at the beginning of your video with a personal introduction, then provide additional information to spark interest and desire. Your goal at the end is to create a compelling call to action. One of the biggest mistakes you can make is to shove too much information and content into a short video without creating a persuasive beginning or action item at the end.
Quick Fix: Develop a Plan
The best fix for this is to plan ahead. Disorganized content can easily be avoided with a storyboard or script. With ScreenPal’s scripted recording and storyboarding features, you can stay organized and on point. You can type or import your script and edit your video to match.
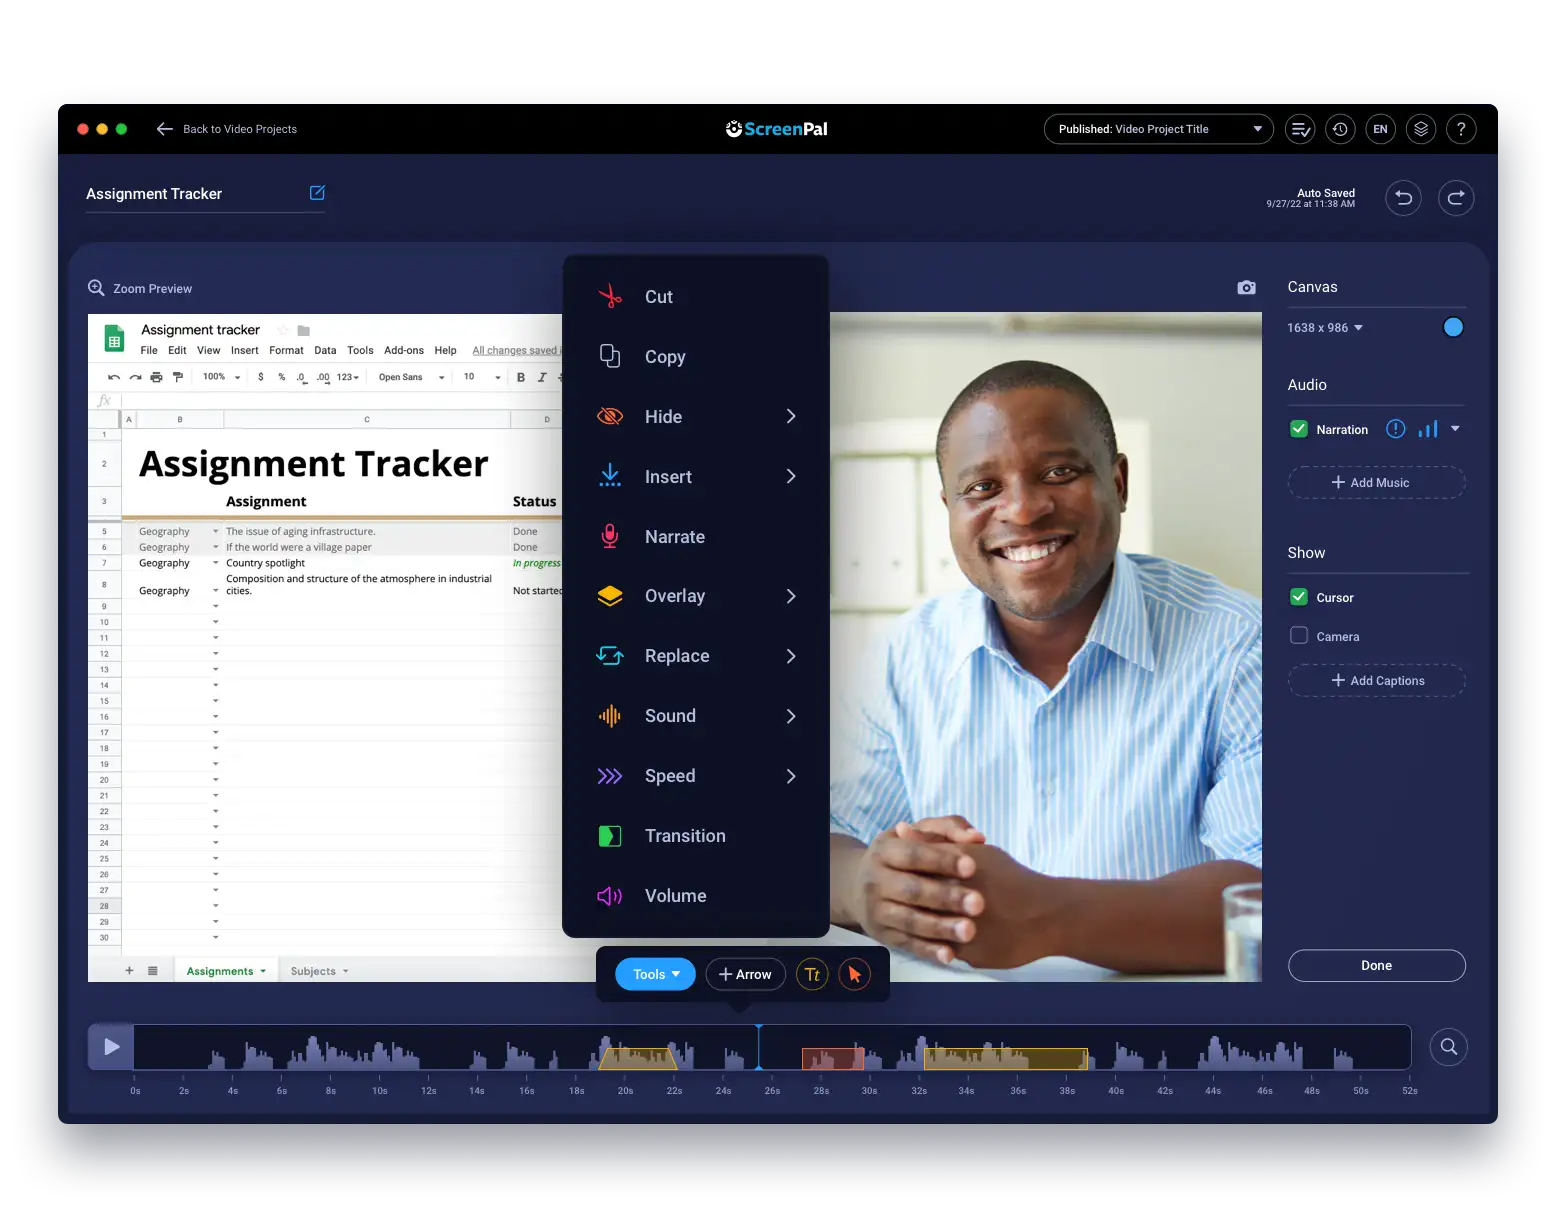
While editing, you can also trim out tangents or run-on elements to keep your video more focused using the cut tool. Whenever you make a cut, listen to it a few times, starting at least 15 seconds before to ensure the content makes sense and flows conversationally.
Video Editing Mistake #2: Poor Audio 
When you are working with audio, there are multiple components: narration track, computer audio, and sometimes music. Each of the individual components, as well as how they interact as a whole, must be clear and consistent. Your audience will find it jarring if one is difficult to hear or another part is too loud.
The music and computer audio should never overpower the narration, which is why it’s best to use a USB microphone rather than the built-in microphone for your audio narration. It will help with your audio quality.
Remember, being in a quiet room will help when recording your audio narration.
Quick Fix: Use Audio Editing Tools
You can fix and adjust the audio settings for each track in the ScreenPal’s video editor. In the editing tool, you can enable and disable individual components, as well as edit the volume and speed. To ensure each part of your narration is set at the same level, use the Normalize tool. The ‘Ducking’ tool in computer audio settings will automatically lower audio clip levels to make sure they never overpower the track.
When you think you are finished editing, play the video with your eyes closed to listen to the audio and make sure it flows without the images.
Video Editing Mistake #3: Music Selection
The main reason to add music to your videos is to help express the emotions and tempo of your video. However, you can ruin this with the wrong music. If you’re trying to convey an upbeat story and you pick slow music, you’ll counteract your goal. The other common music mistake is letting it overpower your narration. Your message and content should always be the strongest element.
Quick Fix: Pick the Right Music
Wait to add your music until the end. If you try to edit your video around the music, you’ll likely lose the key messaging. Instead, wait until you’re almost finished with the video, then browse through the ScreenPal stock music library or upload your own music.
It’s worth your time to test multiple music tracks for your video and see which one fits best. Similar to editing other audio components, listen to the full video with your eyes closed to make sure all the audio flows together, with the narration as the main element.
Video Editing Mistake #4: Too Many Transitions
When you first begin editing, it’s easy to want to try out all the new tools. However, you can quickly have too much of a good thing. This idea certainly applies to transitions. Remember, transitions are meant to do just that: help transition your audience from one scene to another. You don’t need them on every clip. In addition, use transition styles sparingly.
The goal of transitions is for the audience NOT to notice.
Quick Fix: Pick and Choose Sparingly
It’s best to wait to add transitions until you’ve placed most of your video on the timeline. Sit back and watch the full video and see where things appear jarring. That’s where you’ll want to add transitions.
The ScreenPal Video Editor offers compelling transitions like a wipe, swipe, push, and slide. There are dozens more to choose from, but make sure it matches the tone and mood of the video.
One rule is to stick with only one or two types of transitions per video. You can also adjust the timing to make them more or less noticeable. For faster videos, use a short one-second transition, and for somber ones, choose two seconds.
Video Editing Mistake #5: Busy Design
Like transitions, we can over-design our videos with too many arrows, highlights, text, and images. Consistency is key. If you use an arrow at the beginning, then an underline, and then a highlight in a bold color, your audience will start to notice the design inconsistency and not the message itself.
Quick Fix: Stay Consistent
Overlays are great for emphasizing and highlighting parts of your video. If you use them, pick one or two to use throughout the video. In ScreenPal, you can create a style for your overlays including texts and shapes. When you want to use an overlay again, it’s easy to pick a previous style you’ve used to remain consistent throughout your video.
The same goes for fonts. Try to use the same font you use on your website, and stick with one to three of your brand colors. By simplifying your design, you will likely amplify your message.
Video Editing Mistake #6: Webcam Mistakes
Oops, you recorded your webcam presentation and didn’t notice you were not centered and the lighting made you look orange. Depending on how bad it is, it might be worth re-recording using these best practices. Lighting mistakes are best fixed during the recording rather than trying to use an editing tool.
Quick Fix: Adjust Webcam Mistakes
There are webcam mistakes you can fix in the editing process. The video editing tool allows you to crop and adjust your webcam box, allowing you to correct an off-centered recording. You can also remove your background. With the Green Screen Tool, you can remove the background and replace it with your own image/video or choose one from the stock library. This change can help fix some lighting issues, including backlighting, by removing poorly lit areas of the web camera.
The easiest thing you can do is hide your webcam during sections of your video. This way you can continue with your story without distracting your audience.
Practice Makes Perfect
It’s good to remember, mistakes happen, and these six mistakes happen a lot. You may even begin to notice them as you watch other videos online. As you create more videos, you’ll find your best practices and begin to prevent these mistakes from happening.
The most important thing is to be authentic. Be you in the video. Your videos don’t need to be fancy and cost thousands in production costs. Your audience is most likely to connect with you and your message if you are genuine, clear, and consistent.